Good Soldering Is Heat, Cleanliness, And Timing
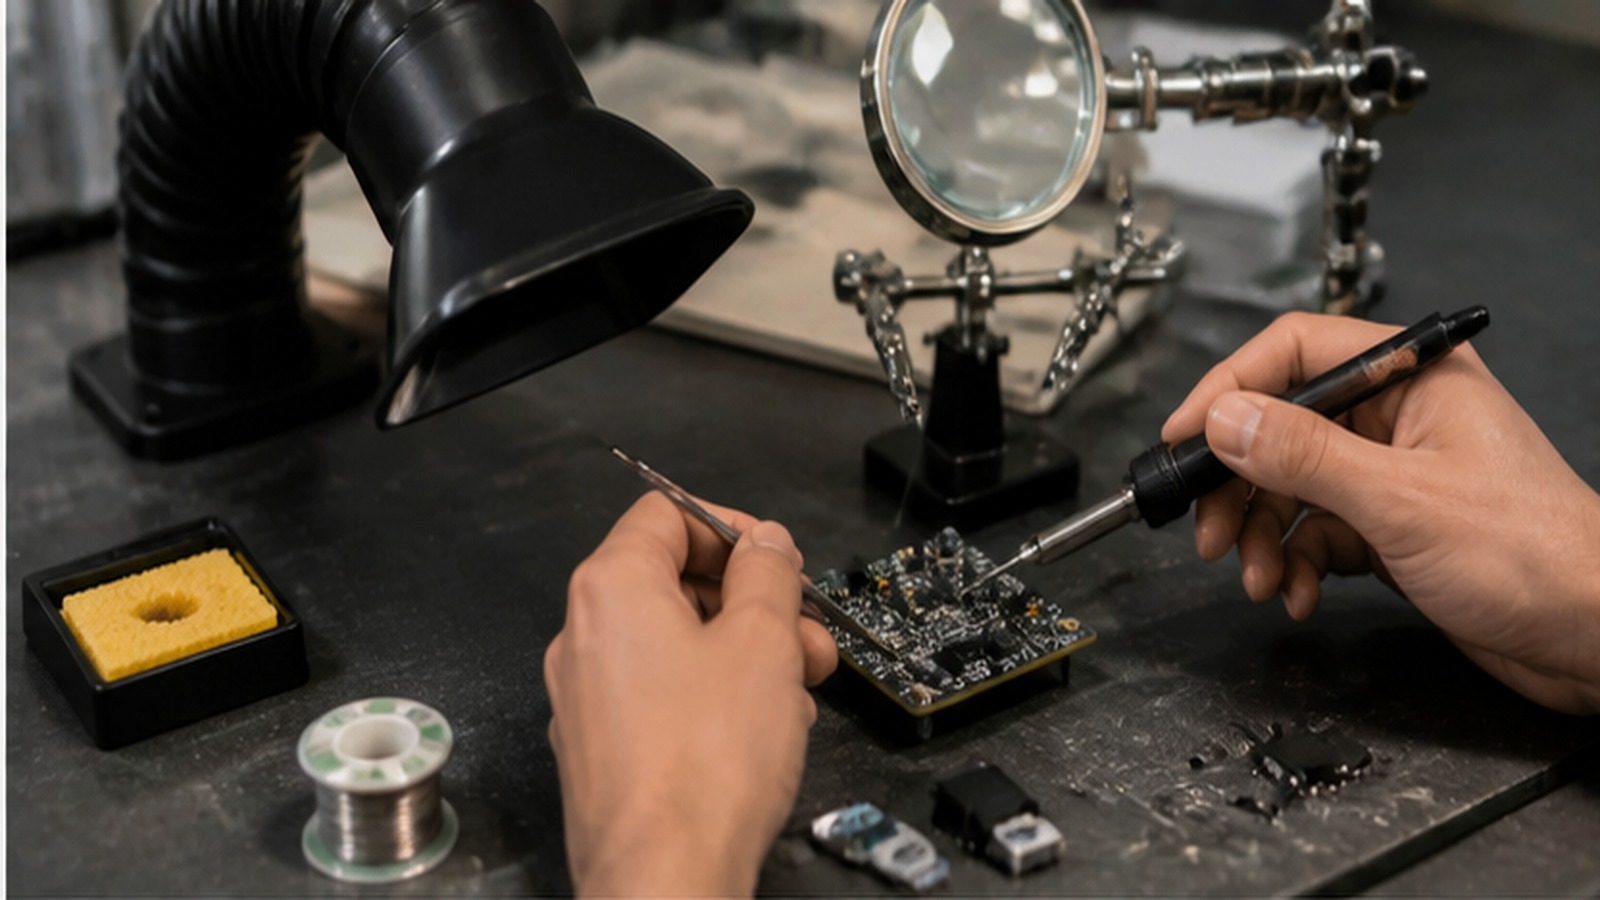
Learning how to solder through-hole and surface mount components is less about making shiny blobs and more about controlling heat transfer, surface cleanliness, flux activity, component position, and inspection. Through-hole soldering teaches lead forming, pad heating, and joint shape. Surface-mount soldering teaches placement, restraint, magnification, and rework patience. Both reward a calm sequence: clean tip, appropriate temperature, enough flux, secure board, quick heat, correct solder amount, and a careful look before power is applied.
A: Start with the smallest test that proves one real part of the project.
A: Enough to know the goal, material limits, tool setup, and first safety check.
A: No. It should be clear, testable, and easy to revise.
A: Early failures usually come from voltage drops, overheated motors, loose wires, weak brackets, bad calibration, and unsafe motion.
A: Match the material to load, use, finish, cost, repair, and available tools.
A: Scale after a small test works repeatedly and the cost still makes sense.
A: Save measurements, settings, suppliers, photos, failures, and changes.
A: Rework drops, fit improves, safety is clearer, and results repeat more often.
A: Avoid hiding weak structure, unsafe setup, or unclear decisions under a nice finish.
A: It solves the intended job and teaches a better next build.
Think In Heat Paths
Soldering works when heat reaches the metal that needs to bond. The iron tip, pad, lead, component body, copper plane, and solder all participate in that heat path. A joint fails when the solder melts somewhere convenient but never wets the surfaces that matter.
This is why tip shape and contact angle matter. The builder is not painting solder onto a board; the builder is heating a joint so solder can flow into it.
Let Flux Do Its Job
Flux cleans oxides during the brief moment when the joint is hot enough to accept solder. Without it, solder may bead, drag, or sit on top of the pad. With too much unmanaged residue, inspection and cleaning become harder. Flux should be used intentionally, not superstitiously.
Surface-mount rework especially rewards fresh flux because tiny leads need solder to move smoothly rather than cling in stubborn bridges.
Through-Hole Builds Confidence
Through-hole parts are forgiving enough to teach timing. The pad and lead are visible, the joint shape is readable, and mistakes can often be reflowed. Beginners should use that visibility to learn what good wetting looks like before moving into denser assemblies.
Lead trimming, component seating, polarity checks, and board support are part of the skill. A neat joint on the wrong component orientation is still a failure.
Surface Mount Demands Smaller Motions
Surface-mount soldering is a lesson in restraint. Tiny parts need alignment before commitment, and fine leads need flux, magnification, and a steady method. Anchoring one pad before finishing the other side can prevent a part from skating around the board.
When bridges appear, add flux and remove excess solder patiently. Scraping at pads is a quick way to turn rework into damage.
Inspect Before Blaming The Circuit
A surprising number of electronic problems are physical. A bridge between adjacent pins, a cold joint on ground, a reversed diode, or a lifted pad can masquerade as bad code or a faulty module. Inspection under good light should happen before any elaborate debugging story begins.
The board should earn power. Visual checks, continuity tests, and polarity review are cheap protection.
Practice Rework On Scrap
Rework is its own skill because it asks the builder to fix a problem without harming the board. Solder wick, flux, hot air, tweezers, and patience all need practice. Scrap boards are perfect for learning how pads behave under repeated heat.
The best soldering habit is not never making mistakes. It is learning to correct them without making the board worse.
Temperature Is Only One Variable
Beginners often chase iron temperature as if it explains every soldering problem. Temperature matters, but so do tip size, tip cleanliness, thermal mass, pad condition, flux, solder diameter, board quality, and contact time. A tiny tip at high temperature can still transfer heat poorly to a large ground pad.
Think in terms of heat transfer, not just a number on the station. The joint needs enough heat in the right place for a short enough time.
Through-Hole Teaches Joint Shape
Through-hole soldering gives clear visual feedback. A good joint usually wets the pad and lead smoothly, with enough solder to cover the connection without becoming a ball. If the solder sits like a bead, the pad or lead may not have heated or cleaned properly.
This makes through-hole practice valuable before dense work. The maker learns what a joint is supposed to do physically before shrinking the same principles onto surface-mount pads.
Surface Mount Rewards Restraint
Surface-mount work punishes heavy hands. Tiny parts move, bridge, tombstone, or overheat when the maker floods them with solder or chases alignment with the iron. Flux, tweezers, magnification, and a methodical sequence matter more than dramatic speed.
A common method is to tin one pad, position the part, anchor it, then solder the remaining side. This creates control before both ends are committed.
Inspection Prevents False Debugging
Many circuit problems blamed on code or bad components are really soldering defects. Bridges, cold joints, reversed parts, lifted pads, and missed pins can all create strange behavior. Inspecting before power saves time and protects components.
Use magnification and good light. Look from different angles. A joint that appears fine from above may reveal a bridge or poor wetting from the side.
Rework Has A Budget
Every rework attempt spends pad adhesion, component tolerance, and patience. Adding more heat to a failing joint is not always the answer. Sometimes the correct move is more flux, solder wick, a larger tip, hot air, or letting the board cool before trying again.
Knowing when to stop protects the board. A lifted pad can turn a small soldering mistake into a wiring repair.
Practice Builds Muscle Memory
Soldering improves through small repeated motions: touching pad and lead, feeding solder, removing solder, removing heat, and inspecting. Practice boards and scrap electronics let those motions become familiar before the project matters.
The goal is not speed first. Smooth timing comes from knowing what proper wetting looks and feels like.
Choose Tip Shape Intentionally
Tip shape changes soldering behavior. A fine conical tip may seem precise but transfer heat poorly to larger pads. A small chisel tip often gives better contact for through-hole work. Drag soldering may benefit from a tip that carries solder smoothly across leads.
Keep several appropriate tips rather than expecting one point to do everything. The right tip makes good technique easier to repeat.
Use Flux As A Working Tool
Flux is not a beginner crutch. It is an active part of soldering because it cleans oxides and helps solder wet metal. Surface-mount rework, old boards, and fine-pitch leads often become dramatically easier with the right flux applied neatly.
Use flux according to its type and clean residues when required. Too little flux makes solder fight the joint; too much unmanaged residue can create inspection or reliability concerns.
Power Up With Caution
After soldering, power should be applied deliberately. Check polarity, shorts between rails, expected resistance, and obvious bridges. If possible, use a current-limited supply for the first power-up. Watch for heat, smell, dimming, or unexpected behavior.
This cautious first power-up protects components and gives the maker a better chance to catch mistakes before they become permanent damage.
Let Inspection Become Automatic
Inspection should not feel like a separate punishment after soldering. It should become the natural closing step for every group of joints. Look for wetting, bridges, polarity, lifted pads, and heat damage while the board is still easy to reach.
This habit prevents long debugging sessions built on a tiny avoidable defect. It also trains the eye to recognize quality faster, which matters when a board has many similar joints and only one of them is wrong.
A maker who inspects consistently starts debugging with evidence instead of anxiety. Over time, inspection becomes part of hand skill, not just quality control at the end. That steady eye is what lets harder boards feel approachable instead of chaotic.
Tin Wires Without Flooding Them
Wire soldering teaches a different version of heat control. Stranded wire should be tinned enough to hold together without turning the whole flexible section into a rigid metal rod. Too much solder wicks under insulation and creates a stiff point where vibration can break the conductor.
Use strain relief when wires leave a board or connector. A beautiful solder joint can fail if movement is allowed to pull directly on it.
Handle Heat-Sensitive Parts Deliberately
Some components tolerate soldering heat easily; others do not. Switches, connectors, LEDs, sensors, plastic-bodied parts, and small surface-mount packages can be damaged by long contact time or repeated rework. Work quickly, pause when needed, and use sockets or clips where appropriate.
The goal is not fear. It is awareness that the joint and the component are both being heated, and both have limits.
Cleanliness Extends To The Tip
A dirty tip transfers heat poorly and makes beginners press harder, which creates more risk. Keep the tip tinned, wipe it appropriately, and replace it when plating is damaged. A good tip makes soldering feel calmer because heat arrives where expected.
Tip care is not cosmetic. It is part of the electrical and mechanical reliability of every joint that follows.
Recognize When Hot Air Helps
Hot air can make surface-mount rework easier, especially for multi-lead packages and tiny parts. It also introduces airflow, nearby-component movement, and heat spread. Shield sensitive areas, use flux, and practice on scrap before pointing hot air at a crowded board.
The best tool depends on the fault. Sometimes an iron and wick are precise. Sometimes hot air is gentler because it heats the whole package evenly.
Make Soldering A Measured Routine
A reliable soldering routine is quiet: place the part, check orientation, clean the tip, add flux when needed, heat the joint, feed solder, remove solder, remove heat, inspect, then move on. The sequence is simple because it has to survive repetition.
When the routine becomes familiar, the builder can notice exceptions sooner. That is when soldering starts to feel like a craft rather than a gamble.
Mind Component Order
Assembly order matters. Low-profile resistors and small capacitors are often easier before tall connectors, headers, or bulky parts block the iron. Surface-mount parts may need to be completed before through-hole hardware makes the board awkward to hold.
Planning order reduces accidental burns, crooked parts, and rework caused by poor access.
Use The Right Solder Amount
Too little solder creates weak or incomplete joints, while too much solder hides shape and invites bridges. The right amount shows that the pad and lead were wetted without burying the evidence. This visual balance is learned through practice, not guessing.
When in doubt, compare practice joints under magnification and reflow only the ones that give a clear reason.
Protect The Board During Handling
Boards can be damaged after soldering by rough trimming, flexing, static, dirty hands, or tools slipping across small parts. Handle the assembly by edges when possible and support it during connector insertion or wire work.
Reliable soldering includes the minutes after the iron returns to the stand.
Build A Practice Path
A useful soldering practice path moves from large through-hole joints to tighter spacing, then to simple surface-mount parts, then to fine-pitch or rework practice. Each step should add one new difficulty while keeping the rest familiar. That progression builds confidence without asking the beginner to solve every problem at once.
Practice should include intentional inspection. The maker should not only ask whether the LED lit, but whether the joint shape, polarity, cleanliness, and handling would be trustworthy in a real project.
That approach turns soldering from a nervous event into a repeatable bench routine.