A Small Workshop Works Best When Every Step Has A Landing Place
Organizing a small workshop is not about making the room look empty. It is about making the next action safer and faster. A compact shop needs clear walking paths, predictable tool homes, enough open bench space for active work, storage that matches frequency of use, and project staging that keeps parts from migrating into every corner. When the room is organized around movement instead of decoration, even a tiny workspace can feel calmer, safer, and more capable.
A: Start with the smallest test that proves one real part of the project.
A: Enough to know the goal, material limits, tool setup, and first safety check.
A: No. It should be clear, testable, and easy to revise.
A: Early failures usually come from voltage drops, overheated motors, loose wires, weak brackets, bad calibration, and unsafe motion.
A: Match the material to load, use, finish, cost, repair, and available tools.
A: Scale after a small test works repeatedly and the cost still makes sense.
A: Save measurements, settings, suppliers, photos, failures, and changes.
A: Rework drops, fit improves, safety is clearer, and results repeat more often.
A: Avoid hiding weak structure, unsafe setup, or unclear decisions under a nice finish.
A: It solves the intended job and teaches a better next build.
Map How Work Moves
A small workshop improves when you trace a project from start to finish. Material enters, gets measured, cut, drilled, sanded, assembled, finished, and stored. If each step requires moving piles, crossing cords, or clearing unrelated tools, the shop is wasting energy. Organization should shorten those transitions.
Walk the path with a real project in mind. Where does a board land before cutting? Where does the drill go when the bit is changed? Where do clamps wait during glue-up? The answers reveal the layout more honestly than a photo of a perfect shop.
Protect The Floor Path
The floor is the most important safety surface in a small shop. It carries people, carts, long boards, wet finishes, sharp tools, and awkward assemblies. A narrow clear path is better than a large room full of surprises. Offcuts, cords, hoses, and stacked boxes create risk because they wait until your hands are full.
Start organization by clearing the walking route and keeping it clear. Put scrap containers where scrap is created. Mount cords and hoses when possible. Store heavy material low and stable. The shop feels larger when the floor stops fighting you.
Give The Bench A Job
A bench can become storage by accident. In a small workshop, that is expensive because the bench is where layout, assembly, repair, and inspection happen. Reserve a central open area for the active task, then push storage to walls, shelves, trays, or under-bench zones. The goal is not emptiness; it is readiness.
A clear bench also improves safety. Cutting, drilling, gluing, and handling sharp tools all become more controlled when parts are not balanced on clutter. The project should occupy the bench, not compete with last week.
Store By Frequency And Task
Tools used constantly belong near the work. Tools used monthly can move outward. Tools used once a year can live in deeper storage. This simple frequency rule prevents rare gear from stealing the best positions. Task grouping adds another layer: drilling supplies together, sanding gear together, finishing supplies together, layout tools together.
Task-based storage helps beginners because it answers what do I need for this step. Instead of hunting through every drawer for a countersink, driver bit, pencil, and screws, the drilling zone collects the small pieces that make the drill useful.
Create Homes For Active Projects
Half-finished projects are the real stress test of a small shop. If there is no project shelf, tray, or bin, parts stay on the bench because moving them feels risky. Then the next task starts on top of the previous one. A simple staging system keeps current work protected without freezing the whole workspace.
Use trays for small parts, vertical slots for flat panels, and labeled bins for hardware tied to a specific build. The label does not need to be fancy. It only needs to prevent mystery piles.
Put Safety Gear In The Work Path
Safety equipment should live where the decision happens. Glasses near cutting, hearing protection near loud tools, dust masks near sanding, gloves near rough handling, and a first-aid kit in a visible spot all reduce friction. If protection is across the room, it becomes easier to skip.
Small shops often share space with homes, cars, laundry, or storage. That makes safety organization even more important. The shop needs clear boundaries so hot tools, sharp blades, dust, and chemical supplies do not drift into everyday life.
Use Walls Without Creating A Museum
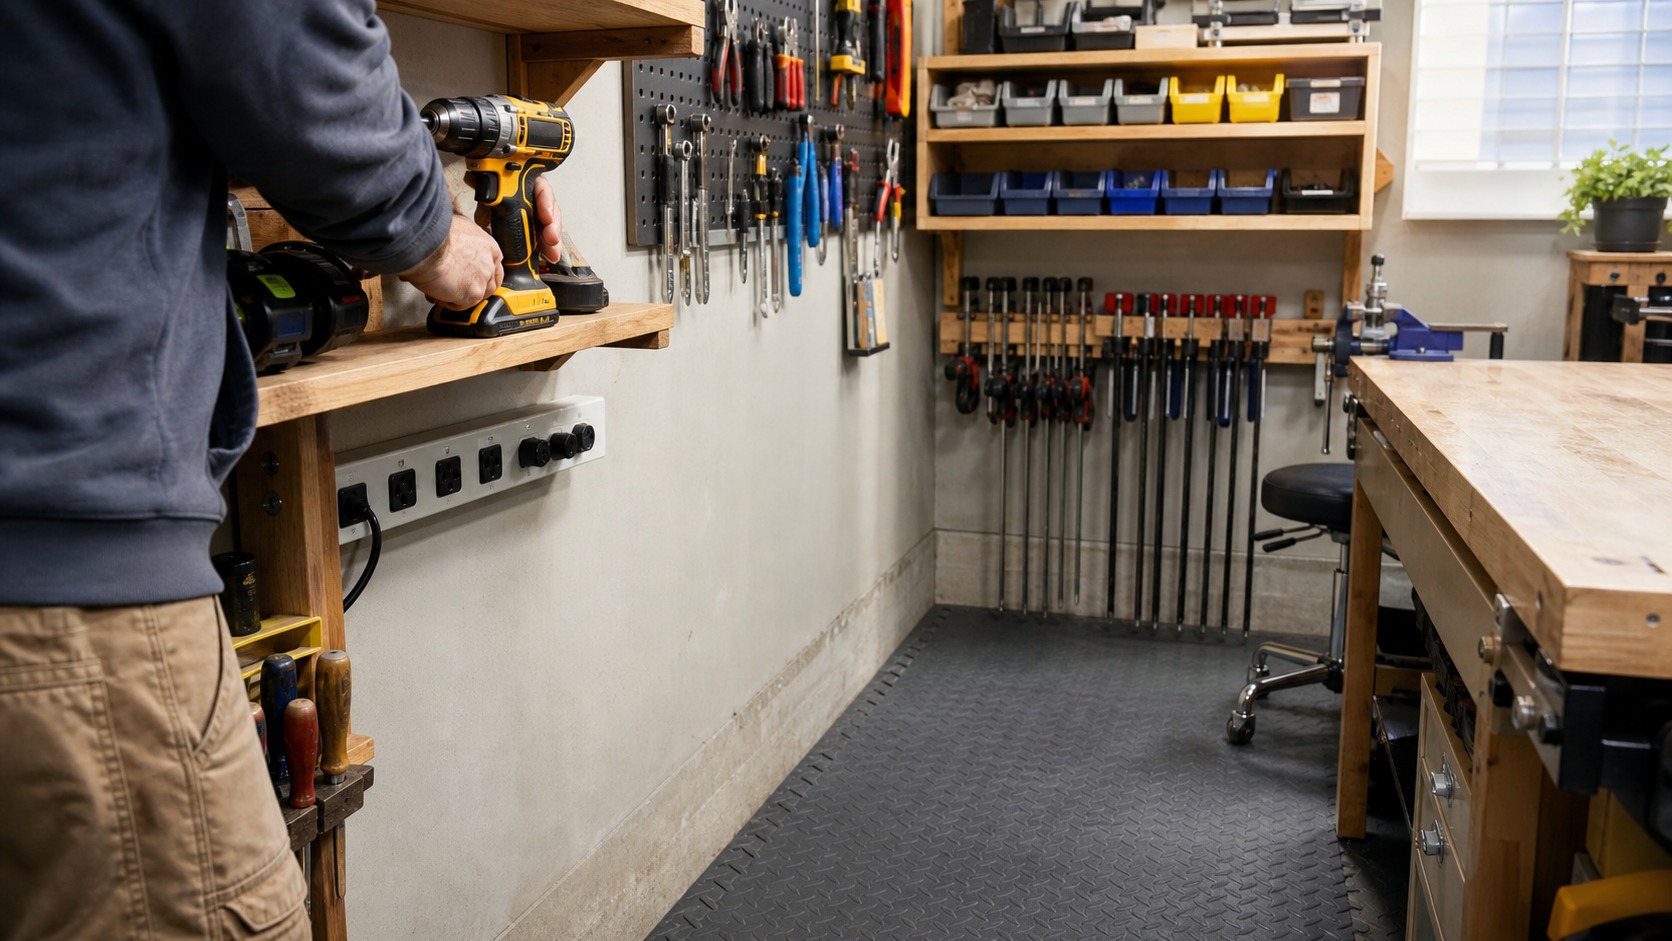
Vertical storage is powerful in compact spaces, but a wall can become decoration instead of workflow. Hang tools that benefit from visibility and quick return. Store small parts in bins that can be removed and carried to the bench. Keep heavy or rarely used items off prime wall space.
The best wall storage is edited. If every tool is displayed equally, nothing is prioritized. A small shop needs a hierarchy that reflects real use.
Control Cords, Chargers, And Batteries
Cords create trips, snags, and setup delays. Chargers create clutter and potential heat concerns when buried under metal hardware or dust. Give power tools a charging zone with airflow, stable surfaces, and cord control. Keep extension cords coiled and inspected rather than knotted under benches.
A safer shop makes electrical paths predictable. You should know where power enters the workspace, which tools share outlets, and where cords travel during a cut or sanding session.
Let Cleanup Teach The Next Layout
Cleanup reveals design flaws in the shop. If every project ends with hardware scattered across the bench, hardware storage is wrong. If dust reaches clean assembly, zones need separation. If offcuts pile up, the scrap system is too far away or too vague.
After each project, change one small thing. Move a hook, add a tray, relabel a bin, clear a shelf, or relocate a tool. Small layout improvements compound until the shop starts supporting work without constant negotiation.
Measure Success By Friction Removed
A small workshop is organized when projects start sooner, hazards are easier to see, tools return naturally, and cleanup no longer feels like rebuilding the room. The space may still look busy. Busy is fine when every object has a reason and a home.
Safer and faster come from the same source: fewer unnecessary decisions. When the shop knows where work should happen next, the maker can focus on the project instead of managing the room.
Create A Setup Sequence
Small shops benefit from a repeatable setup sequence. Open the bench, pull the project tray, connect dust collection, move the needed tools into reach, check lighting, and clear the floor before cutting or assembly begins. A sequence prevents the room from becoming chaotic before the work even starts.
The sequence should be short enough to use. If setup feels like a ceremony, it will be skipped. The goal is a quick reset that makes the first real operation safe and focused.
Use Containers As Temporary Walls
In a compact workspace, containers create boundaries. A tray can hold active hardware. A shallow bin can separate parts waiting for finish. A lidded box can protect electronics from dust. These temporary walls let several project phases coexist without merging into a single pile.
Containers also make cleanup less dramatic. Instead of deciding where every screw and spacer belongs during a tired evening, the maker can return the active tray to a shelf and preserve the project’s context.
Keep The Most Dangerous Tools Most Predictable
Sharp, hot, heavy, and spinning tools need the most predictable homes. Utility knives should not vanish under rags. Hot glue guns and soldering irons need cooling spots. Blades need covered storage. Heavy tools should not live above shoulder height where one awkward reach can become a hazard.
Predictability reduces mental load. When the body knows where a dangerous item lives, the maker spends less time searching and less time improvising unsafe temporary storage.
Separate Storage From Display
A small shop does not need every tool visible. Display is useful when visibility speeds work; storage is better when it protects tools, saves space, or reduces visual noise. The mistake is treating a wall as proof of seriousness rather than a working surface for decisions.
Put the tools you touch constantly in the easiest places. Put specialty tools where they remain safe but do not interrupt daily tasks. A compact shop should feel edited, not deprived.
Design For The Tired Version Of Yourself
Organization should work at the end of the session, when the maker is tired, dusty, and ready to leave. If putting a tool away requires moving three boxes, it will stay out. If project parts have no obvious holding place, they will remain on the bench. Design the cleanup for realistic energy, not ideal motivation.
The tired-version test is honest. A system that survives a late-night cleanup is a system that will probably survive normal use.
Review The Layout With A Finished Project
After a project is complete, walk through what slowed the room down. Did clamps live too far away? Did hardware spill? Did dust reach finishing supplies? Did the floor disappear under offcuts? Each completed build provides evidence for one layout improvement.
Do not reorganize everything after every annoyance. Make one meaningful change and test it on the next project. Small-shop organization is an iterative build of its own.
Make Speed A Safety Feature
Speed in a small workshop should not mean rushing. It should mean fewer obstacles between intention and safe action. When the right clamp is visible, the maker clamps. When eye protection is near the saw, it gets worn. When the floor is clear, carrying a panel is less awkward. Organization turns good habits into the easiest habits.
That is why safer and faster often arrive together. A shop that reduces searching, stepping over things, and balancing parts also reduces the moments when mistakes sneak in.
Plan For Shared-Space Boundaries
Many small workshops share space with cars, storage, laundry, bikes, or household items. Organization needs boundaries that protect both the projects and the rest of the space. Dusty tools should not invade clean storage. Sharp tools should not drift onto family surfaces. Finishing supplies should not sit beside everyday clutter.
Use curtains, shelves, rolling carts, lidded bins, or clear floor markings to make the workshop zone legible. Even a small boundary can help everyone understand where making begins and where it must stop.
Let The Shop Stay Adjustable
A compact shop should not be frozen after one organizing weekend. Project types change. New tools arrive. Old tools leave. A layout that works for small repairs may fail during a furniture build. Adjustable storage, movable carts, removable hooks, and project trays allow the shop to evolve without a complete rebuild.
The best small workshop feels responsive. It has enough structure to stay safe and enough flexibility to keep making interesting.
Use Time Trials Without Rushing
One useful test is to time ordinary setup without changing your pace. How long does it take to find a square, clamp a board, connect dust collection, or clear the bench for glue-up? The numbers reveal friction without blaming the maker. Then move one tool or add one tray and test again.
This is not about turning the shop into a race. It is about discovering where the room interrupts good work. A safer, faster shop removes those interruptions before they become habits.
Make The First Five Minutes Easy
The first five minutes of a project often decide whether the session gains momentum or dissolves into tidying. Keep the current project, core measuring tools, PPE, and a clear bench start zone easy to reach. When beginning is simple, small windows of making time become useful.
That matters in compact shops because setup fatigue can prevent projects from happening at all. Organization should invite the next useful action.