Think Like a Maker, Work Like a Professional
A beginner often focuses on the finished project: the shelf on the wall, the repaired chair, the painted cabinet, the custom desk, the working gadget. A more experienced maker focuses on the process. They ask where the material will be supported, where their hands will be, how the tool will move, where dust will go, and what could slip, spark, crack, bind, or fall. This shift in thinking is one of the most important safety upgrades you can make.
Working like a professional does not mean owning professional equipment. It means respecting the work. It means reading instructions, wearing protective gear, checking your setup, and using the right tool for the task. It also means slowing down at the exact moments when excitement makes you want to speed up. The best makers are not simply people who know how to cut, drill, glue, sand, solder, or assemble. They are people who know how to create repeatable conditions for good results.
Build a Workspace That Helps You Stay Safe
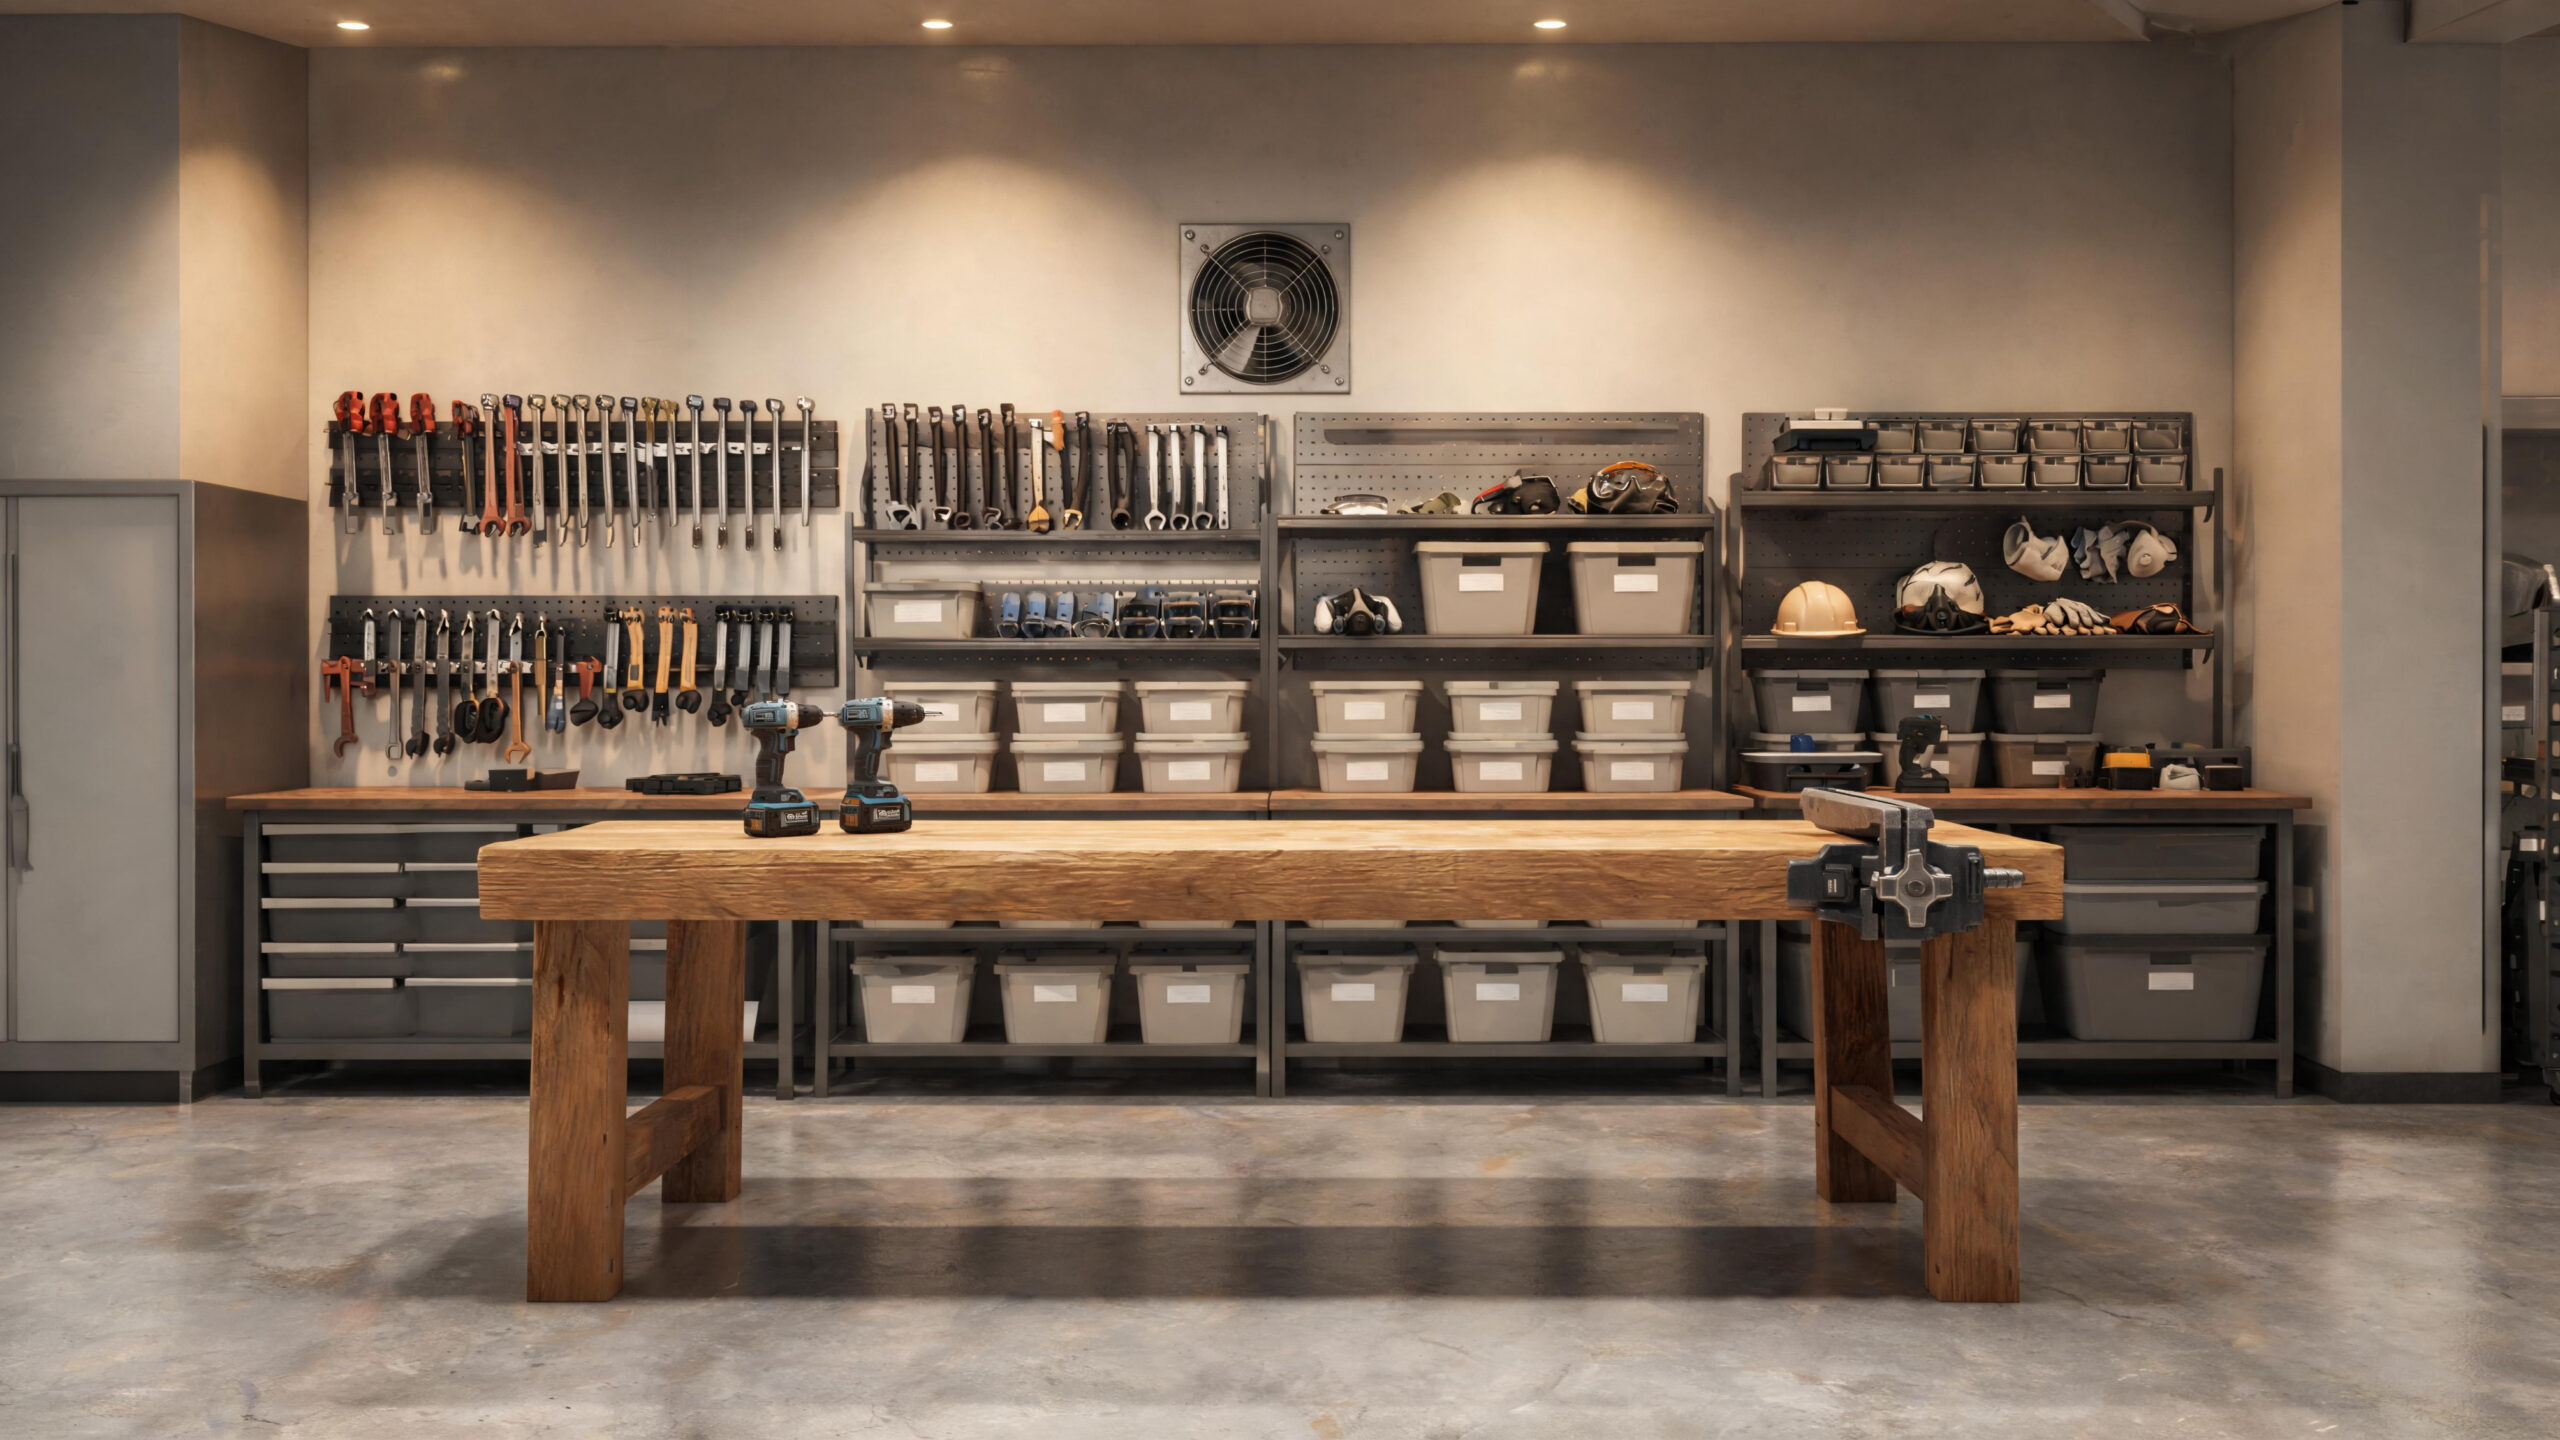
Your workspace shapes your behavior. A cluttered bench encourages shortcuts. Poor lighting hides mistakes. A messy floor turns a simple step backward into a trip hazard. A crowded corner makes it harder to handle long material. A good maker space does the opposite. It gives you clear surfaces, stable footing, strong light, organized tools, and enough room to move without fighting the room. You do not need a dream workshop to build safely. A garage bay, basement corner, shed, utility room, or portable workbench can all work if the setup is intentional. Start with the basics: a sturdy work surface, enough light to see details clearly, safe power access, practical storage, and a cleanup plan. Keep sharp tools protected, heavy tools stored low, cords away from walking paths, and chemicals sealed when not in use. The goal is not perfection. The goal is control.
Protect Your Eyes Every Time
Eye protection is one of the simplest and most important parts of maker safety. Tiny chips, dust, snapped bits, splinters, wire ends, chemical splashes, and flying debris can appear in a fraction of a second. Many beginners only reach for safety glasses when using a saw, but eye hazards exist during drilling, sanding, hammering, grinding, clipping wire, using adhesives, mixing finishes, cleaning dusty surfaces, and even opening pressurized containers.
Good safety glasses should fit comfortably and include side protection. If they are uncomfortable, scratched, foggy, or always missing, you will be tempted not to wear them. Keep a pair near your main workbench and another near your cutting or drilling area. For high-debris work, a face shield can add protection, but it should usually be used with safety glasses rather than instead of them. Your eyes are too valuable to protect only when a task “looks dangerous.”
Protect Your Lungs From Dust and Fumes
A lot of workshop danger is invisible. Fine wood dust, plastic particles, sanding residue, paint mist, solvent vapors, resin fumes, solder smoke, and chemical odors can linger in the air long after the tool is turned off. Breathing protection is especially important because damage from dust and fumes often builds slowly. You may not feel the consequences during one small project, but repeated exposure can become a serious problem over time. A basic dust mask may help with some nuisance dust, but many maker tasks call for a properly fitted respirator with suitable filters. Ventilation is equally important. Open doors and windows when appropriate, use fans to move contaminated air away from your breathing zone, and capture dust at the source with a shop vacuum or dust extractor whenever possible. Read labels on paints, finishes, adhesives, and resins before using them. If a material requires ventilation or respiratory protection, treat that instruction as part of the project, not as optional fine print.
Protect Your Hearing Before It Fades
Hearing damage is easy to ignore because it usually happens gradually. A saw, shop vacuum, impact driver, router, grinder, compressor, or even repeated hammering can expose your ears to harsh noise. Beginners often think hearing protection is only for big machines, but small workshops can be surprisingly loud, especially in garages, basements, and enclosed rooms where sound bounces off hard surfaces.
Keep earplugs or earmuffs in a visible spot and use them before the noise becomes uncomfortable. The habit matters more than the style. Some makers prefer over-ear protection because it is quick to put on and take off. Others keep disposable earplugs in several places around the shop. Once your hearing is damaged, it may not fully recover, so prevention is the smarter path. Building confidence should not come at the cost of the sounds you want to keep enjoying.
Respect Your Hands Without Overusing Gloves
Your hands do the most work in a maker space, so they deserve serious protection. Cuts, splinters, burns, pinches, crushed fingers, chemical exposure, and abrasions are common beginner hazards. Gloves can help when carrying rough lumber, handling metal, moving hot or sharp materials, working with certain chemicals, or cleaning up debris. However, gloves are not always safer. Around spinning tools, rotating bits, saw blades, drill presses, lathes, and some sanders, loose glove material can catch and pull your hand toward danger. The better habit is to choose hand protection based on the task. Use gloves for handling and cleanup when they reduce risk. Remove them when they could catch in moving machinery. Keep blades sharp, secure your workpiece with clamps, and keep your hands out of cutting paths. Never hold a small part in your hand when it should be clamped. The safest hands are not just covered hands. They are hands kept out of danger zones in the first place.
Learn the Tool Before You Trust the Tool
Every tool has a personality. A drill can twist unexpectedly. A circular saw can bind. A sander can round an edge faster than expected. A utility knife can jump a line. A heat gun can damage a surface or ignite nearby material. A 3D printer can run hot for hours. A soldering iron can burn skin or melt insulation. Before using any tool, understand how it starts, stops, grips, cuts, heats, spins, or moves.
Read the manual, inspect the tool, and practice on scrap material before working on your real project. Check blades, bits, guards, cords, batteries, switches, clamps, and accessories. Make sure the tool is designed for the material you are using. Do not force a tool to do a job it was not meant to do. A confident maker is not someone who assumes every tool is simple. A confident maker is someone who learns enough to stay ahead of the tool.
Use Clamps Like a Second Pair of Hands
One of the most important beginner safety lessons is simple: do not use your hand as a clamp. If a workpiece can shift, rotate, bounce, slide, or lift, it should be secured. Clamps make cutting more accurate, drilling more stable, gluing more controlled, and sanding more predictable. They also keep your hands farther away from blades, bits, and moving parts. Many DIY mistakes happen because the material was not held firmly. A board twists during a cut. A small part spins under a drill bit. A glued joint slides out of position. A panel falls while being fastened. Clamps reduce these risks and make your work feel more professional. You do not need every type of clamp at once, but having a few reliable clamps can transform your safety and your results.
Keep Your Body Out of the Danger Line
Tool safety is also body-position safety. Before cutting, drilling, sanding, hammering, or prying, ask where the tool will go if it slips. Ask where the material will move if it breaks free. Ask whether your hand, arm, face, leg, or torso is in that path. This simple habit can prevent many injuries because it forces you to think beyond the perfect version of the task.
Stand with stable footing. Avoid awkward reaches. Do not cross your arms over a blade path. Do not lean your face close to a cutting or drilling operation. Keep your balance centered and your workspace clear enough that you can step away if something changes. Good body position may not feel dramatic, but it is one of the quiet skills that separates careful makers from careless ones.
Manage Power, Batteries, and Cords Carefully
Power makes modern DIY work easier, but it also creates hazards. Overloaded outlets, damaged cords, undersized extension cords, wet conditions, tangled cables, and careless battery charging can turn a project space into a risk zone. Use cords that are rated for the tools you are running, and keep them away from blades, wheels, heat, water, and walking paths. Extension cords should be temporary tools, not permanent wiring. Cordless tool batteries also deserve respect. Charge them on a clean, stable surface away from sawdust, solvents, rags, and direct heat. Do not use damaged batteries or chargers. Let overheated batteries cool before charging. Store batteries where they cannot be crushed or shorted by loose metal objects. Treat power as part of the project plan. A clean electrical setup keeps your workspace safer and your attention focused on the build.
Control Fire Risks Before They Start
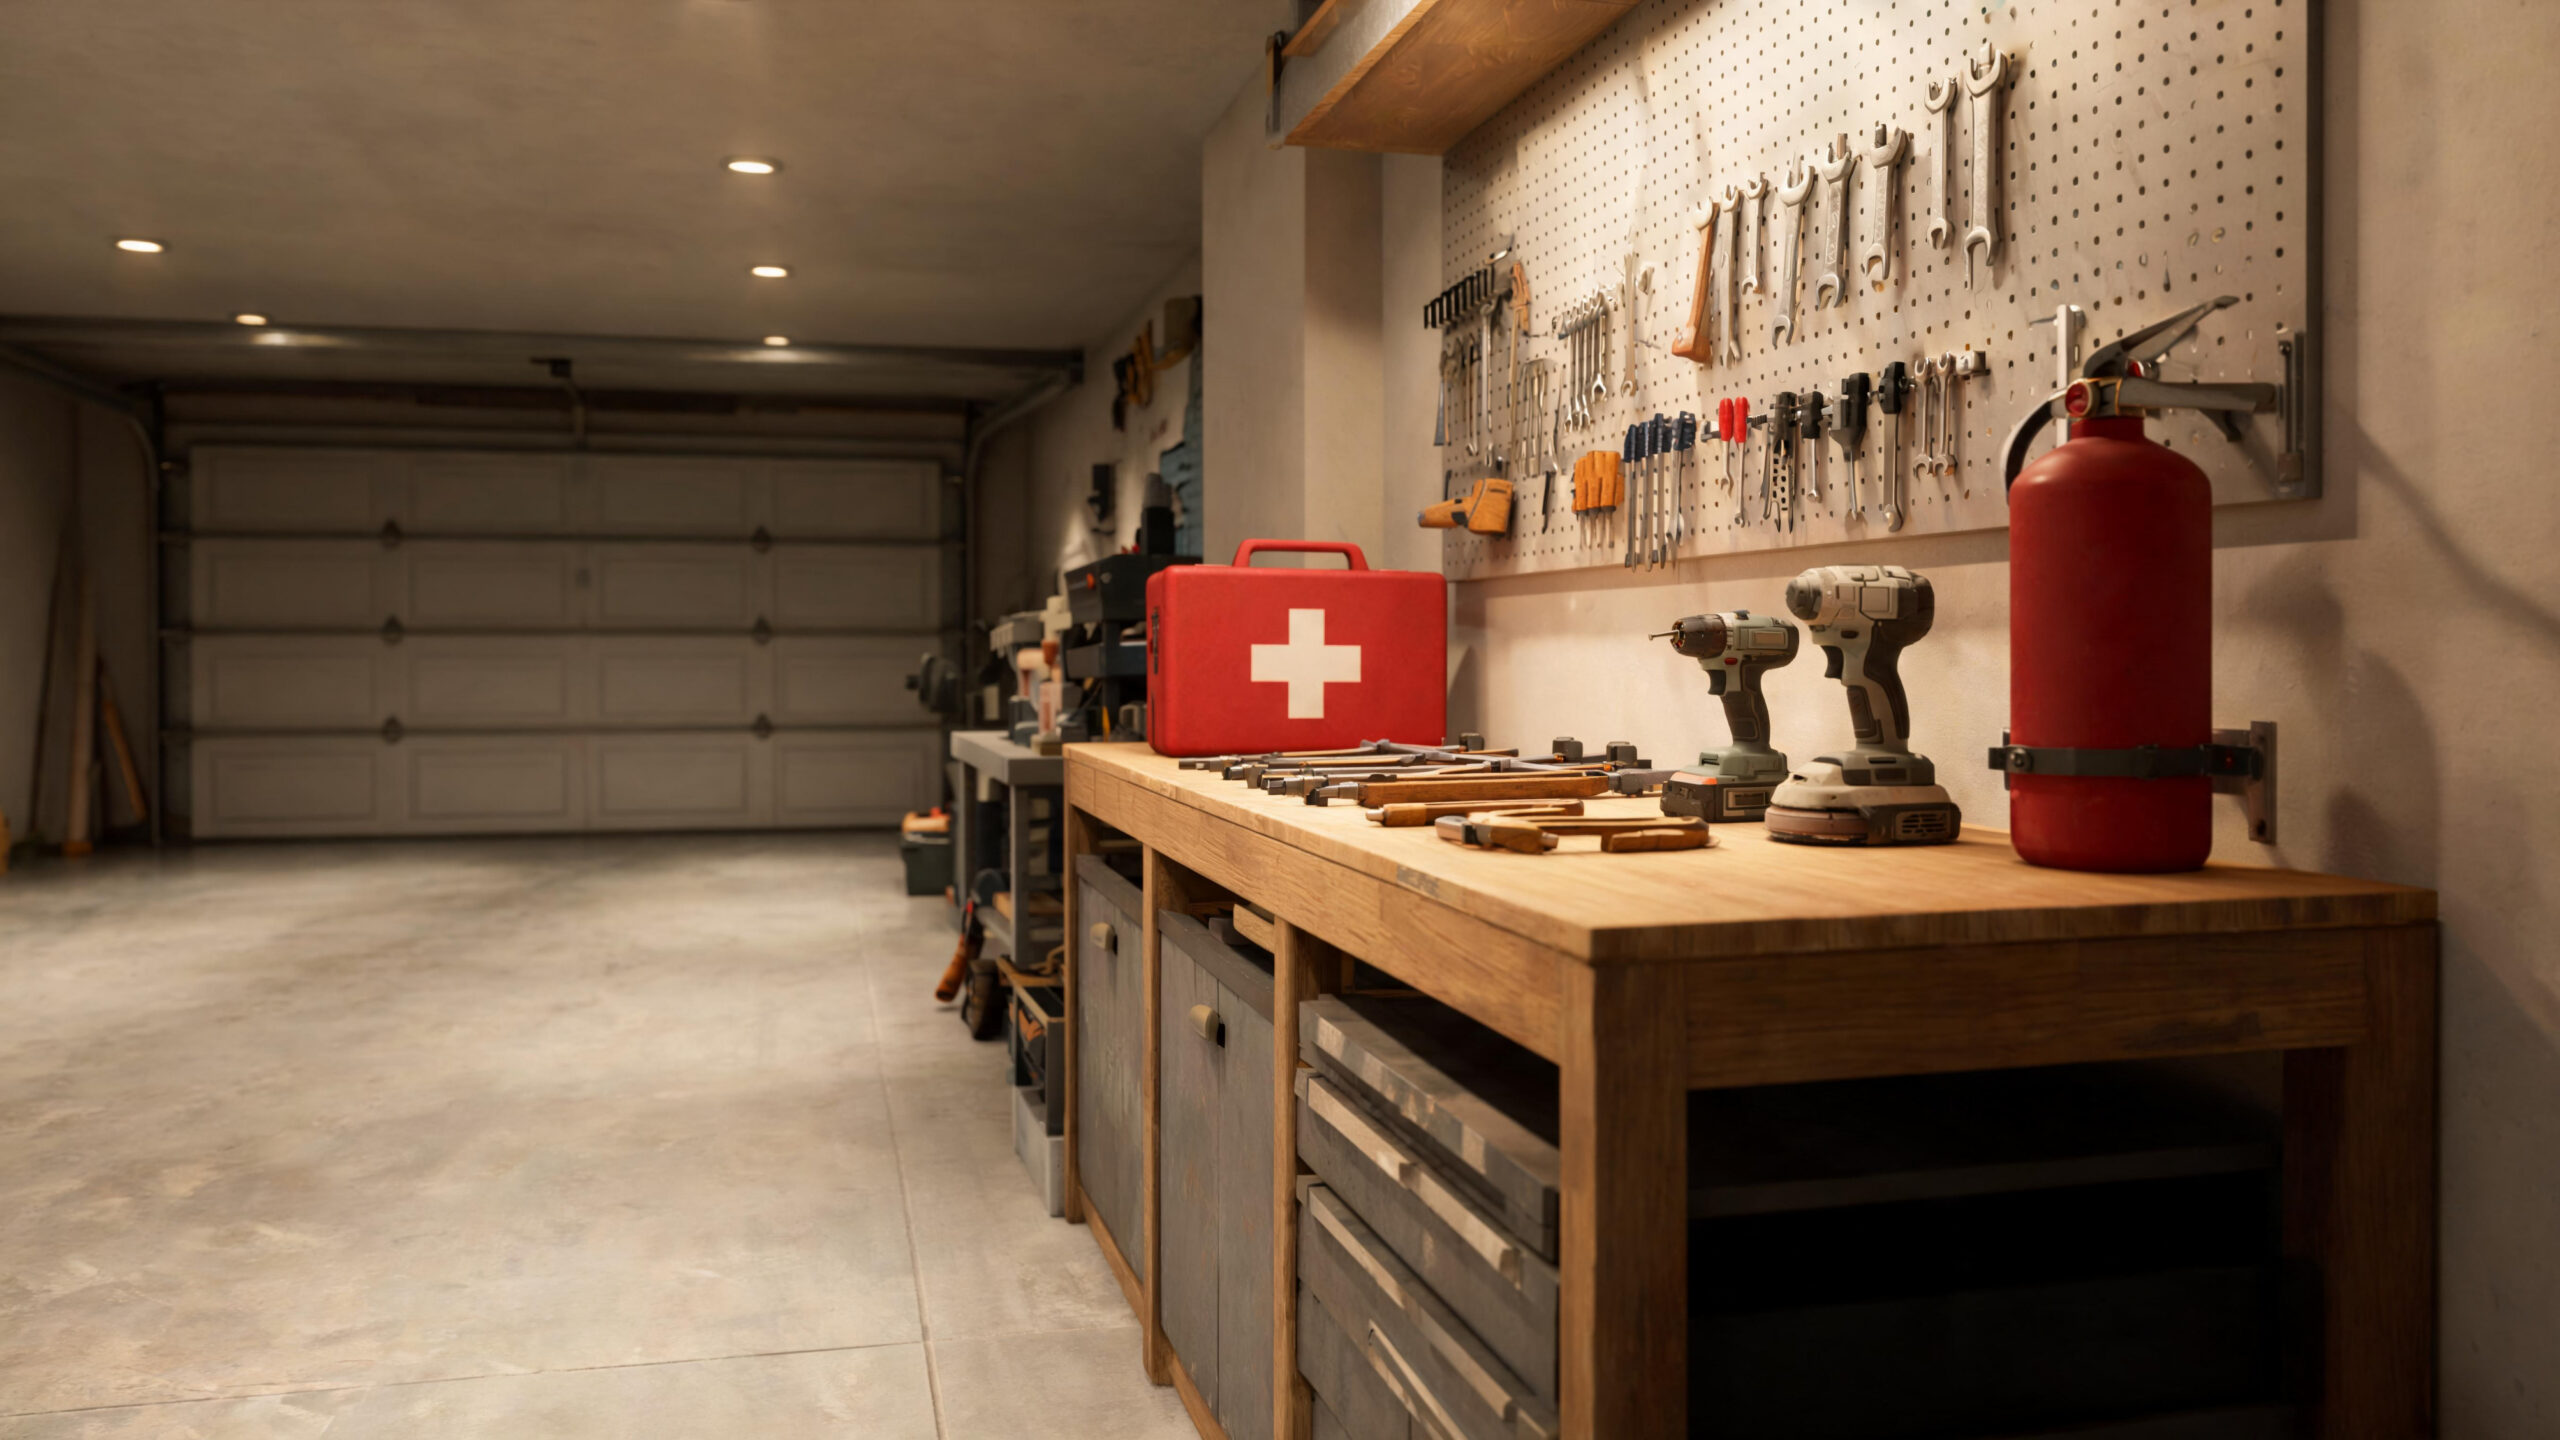
Fire safety is not just for welding shops and industrial spaces. A home maker area may contain sawdust, cardboard, solvents, finishes, adhesives, oily rags, batteries, chargers, heaters, extension cords, and heat tools. Any one of these can become dangerous when ignored. A safe workspace should include an appropriate fire extinguisher placed where you can reach it quickly, preferably near an exit rather than deep inside the hazard area.
Prevention is the real goal. Keep flammable products sealed. Store chemicals away from heat and sparks. Handle oily rags properly. Unplug heat tools after use. Do not charge batteries on piles of scrap material. Clean dust from around motors, outlets, and power strips. Avoid stacking clutter around electrical equipment. Fire safety works best when it is part of your daily workshop rhythm, not something you think about only after smelling smoke.
Do Not Let Cleanliness Become an Afterthought
A clean workshop is not about appearances. It is about reducing hazards. Scrap pieces can trip you. Fine dust can enter your lungs. Loose screws can roll underfoot. Sharp offcuts can cut your hand during cleanup. A cluttered bench can hide blades, bits, and hot tools. When mess builds up, the workspace becomes harder to read, and unclear spaces lead to unclear decisions. Build cleanup into the project instead of saving it all for the end. Pause after dusty steps. Clear the bench before switching tasks. Put sharp tools away when you are finished with them. Vacuum dust instead of sweeping it into the air. Keep trash, recycling, and scrap bins close enough that you actually use them. The safest workshops are not spotless every minute, but they are reset often enough that hazards do not pile up.
Understand Materials Before You Work Them
Different materials create different risks. Wood can splinter, kick back, burn, or create fine dust. Metal can have sharp edges, hot surfaces, sparks, and heavy weight. Plastic can melt, chip, crack, or release unpleasant fumes. Foam can produce dust or fumes depending on how it is cut. Resin can irritate skin and lungs. Paints, stains, and adhesives can require ventilation and careful storage. Electronics can involve heat, sharp leads, batteries, and electrical testing.
Before working with a new material, learn how it behaves. Ask whether it should be cut, sanded, drilled, heated, glued, painted, or finished in a particular way. Check whether it creates hazardous dust or fumes. Use scrap pieces for testing. Do not assume one material behaves like another just because it looks similar. Materials are part of the safety equation, and understanding them improves both protection and craftsmanship.
Build Confidence With Small Wins
Beginner makers often want to jump into ambitious projects, and that excitement is valuable. Still, confidence grows faster when you build in stages. Start with projects that teach measuring, cutting, fastening, sanding, finishing, organizing, or simple repair without overwhelming you. Each small win builds muscle memory and judgment. You learn how a drill feels, how clamps behave, how finish spreads, how dust moves, and how long cleanup really takes. Small projects also reveal gaps in your setup. Maybe your lighting is weak, your bench is too low, your storage is awkward, or your dust control needs improvement. That feedback is not failure. It is how a workshop evolves. Maker safety becomes easier when you are not trying to learn every tool, every material, and every technique at once. Build your skills the same way you build a project: one controlled step at a time.
Slow Down When Something Feels Wrong
One of the strongest safety instincts a maker can develop is the willingness to stop. If a tool sounds strange, stop. If a cut begins to bind, stop. If a workpiece shifts, stop. If a chemical smell feels stronger than expected, stop. If you are tired, frustrated, distracted, or rushing to finish, stop. Pausing is not weakness. It is one of the most powerful forms of control.
Many accidents happen in the final stretch, when the maker is almost done and wants to push through. This is when attention drops and shortcuts become tempting. Train yourself to treat discomfort, confusion, and instability as signals. Step back, reset the workpiece, improve the clamp, change the blade, open the door, put on the respirator, or come back later. Confidence is not ignoring warning signs. Confidence is knowing you can solve them safely.
Make Safety a Habit, Not a Checklist You Ignore
Checklists are useful, but maker safety becomes powerful when it turns into habit. Put on eye protection before tools start. Clamp before cutting. Check the floor before carrying material. Turn on ventilation before opening chemicals. Put blades away after use. Return tools before the bench becomes crowded. Vacuum before dust spreads. Unplug or power down when a tool is no longer in use. These habits may feel slow at first, but they quickly become automatic. Once they are automatic, they free your mind for better creative decisions. You no longer waste energy wondering where your glasses are, whether the part is secure, or whether the floor is clear. The workshop begins to support you. The process feels smoother. Safety becomes part of the craft rather than an interruption.
Build With Confidence, Not Luck
Maker safety is not about eliminating every possible risk. No workshop, tool, or project is completely risk-free. The goal is to understand risk well enough to manage it. When you protect your eyes, lungs, ears, hands, workspace, power, tools, materials, and workflow, you replace guesswork with confidence. You stop relying on luck and start relying on preparation.
The best part is that safer making usually leads to better making. Clean setups produce cleaner cuts. Stable workpieces produce better joints. Better lighting improves accuracy. Dust control improves comfort. Organized tools reduce frustration. Good habits make bigger projects feel possible. Maker Safety 101 is not a side lesson before the real work begins. It is the foundation that lets every future project become more exciting, more controlled, and more rewarding.
A: Start with a sturdy workbench, clear lighting, basic PPE, safe power access, and a simple cleanup system.
A: Yes. Use wall storage, folding surfaces, rolling carts, and clear floor zones to keep the space controlled.
A: Yes, at least at a basic level. A shop vacuum, respirator, and regular cleanup make a major difference.
A: Safety glasses, hearing protection, work gloves for handling materials, and a respirator for dust or fumes are smart basics.
A: They can be when properly rated and used temporarily, but they should not become permanent wiring or floor clutter.
A: Lock sharp tools, store chemicals high or secured, unplug tools, block access, and never leave active projects unattended.
A: Store them unplugged or powered down, with blades and bits protected, and keep heavier tools on lower shelves.
A: Use bright general lighting plus focused task lights wherever you cut, measure, sand, assemble, or inspect details.
A: Yes. Place an appropriate extinguisher near the exit where it is visible, reachable, and not blocked by tools or storage.
A: Make sure you have enough clearance, power capacity, dust control, storage, stable surfaces, and safe workflow before upgrading.
Choose the Right Location for Your Home Workshop
The first major decision is where your workshop should live. Garages are popular because they usually offer access to power, ventilation, concrete floors, and enough space for tools and materials. Basements can be comfortable and protected from weather, but they require careful attention to dust, fumes, moisture, and noise. Sheds and detached spaces can be excellent for messy or noisy work, but they may need upgraded lighting, electrical access, climate control, and security. Spare rooms can work for clean projects, crafts, electronics, small repairs, and assembly, but they are usually not ideal for heavy cutting, sanding, finishing, or high-dust tasks.
A safe location should give you enough room to move around your main work surface without stepping over cords, scraps, boxes, or materials. It should also allow you to separate messy work from living spaces. If your workshop shares space with vehicles, laundry, storage, pets, or family traffic, your layout needs clear boundaries. Even a small workshop can be safe if the space is intentional. The goal is not to create a showroom. The goal is to create a working zone where dangerous tools are controlled, dust and fumes have somewhere to go, and unfinished projects do not take over the rest of your home.
Start With a Smart Workshop Layout
Layout is one of the most important parts of home workshop safety because it determines how you move, reach, cut, carry, clamp, and clean. A safe workshop should have a logical flow from storage to cutting, assembly, finishing, and cleanup. If every task happens on the same cluttered surface, mistakes become easier. If you have to carry long boards around obstacles or operate a saw in a cramped corner, your setup is working against you. Even in a small space, try to create zones that match the way projects actually happen. Your main workbench should be the center of the workshop. Around it, place the tools you use most often within easy reach, while keeping sharp, heavy, or specialized tools stored securely when not in use. Cutting tools need extra clearance, especially in front of and behind the material path. Assembly areas need flat surfaces, clamps, and enough room for parts to sit without falling. Finishing areas need airflow and protection from dust. Cleanup tools should be easy to grab, not buried behind project materials. A good layout makes safe behavior the easiest behavior.
Build a Strong and Stable Workbench
Your workbench is more than a table. It is the foundation of your DIY workflow. A weak, wobbly, overloaded, or poorly placed bench can make every project harder and more dangerous. A safe workbench should be stable enough to handle clamping, sanding, drilling, assembly, and light impact without sliding or shaking. It should be at a comfortable height so you are not constantly bending, reaching, or working with your shoulders raised. For many home workshops, a simple sturdy bench with a flat top, lower shelf, and good lighting is more valuable than a room full of specialized tools.
The surface matters too. A bench used for woodworking may need a sacrificial top that can take cuts, dents, glue, and finish spills. A bench used for electronics or precision work should be cleaner, smoother, and better protected from dust and static. If you work with sharp tools, make sure the bench gives you room to keep blades pointed away from your body. If you use clamps, add edges or dog holes that help secure materials. Most workshop injuries are not dramatic failures. They often come from small slips, unstable workpieces, awkward angles, and rushed setups. A solid workbench helps prevent all of them.
Set Up Safe Power and Electrical Access
Power is one of the most overlooked parts of a home workshop. Many DIY spaces grow slowly, with one extension cord becoming two, then three, until the floor becomes a web of trip hazards and overloaded outlets. A safe workshop needs enough electrical access for your tools, lights, chargers, dust collection, fans, and equipment without pushing circuits beyond their limits. High-demand tools may need dedicated circuits, and any questionable wiring should be inspected by a qualified professional before you rely on it. Extension cords should be used carefully and temporarily, not as a permanent wiring system. Choose cords rated for the tools you use, keep them away from cutting paths, and avoid running them under rugs or through pinch points. Power strips are useful for low-demand accessories, but they are not a solution for heavy tools. In garages, basements, sheds, and damp areas, ground-fault protection is especially important. Your workshop should also have a simple charging area for cordless tool batteries, away from flammable scraps, solvents, and direct heat. Clean power planning makes your shop safer, neater, and easier to use.
Make Lighting a Safety Feature
Good lighting is not just about making your workshop look better. It is a safety system. Poor lighting hides blade positions, pencil marks, uneven surfaces, cords, sharp scraps, and spilled liquids. It also causes eye strain, which can lead to rushed decisions and fatigue. A safe workshop should combine bright general lighting with focused task lighting over the workbench, cutting area, assembly zone, and any precision station. Shadows are the enemy of accuracy, especially when measuring, cutting, drilling, soldering, or finishing.
Natural light is a bonus, but it should not be your only source. Daylight changes, garage doors close, and evening projects often stretch longer than expected. Use overhead lighting to brighten the whole space, then add adjustable lights where details matter. Position lights so your own body does not cast shadows across the work. If you use glossy finishes, metal, glass, or small parts, lighting angle becomes even more important. A workshop that is easy to see is easier to control, and control is one of the most important ingredients in safety.
Control Dust Before It Controls the Room
Dust may seem harmless at first, but in a home workshop it can become one of the biggest long-term safety problems. Wood dust, drywall dust, plastic particles, sanding residue, and fine debris can irritate lungs, settle on surfaces, damage equipment, and spread into the home. A safe workshop should include a plan for capturing dust at the source, filtering the air, and cleaning surfaces regularly. Even small projects can produce more airborne particles than beginners expect. Start with simple habits. Connect a shop vacuum or dust extractor to sanders, saws, and other dust-producing tools whenever possible. Sweep less and vacuum more, because sweeping often pushes fine dust back into the air. Use a respirator when sanding, cutting, or working with materials that create fine particles. If your space allows it, add air filtration or a fan setup that moves dirty air away from your breathing zone. Dust control does not have to be complicated, but it does need to be consistent. A clean workshop is not just nicer to look at. It is healthier, safer, and more professional.
Ventilate for Fumes, Finishes, and Heat
Ventilation is essential if your DIY projects involve paint, stain, solvents, adhesives, resin, soldering, laser cutting, 3D printing, heat tools, or any process that creates fumes. Many materials that seem ordinary can release vapors that should not build up indoors. A safe home workshop needs fresh air movement, especially when you are using chemical products or heat. Opening a door may help, but it is not always enough. The goal is to move contaminated air away from you and out of the workspace while bringing cleaner air in.
Finishing work deserves special attention. Stains, sprays, sealers, paints, and adhesives should be used according to their labels, with proper protective gear and airflow. Never assume that a product is safe just because it is sold for home use. If you work in a basement or enclosed room, ventilation becomes even more important because fumes can linger. Avoid open flames, sparks, and high heat around flammable products. Store chemical containers tightly closed and away from ignition sources. When in doubt, treat air quality as part of the project, not as an afterthought.
Choose Personal Protective Equipment That Fits the Work
Personal protective equipment, or PPE, is the last line of defense, but it should never be treated as optional decoration. Safety glasses protect your eyes from dust, chips, snapped bits, splashes, and flying debris. Hearing protection reduces the long-term damage caused by saws, vacuums, compressors, grinders, and impact tools. Respirators help protect your lungs during dusty or fume-heavy tasks. Gloves can protect your hands during material handling, finishing, and cleanup, but they should be used carefully around spinning tools where loose material can catch. The best PPE is the gear you will actually wear. Choose safety glasses that fit comfortably, respirators that seal properly, and hearing protection that is easy to grab. Keep PPE visible near the entrance or main workbench so putting it on becomes automatic. Replace scratched eye protection, clogged filters, worn gloves, and damaged ear protection. A safe workshop does not rely on courage or luck. It relies on repeatable habits. When your protective gear is easy to find and comfortable to use, you are much more likely to protect yourself every time.
Store Tools So They Cannot Surprise You
Tool storage is safety disguised as organization. A sharp chisel buried in a drawer, a circular saw balanced on a shelf, a drill bit rolling across the bench, or a heavy clamp stacked overhead can turn a normal workday into an injury. A safe workshop gives every tool a secure home. Frequently used hand tools can hang on a wall, sit in a shallow drawer, or live in a tool chest. Heavy tools should be stored low. Sharp tools should be covered or separated. Power tools should be unplugged or locked out when not in use.
Good storage also speeds up your work. When tools are easy to find, you are less likely to improvise with the wrong tool. When bits, blades, fasteners, and accessories are organized, you are less likely to force a cut, strip a screw, or damage material. Avoid creating storage systems that look impressive but are difficult to maintain. The best system is one that matches your habits. If you can clean up quickly at the end of a project session, your workshop will be safer the next time you walk in.
Store Materials With Safety in Mind
Materials can create hazards even before you start building. Long boards can fall, sheet goods can tip, metal stock can cut, glass can break, fabrics can collect dust, and small parts can scatter across the floor. A safe home workshop stores materials by size, weight, and risk. Long items should be supported along their length. Sheet goods should be secured so they cannot slide or fall. Small parts should be contained in bins, drawers, or compartment boxes. Scrap material should be useful, not chaotic. Chemical materials need even more care. Paints, solvents, oils, adhesives, finishes, resin, and cleaners should be stored in their original containers whenever possible, with lids sealed and labels intact. Keep them away from heat, sparks, and direct sunlight. Do not let oily rags pile up, because some finishes can create fire risks if rags are handled carelessly. Battery storage also matters. Cordless tool batteries should be stored where they cannot be crushed, overheated, or exposed to moisture. Safe material storage protects your space even when you are not actively working.
Keep the Floor Clear and Predictable
The floor is one of the most important safety surfaces in your workshop. A cluttered floor creates trip hazards, unstable footing, and awkward movement. Cords, hoses, offcuts, packaging, clamps, and scattered tools can become dangerous when you are carrying material or operating equipment. A safe workshop floor should be clear enough that you can step backward, turn, carry a board, or move around a bench without surprise obstacles.
Floor comfort also matters. Concrete is durable and easy to clean, but long work sessions can strain your feet, knees, and back. Anti-fatigue mats can help in standing areas, as long as they do not create tripping edges or interfere with rolling equipment. Spills should be cleaned quickly, especially finishes, oils, water, and fine dust that can become slippery. Floor safety is a daily habit, not a one-time setup. Before starting any tool, glance down and ask whether your stance is solid and your escape path is clear.
Plan for Fire Safety From the Beginning
Fire safety should be part of every home workshop setup. Power tools, batteries, extension cords, sawdust, solvents, finishes, rags, heaters, and chargers can all add risk if they are not managed carefully. A safe workshop should have an appropriate fire extinguisher in an easy-to-reach location, along with smoke detection where suitable. The extinguisher should not be hidden behind storage or placed where a fire would block access to it. You should know how to use it before an emergency happens. Fire prevention is just as important as emergency response. Keep flammable liquids sealed. Store oily rags properly. Do not charge batteries on piles of sawdust or cardboard. Avoid overloading outlets. Keep heat tools away from clutter. Unplug tools when you are finished. Clean up fine dust regularly, especially around motors, outlets, and power strips. A workshop that looks clean but hides flammable buildup is not truly safe. Treat fire safety as part of your closing routine every time you leave the space.
Create a Safe Workflow for Every Project
A safe workshop is not only about the room. It is also about the way you work. Before beginning a DIY project, take a moment to plan the sequence. Decide where materials will enter, where cuts will happen, where parts will be assembled, where finishing will occur, and where the finished piece will dry or rest. This prevents the common beginner problem of starting strong, then running out of safe surface area halfway through the build.
Rushing is one of the biggest enemies of workshop safety. Many accidents happen when a person tries to make “just one quick cut,” skip a clamp, ignore PPE, use a dull blade, or finish one more step while tired. Build pauses into your workflow. Stop to clear scraps. Stop to check measurements. Stop to change blades or bits when needed. Stop when something feels unstable. Safe making does not slow creativity down. It protects the momentum that lets you keep creating.
Prepare for First Aid and Emergency Moments
Even careful makers can get small cuts, splinters, burns, eye irritation, or minor injuries. A safe home workshop should include a first aid kit that is clean, visible, and stocked for the types of projects you do. Bandages, antiseptic, tweezers, burn care, eye wash, and basic wound supplies are useful starting points. The kit should be close enough to reach quickly but protected from dust and chemicals. You should also think through emergency access. Can you exit the workshop quickly? Can someone reach you if you need help? Is your phone accessible without being in the tool path? Do you know where the main breaker is? Do other people in the home know when you are using loud tools or hazardous materials? These details may seem small, but they can matter when something unexpected happens. A safe workshop is one where problems are less likely and responses are easier.
Make the Workshop Easy to Clean
Cleanliness is not about perfection. It is about control. A workshop that is easy to clean is safer because hazards do not accumulate. Place trash, recycling, scrap bins, vacuum tools, and cleaning supplies where you will actually use them. If cleanup takes too long, it will get skipped. If cleanup is simple, it becomes part of the rhythm of making.
End each project session by returning tools, clearing the bench, vacuuming dust, dealing with sharp scraps, and checking that power tools are off or unplugged. Put finishes and chemicals away. Move batteries to their charging or storage zone. Clear the floor before leaving. These closing habits make the next session safer and more enjoyable. There is a special kind of confidence that comes from walking into a workshop that is ready for you instead of one that still feels like yesterday’s mess.
Design for Growth Without Losing Safety
Your first home workshop does not need every tool. In fact, buying too much too soon can make the space less safe. Start with the projects you actually want to build, then add tools as your skills and space grow. A beginner workshop might begin with a sturdy bench, basic hand tools, a drill, clamps, measuring tools, PPE, lighting, storage, and cleanup equipment. As you gain experience, you can add saws, sanders, specialty tools, dust collection, better workholding, or dedicated stations. The key is to grow intentionally. Every new tool should come with a storage plan, power plan, dust or fume plan, and safe operating plan. If a tool makes your shop more crowded, noisier, dustier, or harder to clean, your setup may need to evolve before you use it heavily. A safe workshop is never truly finished. It improves as your projects become more ambitious. The best makers are not just good at building objects. They are good at building better systems around their work.
Turn Safety Into Creative Freedom
Some beginners think workshop safety is a set of restrictions. In reality, it is what gives you freedom to create with confidence. When your tools are organized, your workbench is stable, your lighting is strong, your air is cleaner, your PPE is ready, and your workflow is planned, your mind has more room for design, problem-solving, and craftsmanship. Safety removes friction. It makes the workshop feel less intimidating and more inviting.
A safe home workshop does not have to be perfect, huge, or expensive. It has to be thoughtful. Start with the basics, fix the obvious hazards, and improve one system at a time. Create clear zones, protect your eyes and lungs, manage power carefully, control dust, store tools securely, and clean as you go. With the right setup, your workshop becomes more than a room full of tools. It becomes a launchpad for better DIY projects, smarter skills, and the satisfaction of making things with your own hands.