Why Foam and Plastics Fabrication Matters
Foam and plastics fabrication sits at the intersection of creativity, precision, and practical problem-solving. It is used in everything from custom packaging and protective inserts to cosplay armor, architectural models, machine guards, signs, prototypes, and workshop fixtures. For beginners, these materials are approachable because many of them are lightweight, affordable, and easy to shape. For experienced makers, they offer tremendous flexibility, allowing complex forms, smooth finishes, and repeatable results without the cost or difficulty of machining metal. What makes this category so appealing is how adaptable it can be. A simple foam sheet can become a mock-up for a product concept, while a plastic panel can become a durable enclosure or display piece. Fabrication is not just about cutting material into smaller parts. It is about understanding how different materials respond to tools, heat, adhesives, pressure, and finishing methods. Once that foundation is in place, the leap from rough workshop idea to polished final build becomes far more manageable.
A: EVA foam is beginner-friendly because it is easy to cut, shape, and glue.
A: Acrylic is a popular choice when you want a rigid, transparent finished part.
A: Excessive friction, the wrong blade, or feeding too slowly can generate too much heat.
A: Yes, especially thinner foam sheets, as long as the blade is sharp and the passes are controlled.
A: Hot wire cutting is one of the cleanest and most precise methods for rigid foam.
A: Usually yes, because some strong solvents can damage or dissolve foam surfaces.
A: It can be brittle, but with proper scoring, cutting, and finishing, it works very well.
A: CNC is best when you need repeatability, tight tolerances, or complex shapes across multiple parts.
A: Sand progressively, refine the shape carefully, and polish or seal the surface when needed.
A: Material choice, sharp tools, accurate layout, steady technique, and patient finishing all matter.
Understanding the Core Materials
The first step in successful foam and plastics fabrication is learning the behavior of common materials. Foam is not a single thing. EVA foam is flexible, easy to cut, and widely used for props, costume work, and protective padding. XPS foam is rigid and popular for insulation, model building, and terrain projects. Polyurethane foam comes in different densities and is used in cushioning, carving, and industrial applications. Each one cuts, sands, and bonds differently, so material choice always affects the process.
Plastics bring even more variety. Acrylic is visually appealing and can be polished to a clear finish, but it can also chip or crack if handled poorly. ABS is tougher and easier to machine for many fabrication tasks, which is why it is common in housings and functional parts. PVC is versatile and often economical, though it needs proper ventilation during cutting and shaping. Polycarbonate is known for impact resistance and durability, making it a strong choice for protective applications. Understanding the basic strengths and limitations of each material helps prevent frustration later in the build.
Matching the Material to the Project
A good fabrication outcome begins long before the first cut. The right material for a display model may be the wrong one for a protective case or structural form. Lightweight foam works well when shape matters more than strength, while rigid plastic is often better when the final part needs durability, moisture resistance, or a more polished appearance. Density, thickness, flexibility, and surface finish all matter when choosing what to use. Project requirements should drive the decision. If a build needs to be carved, layered, and painted, foam may be the more forgiving option. If it needs to hold screws, maintain crisp edges, or survive repeated handling, a plastic sheet or formed panel may be the smarter choice. This early decision affects everything that follows, including tool selection, cutting speed, joinery, finishing, and cost. Makers who choose materials with the end use in mind usually get cleaner results with fewer setbacks.
Essential Cutting Tools for Beginners
For many people, fabrication starts with simple hand tools. A sharp utility knife remains one of the best entry points for cutting foam and thin plastics. With a straightedge and controlled passes, it can deliver surprisingly accurate cuts. Snap-off blades are especially helpful because fresh edges matter. Dull blades drag, tear foam, and stress brittle plastics, which almost always produces rough results.
A scoring knife is another practical beginner tool, especially for acrylic and thin plastic sheets. Scoring creates a controlled line that allows the sheet to snap cleanly when supported properly. Basic hand saws with fine teeth can also work for thicker plastics or rigid foam when power tools are unnecessary. These tools are inexpensive, accessible, and perfect for building core skills. More importantly, they teach the most valuable lesson in fabrication: clean work usually comes from patience, not force.
Stepping Up to Power Tools
As projects grow in size or complexity, power tools become more useful. Jigsaws, circular saws, band saws, and routers all have a place in foam and plastics fabrication when used correctly. A jigsaw can handle curves and irregular shapes in plastic panels. A circular saw with the proper blade can make long, straight cuts in sheet plastic quickly. Routers are excellent for edge shaping, trimming, and achieving uniformity across repeated parts. The key with power tools is managing speed and friction. Plastics are especially sensitive to heat, and too much blade speed can melt the edge instead of cutting it cleanly. Foam can also suffer when aggressive cutting causes tearing or compression. Fine-tooth blades, firm support, and slower feed rates usually produce the best results. Power tools increase efficiency, but only when paired with careful setup and an understanding of how the material behaves under motion and pressure.
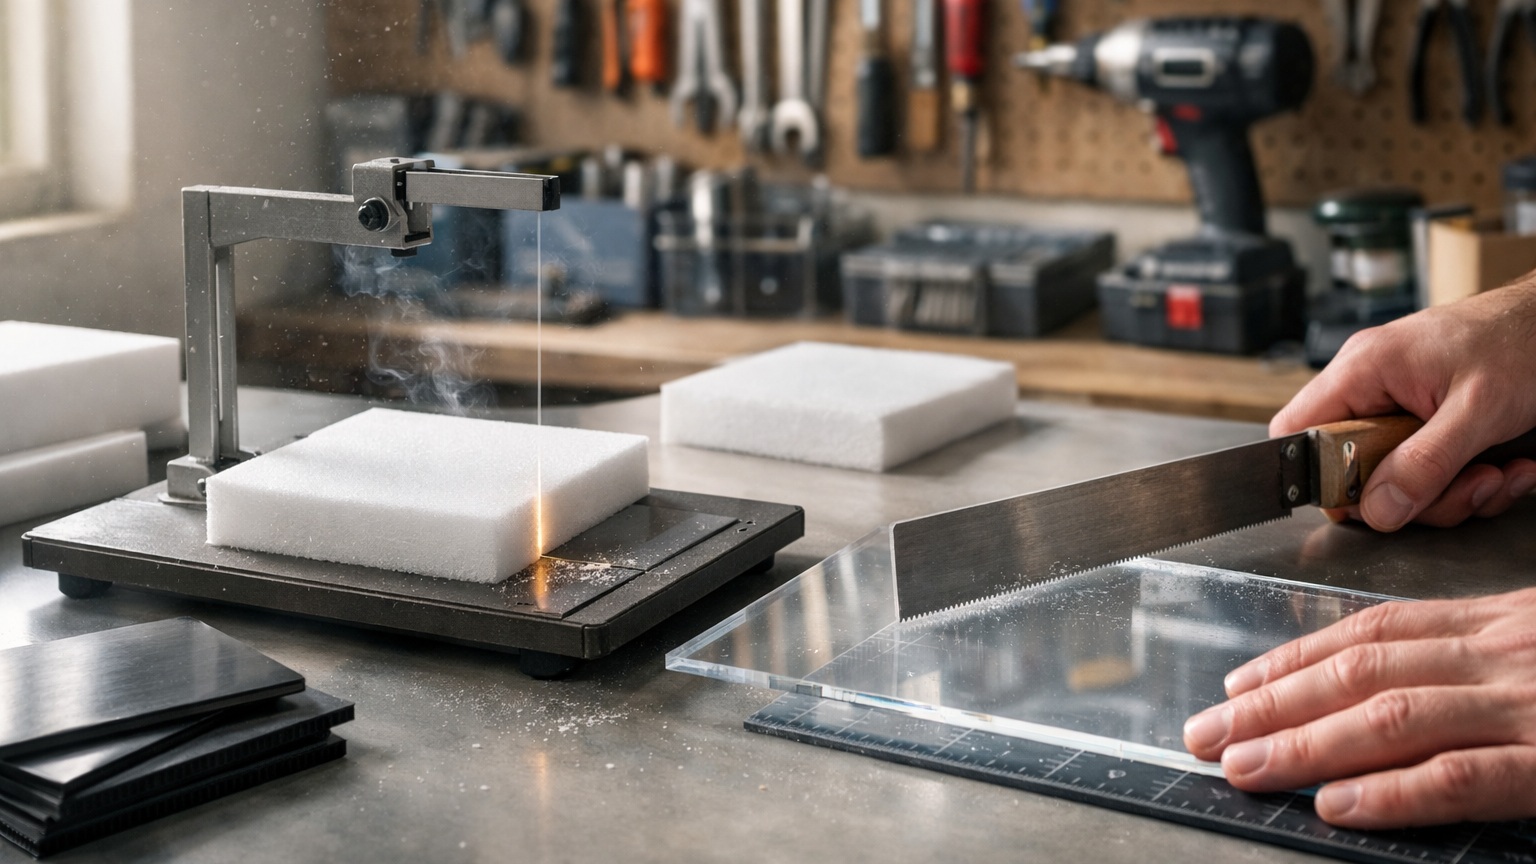
Hot Wire and Heat-Based Methods
Hot wire cutting is one of the defining techniques in foam fabrication. Instead of mechanically slicing through the material, a heated wire melts a narrow path and leaves behind smooth, controlled edges. This makes it especially useful for rigid foam sheets, model forms, signs, and shaped contours. It can create curves and profiles that would be difficult to produce cleanly with a blade alone.
Heat also plays a major role in plastic fabrication. Acrylic and certain thermoplastics can be bent, formed, and shaped once heated to the proper temperature. A strip heater or controlled heat gun can soften a section enough for a precise bend without damaging the rest of the part. These methods require practice, because too little heat leads to stress and cracking while too much causes bubbling, distortion, or scorching. Still, when mastered, heat-based methods add a level of precision and design freedom that cutting alone cannot provide.
Advanced Fabrication Tools and CNC Options
At the professional end of the spectrum, CNC routers, laser cutters, and vacuum forming systems take foam and plastics fabrication to another level. CNC routing is ideal for repeatable cuts, intricate geometries, and precise dimensions across multiple parts. It works especially well for rigid foam, ABS, PVC, and similar materials when feed rate, bit selection, and depth of cut are dialed in correctly. For businesses and serious makers, CNC tools make it easier to scale production without sacrificing consistency. Laser cutters are especially useful for thin acrylic and other compatible plastics, producing crisp, visually impressive edges. Vacuum forming, on the other hand, allows heated plastic sheets to be shaped over molds for trays, housings, and contoured covers. These processes demand more equipment and planning, but they open the door to cleaner repeatability, faster workflows, and professional-grade parts. The more advanced the tool, the more important preparation becomes. Material testing, fixturing, and proper settings separate a successful fabrication run from wasted stock.
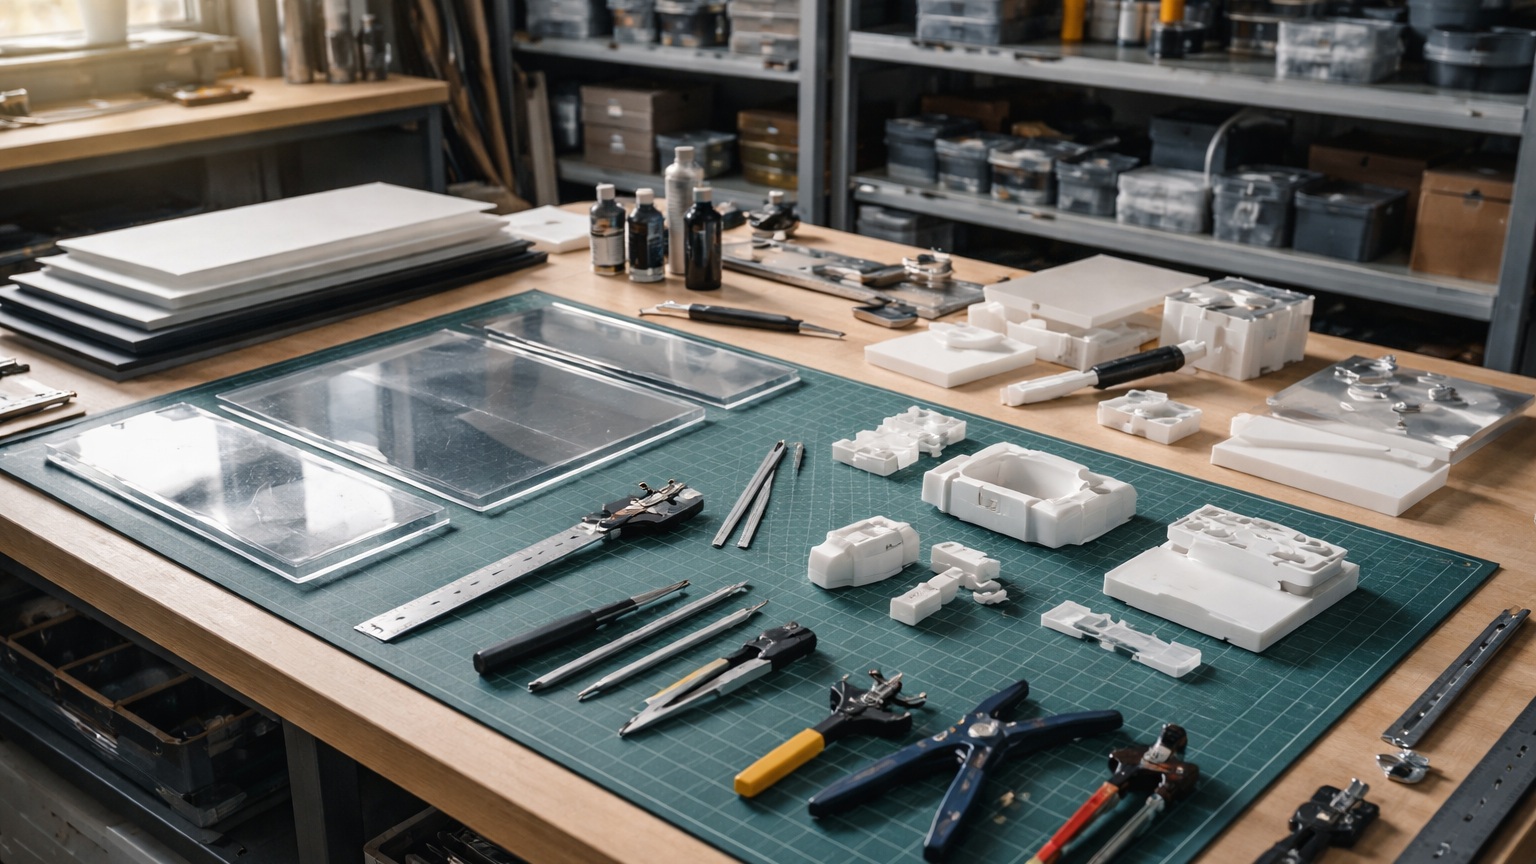
Measuring, Marking, and Layout Techniques
Many fabrication problems start with poor layout rather than poor cutting. Accurate measuring and clear marking are essential because foam and plastic rarely forgive rushed work. A metal ruler, square, compass, marking gauge, and fine-tip marker or scribe all help establish clean reference lines. On transparent plastics, masking tape can make lines easier to see while also helping reduce surface scratches during handling.
Templates also matter more than many beginners expect. A simple cardboard, MDF, or printed template can improve repeatability and reduce mistakes, especially for symmetrical or complex parts. In professional workflows, layout is often treated with the same seriousness as cutting because it determines the final fit. Accurate planning saves material, keeps cuts cleaner, and reduces the need for trimming and correction later. When parts need to line up, stack, or bond together, good layout becomes one of the most important steps in the entire process.
Cutting Techniques for Clean Results
The goal in foam and plastics fabrication is not just to separate material. It is to create clean, usable edges that reduce finishing time and improve fit. For hand cutting, that usually means using multiple shallow passes rather than one aggressive push. In foam, shallow passes prevent compression and wandering. In plastic, they reduce cracking and make it easier to stay on the line. Stable support under the workpiece also matters because unsupported material flexes, vibrates, and splinters more easily. With power tools, the same logic applies in a different form. The right blade, the right speed, and steady feed pressure all matter. For plastic sheets, chip-out can often be reduced by backing the cut line with sacrificial material or by keeping the protective film in place as long as possible. For foam, templates and fences help maintain straight lines while hot wire tools shine when long, smooth contours are required. Clean technique is about controlling motion, pressure, and heat rather than relying on raw cutting force.
Bonding and Joining Foam and Plastics
Fabrication rarely ends with a single cut part. Most projects involve joining multiple pieces into one final form, and the method used affects both strength and appearance. Foam can be joined with contact cement, foam-safe adhesives, hot glue in some cases, and specialty bonding agents depending on the material type. The wrong adhesive can dissolve foam or create weak joints, which is why compatibility always matters.
Plastics require a different approach. Acrylic often bonds best with solvent cements that chemically fuse the parts together. ABS may be joined with compatible adhesives, mechanical fasteners, or even plastic welding techniques in certain applications. Some projects also combine foam and plastic, which introduces another layer of complexity because not every adhesive works well across materials. Strong fabrication depends on selecting a joint method that matches the material, load, and desired appearance. A clean bond line can be just as important as a clean cut.
Shaping, Sanding, and Surface Refinement
After cutting and joining, shaping and surface refinement bring the project closer to a finished result. Foam can be carved, rasped, and sanded into smooth contours, which makes it ideal for sculpted parts, props, and mockups. Coarse abrasives remove material quickly, while finer grits refine the shape and reduce visible tool marks. The key is to work gradually so that the form stays balanced and symmetrical. Plastic finishing often demands more care because scratches and edge defects are more visible. Sanding plastic should usually begin with a grit that removes saw marks without digging too deeply, then progress toward finer grits for a cleaner surface. Acrylic edges can be polished to a clear finish with buffing or controlled flame polishing, while functional parts may only need a smooth, consistent edge without a glossy appearance. Finishing is where a project starts to look deliberate and professional rather than improvised.
Sealing, Painting, and Final Appearance
A fabricated part often needs more than smooth edges. It may need a sealed surface, paint-ready texture, or a durable final coating. Foam especially benefits from sealing before painting because porous surfaces tend to absorb paint unevenly and reveal imperfections. Flexible sealers, fillers, and surface primers can transform raw foam into a finishable surface that looks far more refined. The better the prep, the better the final appearance.
Plastics may not always require sealing, but they often benefit from cleaning, light abrasion, and plastic-compatible primers before painting. Surface preparation helps coatings adhere and reduces the chance of peeling later. In some applications, the natural material finish is desirable and the goal is simply to preserve clarity or texture. In others, paint is essential for creating a uniform look or matching a design. Final appearance depends less on the material itself than on how well the surface has been prepared and finished.
Safety in the Fabrication Workspace
Foam and plastics fabrication may look straightforward, but safety should never be treated casually. Cutting creates sharp offcuts and dust, sanding can produce fine airborne particles, and heat-based processes may release fumes. Ventilation, eye protection, gloves where appropriate, and respiratory protection are all important parts of a serious workshop routine. Material safety varies widely, so it is worth understanding the specific risks of each foam or plastic before cutting or heating it. A clean workspace also improves safety. Stable work surfaces, secure clamps, organized tools, and clear access around the project reduce mistakes and help maintain accuracy. Many accidents happen when users rush, reach awkwardly, or work around clutter. Safe habits also tend to improve the quality of the work, because careful handling, deliberate setup, and attention to detail naturally lead to better cuts and cleaner finishes. Good fabrication practice and good safety practice usually go hand in hand.
Moving from Beginner to Pro
The transition from beginner to advanced fabricator rarely comes from buying more expensive tools alone. It comes from understanding the relationship between materials, methods, and intended outcomes. Beginners often focus on getting through the cut. Professionals focus on controlling the cut, the edge quality, the fit, the finish, and the repeatability. That difference shows up in every stage of the process, from layout and material choice to sanding and final assembly.
Practice accelerates that learning curve. Repeating cuts on scrap, testing adhesives before committing to a full build, and comparing different finish methods all teach lessons that no tool catalog can provide. Over time, makers develop instincts about blade choice, feed rate, heat control, and material response. Those instincts are what turn simple workshop steps into confident fabrication. The path from rough prototype to polished part is built on repetition, observation, and refinement.
Final Thoughts on Foam and Plastics Fabrication
Foam and plastics fabrication is one of the most accessible and rewarding areas of hands-on making. It allows beginners to start with inexpensive tools and straightforward projects while giving experienced builders room to explore advanced techniques, custom forms, and highly refined finishes. With the right materials, the proper tools, and a solid understanding of technique, these everyday workshop materials can become impressive finished parts. The real value of fabrication lies in control. Clean lines, thoughtful material choices, accurate templates, strong joints, and consistent finishing all add up to better results. Whether the goal is a protective insert, a prototype panel, a shaped foam model, or a polished plastic enclosure, the same principles apply. Learn the materials, respect the process, and build with intention. That is how foam and plastics fabrication moves from basic workshop task to true craft.