The Must-Have Tool Is The One That Solves A Repeated Task
A useful DIY workshop does not need every tool from every aisle. It needs a dependable core that helps makers measure, mark, cut, drill, fasten, clamp, sand, assemble, protect themselves, and clean up without turning each project into a scavenger hunt. The best must-have tools are not chosen for status. They are chosen because the same basic tasks appear again and again across shelves, repairs, fixtures, small furniture, decor, prototypes, and weekend experiments.
A: Start with the smallest test that proves one real part of the project.
A: Enough to know the goal, material limits, tool setup, and first safety check.
A: No. It should be clear, testable, and easy to revise.
A: Early failures usually come from voltage drops, overheated motors, loose wires, weak brackets, bad calibration, and unsafe motion.
A: Match the material to load, use, finish, cost, repair, and available tools.
A: Scale after a small test works repeatedly and the cost still makes sense.
A: Save measurements, settings, suppliers, photos, failures, and changes.
A: Rework drops, fit improves, safety is clearer, and results repeat more often.
A: Avoid hiding weak structure, unsafe setup, or unclear decisions under a nice finish.
A: It solves the intended job and teaches a better next build.
Build Around Repeated Work
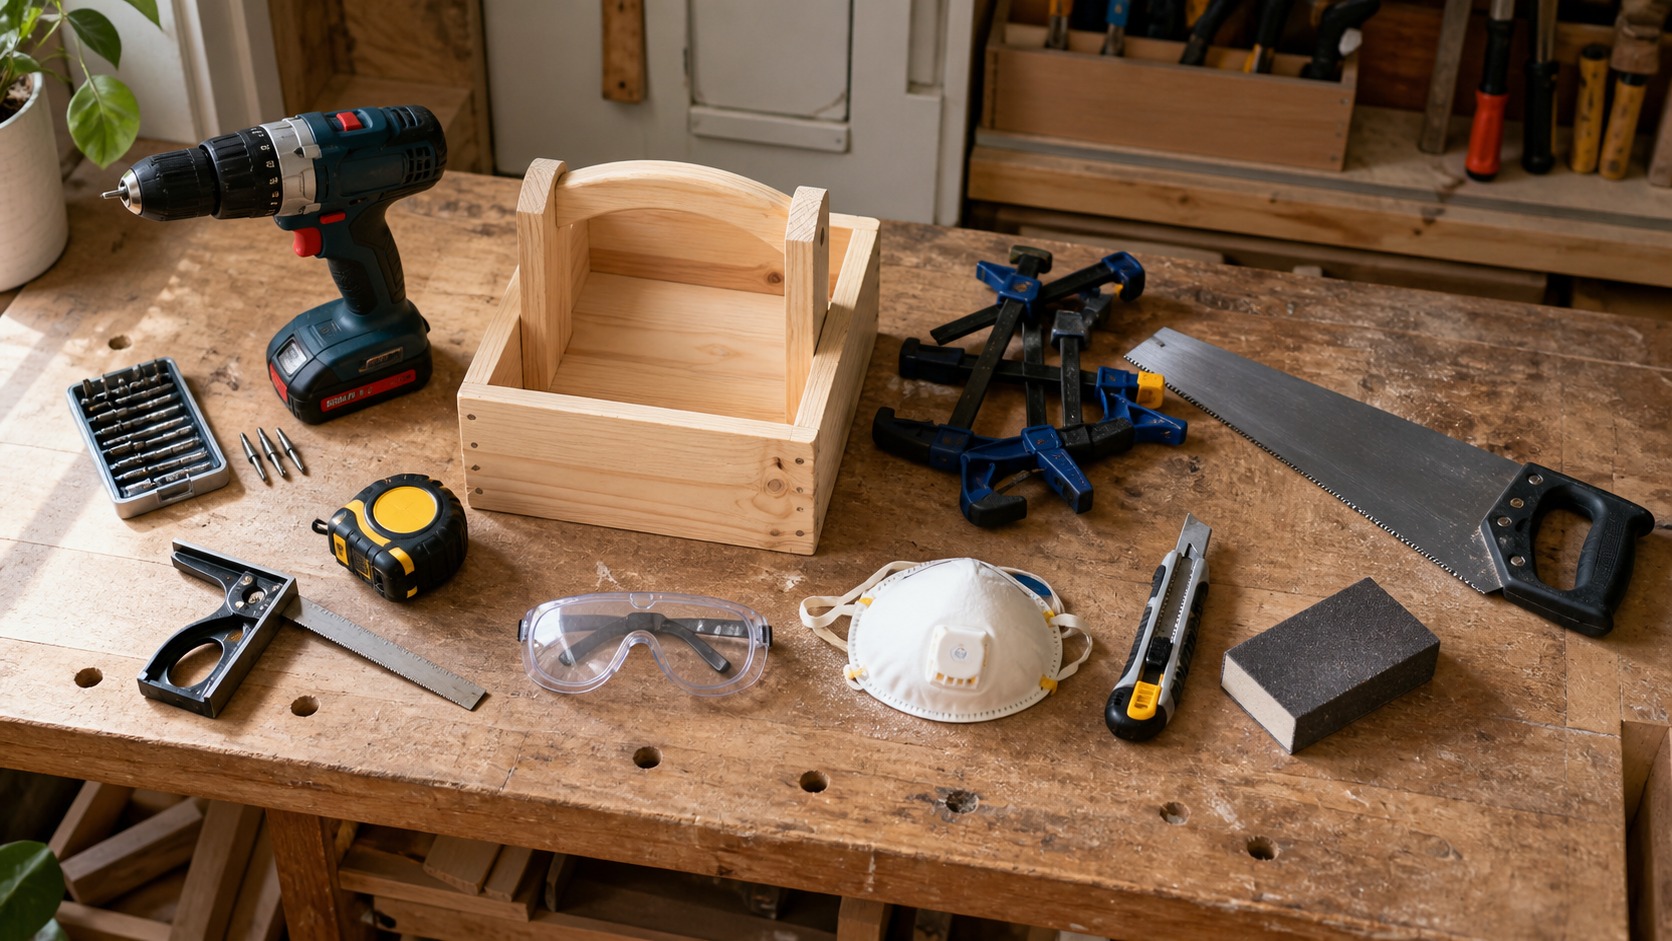
The phrase must-have can become a trap. A tool is essential only if it supports work that appears repeatedly in your projects. Most DIY makers need to measure, mark, cut, drill, fasten, clamp, sand, and protect themselves. That core shows up whether the project is a shelf, repair, small table, organizer, prototype, planter, picture frame, or fixture.
Start with the tasks, then choose the tools. This keeps the shop from becoming a museum of imagined hobbies.
Measuring And Layout Come First
A tape measure, square, ruler, pencil, level, and straightedge do not look dramatic, but they decide whether the build begins correctly. Bad layout can waste material before the saw starts. A crooked line, unreliable square, or vague measurement creates problems that stronger tools cannot erase.
Choose layout tools you will actually use. A small square near the bench is often more valuable than a precision instrument stored across the room. Accuracy improves when the right tool is close enough to become a habit.
Cutting Tools Should Match Materials
A utility knife with spare blades is one of the most-used tools in a DIY space. Add a handsaw or pull saw for wood, snips for thin sheet where appropriate, and project-specific cutters as needs repeat. Sharpness and support matter more than owning every cutting option.
Power saws are useful when the work justifies them. A circular saw can transform sheet-goods projects, but it also requires safe support, eye and ear protection, dust planning, and confidence with layout. Buy capability with the habits that make it safe.
A Drill-Driver Earns Its Space Early
A drill-driver is often the first power tool worth owning because it handles holes, screws, fixtures, repairs, hinges, hardware, and assembly. Its usefulness depends on bits, pilot holes, driver fit, and battery discipline. Without those supporting pieces, the tool becomes more frustrating than powerful.
Keep common bits organized and replace damaged ones. A bad bit can strip screws, wander through material, or make a beginner think their technique is worse than it is.
Clamps Are Quietly Essential
Clamps hold work still so your hands do not have to. They make drilling safer, glue-ups cleaner, cuts more controlled, and assemblies more accurate. Many beginners buy cutting tools before holding tools, then struggle because the material keeps moving.
Start with a few types and sizes: quick-grip clamps, spring clamps, and small bar clamps can cover many early projects. Add more when a real assembly asks for them.
Surface Tools Finish The Experience
Sandpaper, sanding blocks, files, scrapers, and cleanup supplies turn rough construction into something people can touch. They also help paint, stain, glue, and finish behave better. Surface work is not decorative extra time; it is where many projects become usable.
Dust control belongs in the same conversation. A mask, vacuum, brush, and sensible cleanup routine protect lungs, finishes, electronics, and the next project on the bench.
Safety Gear Must Be Easy To Reach
Safety glasses, hearing protection, dust protection, appropriate gloves, and a first-aid kit should live near the work. If protective gear is buried, it becomes optional in the worst possible moments. Good shop design makes the safer choice convenient.
Different tasks ask for different judgment. Gloves may protect during rough handling but create hazards around spinning tools. Dust protection should match the material. A must-have toolkit includes the habit of asking what the task can throw, breathe, pinch, or burn.
Storage Is A Tool Too
Storage affects whether tools are used well. Clear bins, labeled hardware drawers, wall storage, bit cases, and a reset space can save more time than a new gadget. The goal is not a perfect photo wall. The goal is being able to start, find, use, and return tools without losing momentum.
As your workshop grows, track what actually slows you down. If setup takes forever, improve storage. If cuts are poor, improve support and blades. If assemblies shift, buy clamps. The best tool purchases come from repeated evidence.
Grow The Kit With Your Projects
A DIY maker’s workshop should evolve. Woodworking may add a better saw, chisels, plane, or sander. Electronics may add a soldering iron and multimeter. Metalworking may add files, grinder accessories, and better PPE. Finishing may add brushes, abrasives, and dust control. Each path adds tools for a reason.
Must-have tools are not universal trophies. They are the dependable core that lets you keep making safely, accurately, and with less friction. Build that core first, then let real projects tell you what belongs next.
The Work Surface Is Part Of The Toolkit
Before buying more tools, make sure the work has a stable place to happen. A bench, folding table, sawhorses with a panel, or sturdy portable surface can all work if the material is supported and clamping is possible. A shaky surface makes even good tools behave badly.
The surface should also allow mess to be managed. Cutting, sanding, gluing, drilling, and finishing all create leftovers. A practical work surface gives those leftovers somewhere to go without invading every other part of the room.
Lighting Belongs On The Must-Have List
Lighting is often ignored because it is not held like a tool, but it changes accuracy. Poor light hides pencil lines, glue smears, saw marks, uneven paint, and hardware alignment. A bright overhead fixture helps, but a movable task light can reveal the line or surface that matters right now.
Good lighting also improves safety. It is easier to keep fingers away from blades, see a drill angle, spot a loose cord, and notice dust buildup when the work is properly lit.
Hardware And Consumables Keep Projects Moving
A workshop with tools but no consumables stalls constantly. Screws, washers, anchors, sandpaper, blades, bits, tape, glue, rags, pencils, and disposable cups may not feel exciting, but they keep projects from pausing at the worst moments. The key is stocking common needs without hoarding mystery leftovers.
Organize consumables by task. Drilling, fastening, sanding, finishing, and repair supplies should be easy to find when the step begins. If a drawer must be dumped out to find one washer, the storage system is costing attention.
Quality Matters Most At The Contact Point
Not every beginner tool needs to be premium. Spend attention where the tool meets the work: blades, bits, measuring edges, clamp pads, driver tips, and abrasive surfaces. A modest tool with a sharp blade may outperform an expensive tool with a dull one.
This helps makers buy wisely. Upgrade the parts that affect accuracy, safety, and finish first. A better bit set, stronger clamps, sharper saw blade, or brighter task light may improve results more than a new machine.
Borrowing And Renting Can Be Smart
A must-have tool is not always a must-own tool. Some projects require a specialty tool once or twice a year. Borrowing, renting, or using a shared maker space can be wiser than storing an expensive item that rarely runs. Ownership makes sense when repetition, access, and convenience justify it.
This is especially true for larger saws, routers, planers, welders, sprayers, and specialty sanders. Try the workflow before committing storage, money, and maintenance space.
The Best Toolkit Teaches Better Decisions
A workshop tool set should make the maker more capable, not more scattered. Each useful tool teaches a habit: measure honestly, support the work, clamp before cutting, protect your body, test fit, clean the edge, and store the tool for next time. The kit becomes powerful when those habits become automatic.
For DIY makers, the best shop is the one that helps projects finish. Build a reliable core, keep it cared for, and let each completed project reveal the next tool that truly earns a place.
Create A First-Project Tool List
One of the best ways to avoid overbuying is to choose the first three projects and list only the tools needed to finish them safely. A floating shelf, a repair, and a small organizer may reveal a practical starting kit faster than any universal checklist. The list becomes grounded in real use.
After those projects, review what slowed you down. Did you lack clamps, lighting, blades, drill bits, dust control, or storage? That review points to the next purchase with more honesty than impulse shopping.
Do Not Confuse Capability With Readiness
Owning a tool does not mean the shop is ready for the operation. A saw needs support, clearance, blades, eye and ear protection, dust planning, and a way to control the offcut. A sander needs abrasives, dust collection, and cleanup. A drill needs bits, pilots, and fastener knowledge.
This mindset keeps tool buying responsible. Every new tool brings a small ecosystem. Budget space, safety, consumables, and learning time along with the tool itself.
Let The Toolkit Stay Portable At First
Many DIY makers benefit from a portable core kit even if they eventually build a larger shop. A tote with measuring tools, drivers, knife, bits, pliers, safety glasses, pencils, tape, and basic hardware can follow the project around the house. Portability reduces the friction of small repairs and setup tasks.
As the workshop grows, the portable kit can remain the daily driver while larger tools stay in zones. This prevents the common problem of owning many tools but never having the right basics where the work is happening.
Match Tools To The Space You Actually Have
A tiny apartment corner, garage bay, shared basement, spare room, and dedicated shop all demand different tool choices. A benchtop tool that works beautifully in a large shop may create dust, noise, storage, or support problems in a small room. Space is part of the buying decision.
Compact makers often benefit from folding surfaces, portable clamps, hand tools, track guides, stackable bins, and careful dust collection before buying stationary machines. A tool that fits the space gets used more safely and more often.
Plan For Cleanup Before The Mess Exists
Cleanup tools are workshop tools. A brush, vacuum, dustpan, trash container, blade disposal spot, rag bin, and finish-safe waste plan keep projects from spreading across the entire workspace. Beginners often treat cleanup as punishment after making, but it is really part of the workflow.
A clean reset helps the next project begin with less resistance. It also protects tools from rust, grit, dried glue, and lost parts. The workshop feels more capable when cleanup has a system instead of a sigh.
Let Finished Projects Audit The Toolkit
After each project, ask which tools were used constantly, which tools were missing, and which tools never left storage. Finished projects are honest auditors because they reveal real habits instead of imagined ones. That review keeps the toolkit lean while still allowing it to grow.