Where Ideas Become Real
Every product begins with a moment of friction. Something feels awkward, slow, wasteful, or unnecessarily complicated—and a thought flashes through your mind: there has to be a better way. Sometimes that thought becomes a sketch, sometimes it becomes a late-night note, and sometimes it becomes the start of an invention that won’t leave you alone. But between that first spark and a real, testable prototype, there’s a journey—a workflow that turns imagination into a buildable path. Beginners often picture product development as a straight line: sketch, design, prototype, finished product. In real life, it’s more like a smart loop. You define a problem, explore options, build something quick, test it, learn what’s wrong, and then return to the design with clearer eyes. The best workflow isn’t the one that looks neat on paper. It’s the one that gets you to truth faster. This guide walks you through a complete idea development workflow from first sketch to early prototype, with a focus on momentum, clarity, and smart iteration. Whether you’re building a tool, a household product, a mechanical device, or a new piece of gear, this process helps you avoid the two biggest killers of invention: overthinking and under-testing.
A: Define the problem clearly so you know what to prototype and test.
A: No—sketching is about clarity and options, not artistic perfection.
A: Often yes for ergonomics; CAD is best when precision and fit become critical.
A: It answers a key question and reveals what to improve next.
A: Several—iteration is how designs become reliable and user-friendly.
A: Early—prove the make-or-break function before polishing the design.
A: Keep each prototype focused on one learning goal.
A: Test in real use and change one or two variables per iteration.
A: Photograph versions, note adjustments, and label what each build tested.
A: Refinement, durability testing, and planning for manufacturable design.
Step 1: Start With the Problem, Not the Product
Before you sketch what the product looks like, identify what the product fixes. The difference is subtle, but it changes everything. A product idea without a crisp problem usually turns into a pile of features. A product idea anchored to a real problem becomes focused, testable, and easier to improve.
Write the problem in one sentence using everyday language. Try to describe the situation that triggers the need. Who is the user? What are they trying to do? What gets in the way? What does failure look like? The more specific you are, the more powerful your prototypes become, because you’ll know what to test.
This step also helps you discover whether you’re solving a real pain or a mild inconvenience. If the problem is intense, users tolerate imperfect prototypes because they want relief. If the problem is minor, you’ll need excellent usability and polish later. Knowing which one you’re dealing with helps you set the right expectations for early builds.
Step 2: Define Success Like a Builder
A prototype is only as useful as the question it answers. So before you draw your first concept, define what “success” means for this idea. Not success in the market—success for your first prototype.
Success might mean the grip feels comfortable in multiple hand sizes. It might mean a latch closes securely without extra effort. It might mean the device fits within a specific space constraint. It might mean a mechanism completes one full cycle reliably. These are prototype-level successes, and they create a clear target for your first build. This is where beginners gain a serious advantage: if you define success early, you don’t waste time perfecting the wrong thing. You build for learning, not for looks. And learning is the fuel of innovation.
Step 3: Research the “Already Exists” Landscape Without Getting Stuck
Before you invest deeply in a concept, spend a little time exploring what’s already out there. Not to copy, but to understand patterns. What solutions already exist? What do they do well? Where do users complain? What features show up repeatedly, and why?
This kind of research helps you avoid reinventing a weak solution. It also gives you language to describe your improvement clearly. When you know what’s common in the category, you can define your differentiation: lighter, faster, safer, simpler, more durable, easier to maintain, more intuitive, or more adaptable.
The key is to keep research practical. You’re not writing a report. You’re collecting clues that will shape what you sketch and what you prototype.
Step 4: Sketch Fast and Wide, Not Perfect and Narrow
Sketching is where your idea begins to take shape, but it’s easy to fall into the trap of drawing one “best” concept too early. The stronger approach is to sketch multiple concepts quickly, even if they’re messy. Fast sketching gives you options. Options give you leverage.
Start with rough silhouette sketches that explore different overall forms. Then sketch variations of key features: handles, hinges, locks, attachments, and interfaces. If your product involves movement, sketch how it moves. If it involves assembly, sketch how parts come together. If it involves human interaction, sketch where hands go and where force is applied. The purpose of sketching is not art. It’s decision-making. When you sketch quickly, you’re less emotionally attached. That makes it easier to improve.
Step 5: Choose a “Concept Winner” Based on Risk
After you sketch multiple concepts, choose a direction—but don’t choose only based on what looks best. Choose based on risk. Ask yourself what could fail in the real world. Which concept has the clearest path to solving the problem? Which one has the fewest unknowns? Which one can be prototyped quickly? Beginners often choose the most exciting concept and ignore how hard it is to build. That’s not wrong, but it can slow your learning. A smarter approach is to choose the concept that can be tested fastest. The goal is to confirm whether the core idea works. Once the core works, you can expand the ambition.
Step 6: Translate the Sketch Into a Simple Build Plan
Before you start building, create a quick build plan. It doesn’t need to be formal. It just needs to answer: what are you building, what are you testing, and what materials will get you there quickly?
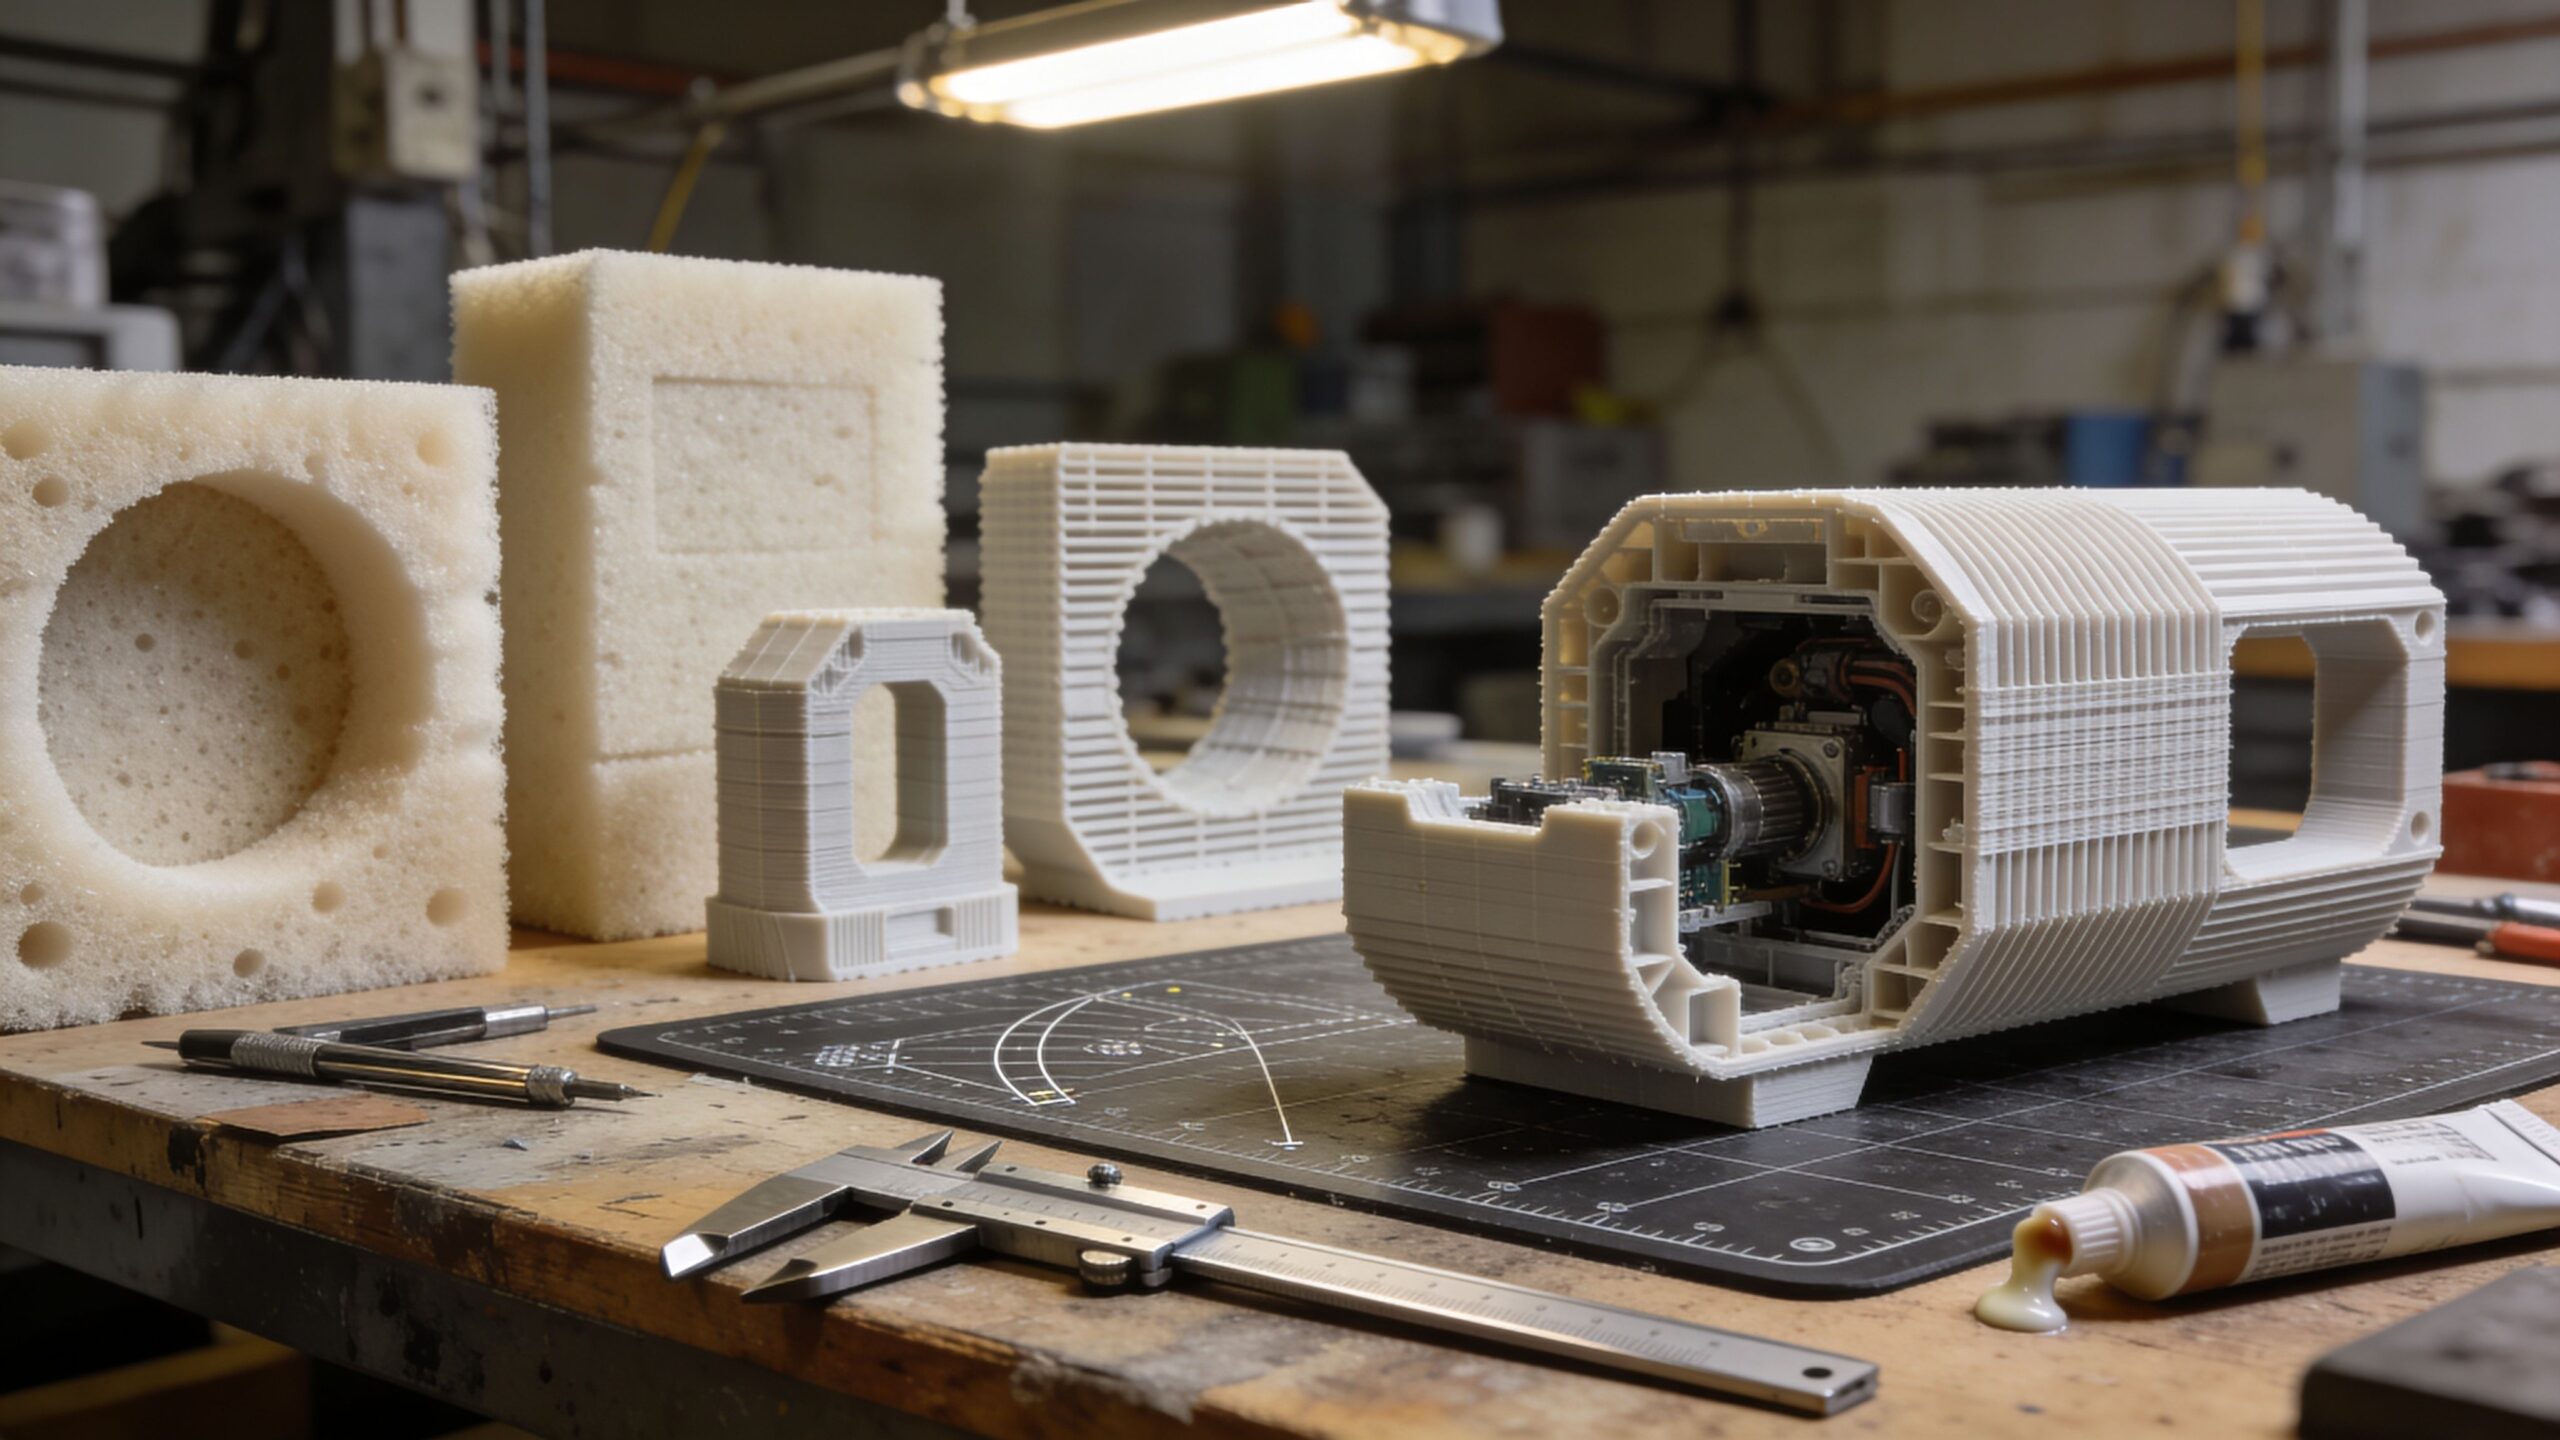
This is where you decide whether you need a form prototype, a feel prototype, or a functional prototype first. A form prototype tests size and appearance. A feel prototype tests ergonomics and comfort. A functional prototype tests whether the mechanism works.
Most beginner projects benefit from starting with form and feel. These prototypes are fast and reveal major issues early. Once the shape and interaction make sense, functional prototypes become more valuable because they’re built around a more realistic design.
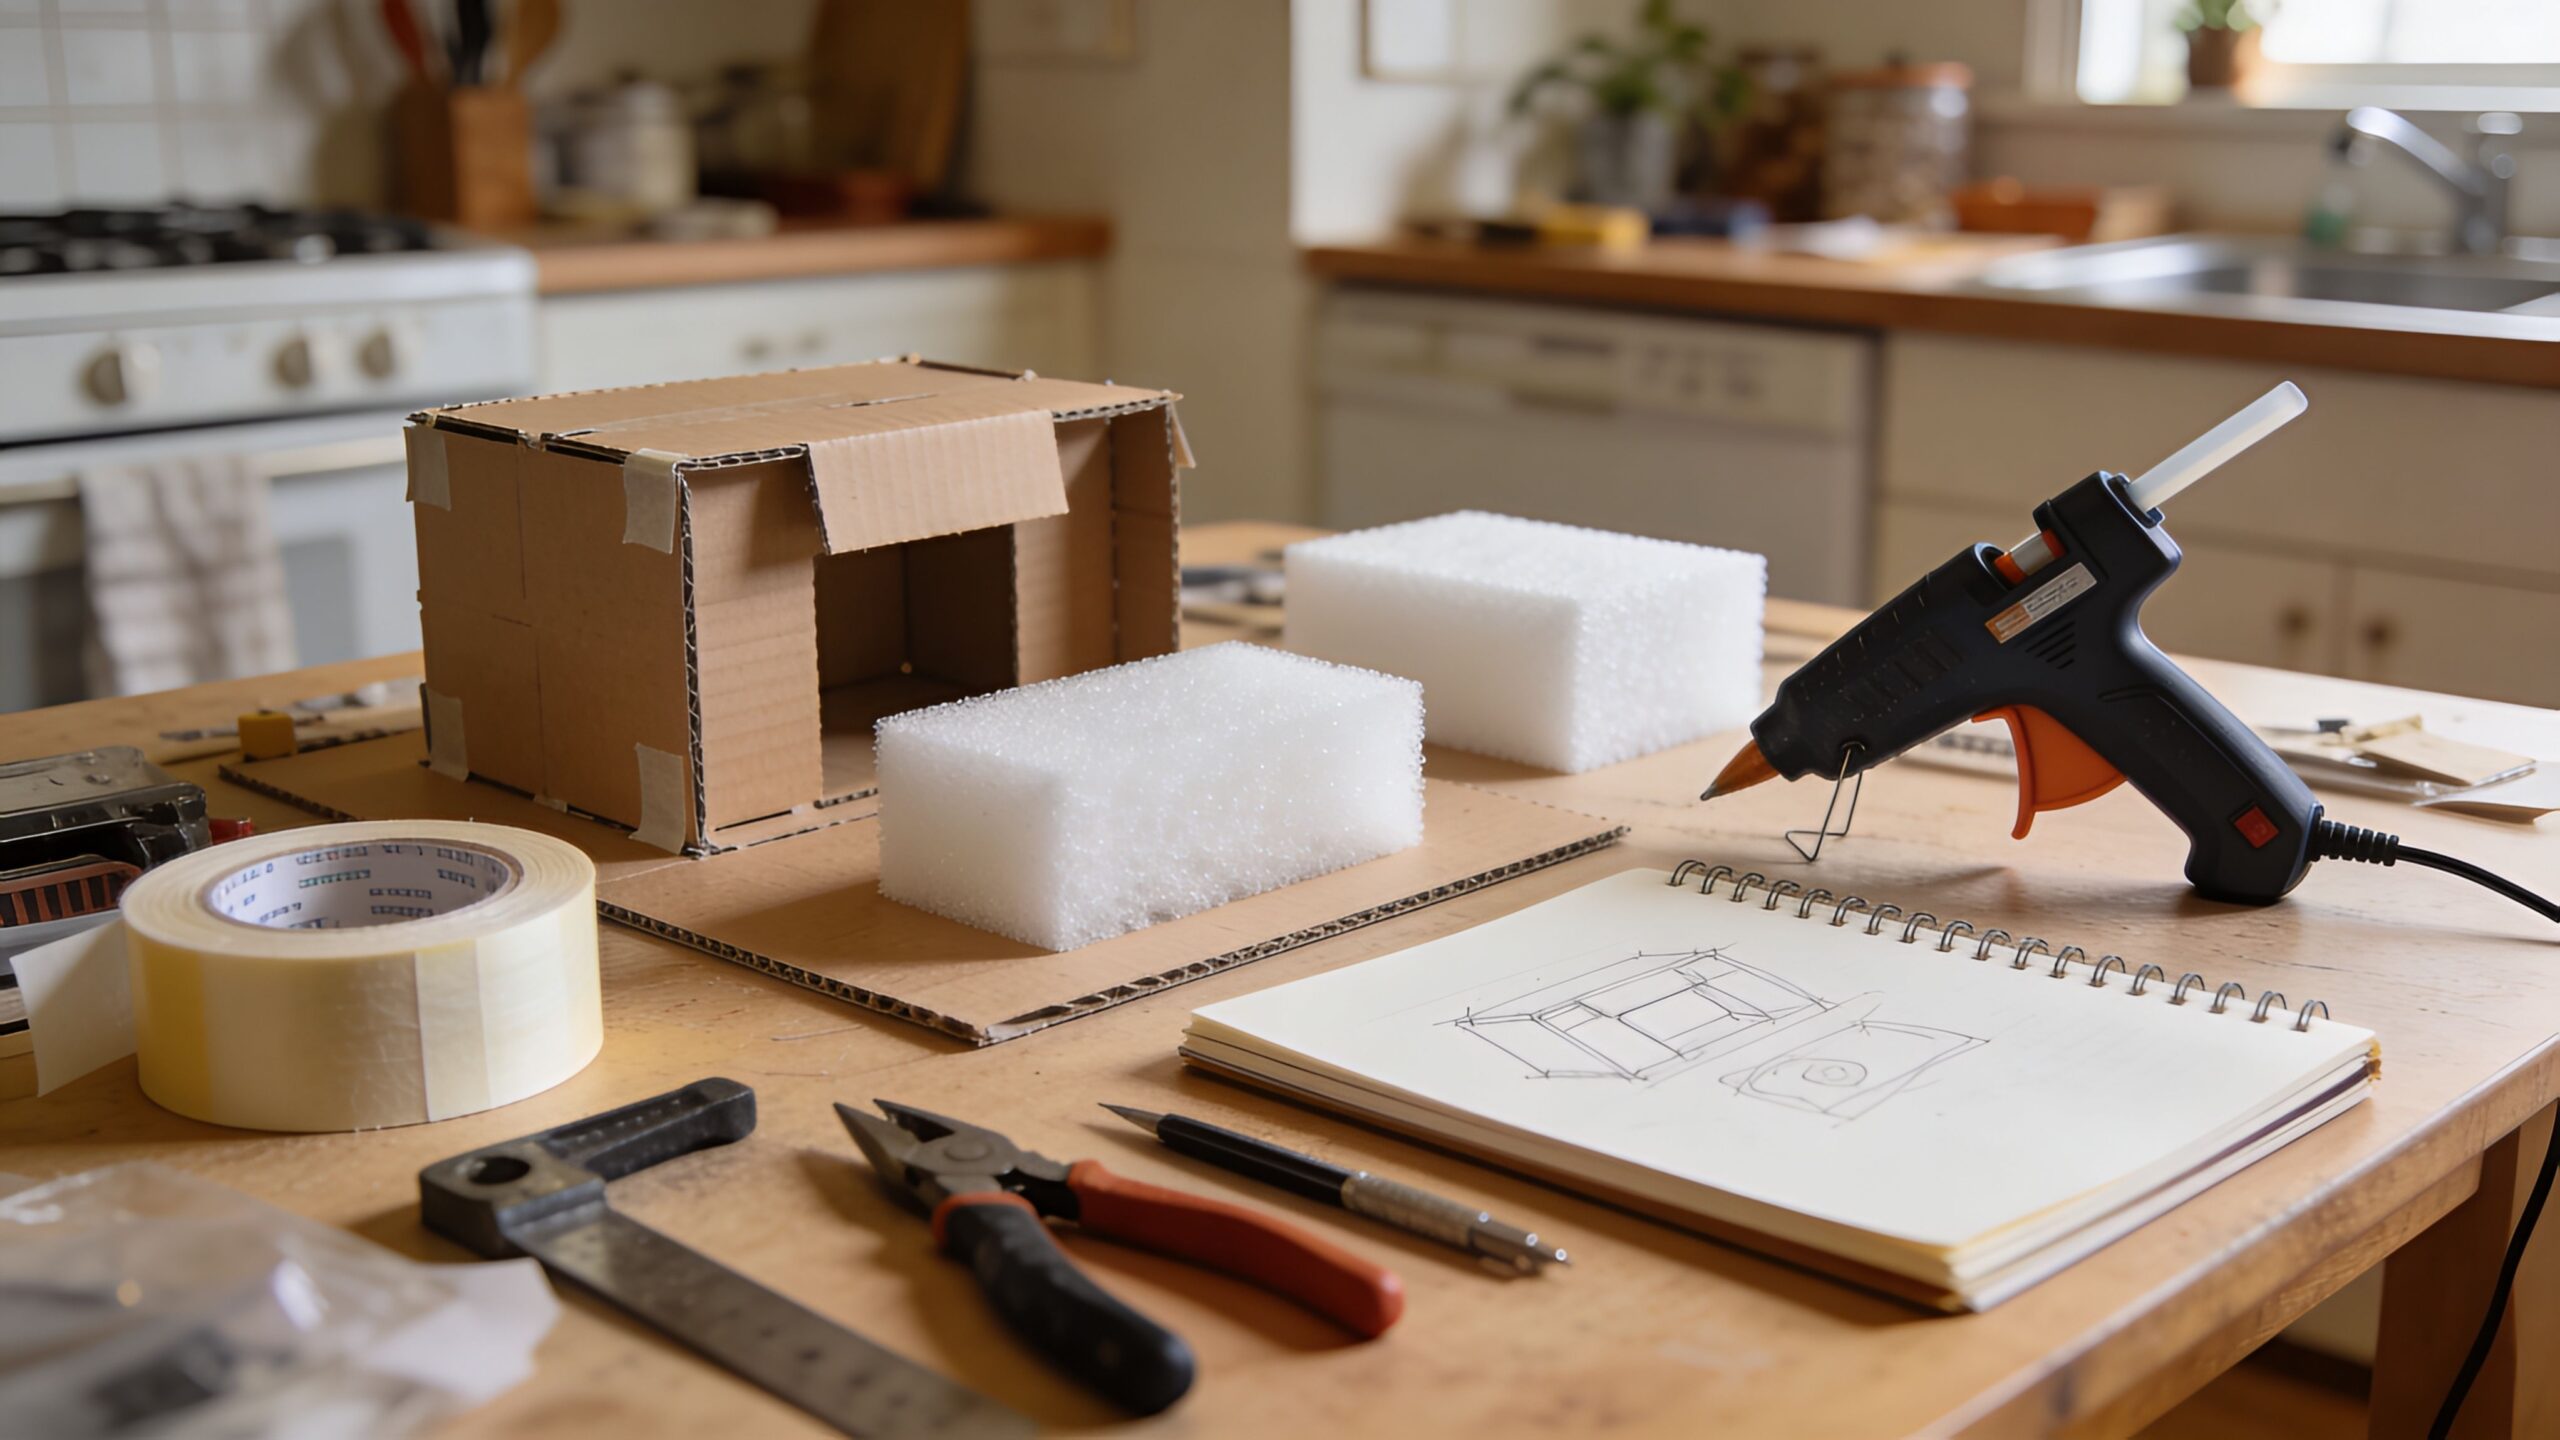
Step 7: Build a Rough Physical Mockup to Confirm Scale
A sketch can hide scale problems. A physical mockup cannot. Even a simple cardboard or foam model instantly reveals whether your idea fits in the hand, the workspace, or the environment it’s designed for.
Build the simplest version that represents the outer shape. If the product is handheld, hold it in different grips and simulate use. If it sits on a surface, place it where it would live. If it attaches to something, test the interface. You’re looking for obvious friction: awkward reach, unstable balance, unclear orientation, or uncomfortable edges. This mockup stage is where many “great ideas” are saved, because it forces you to adapt early—when adaptation is cheap.
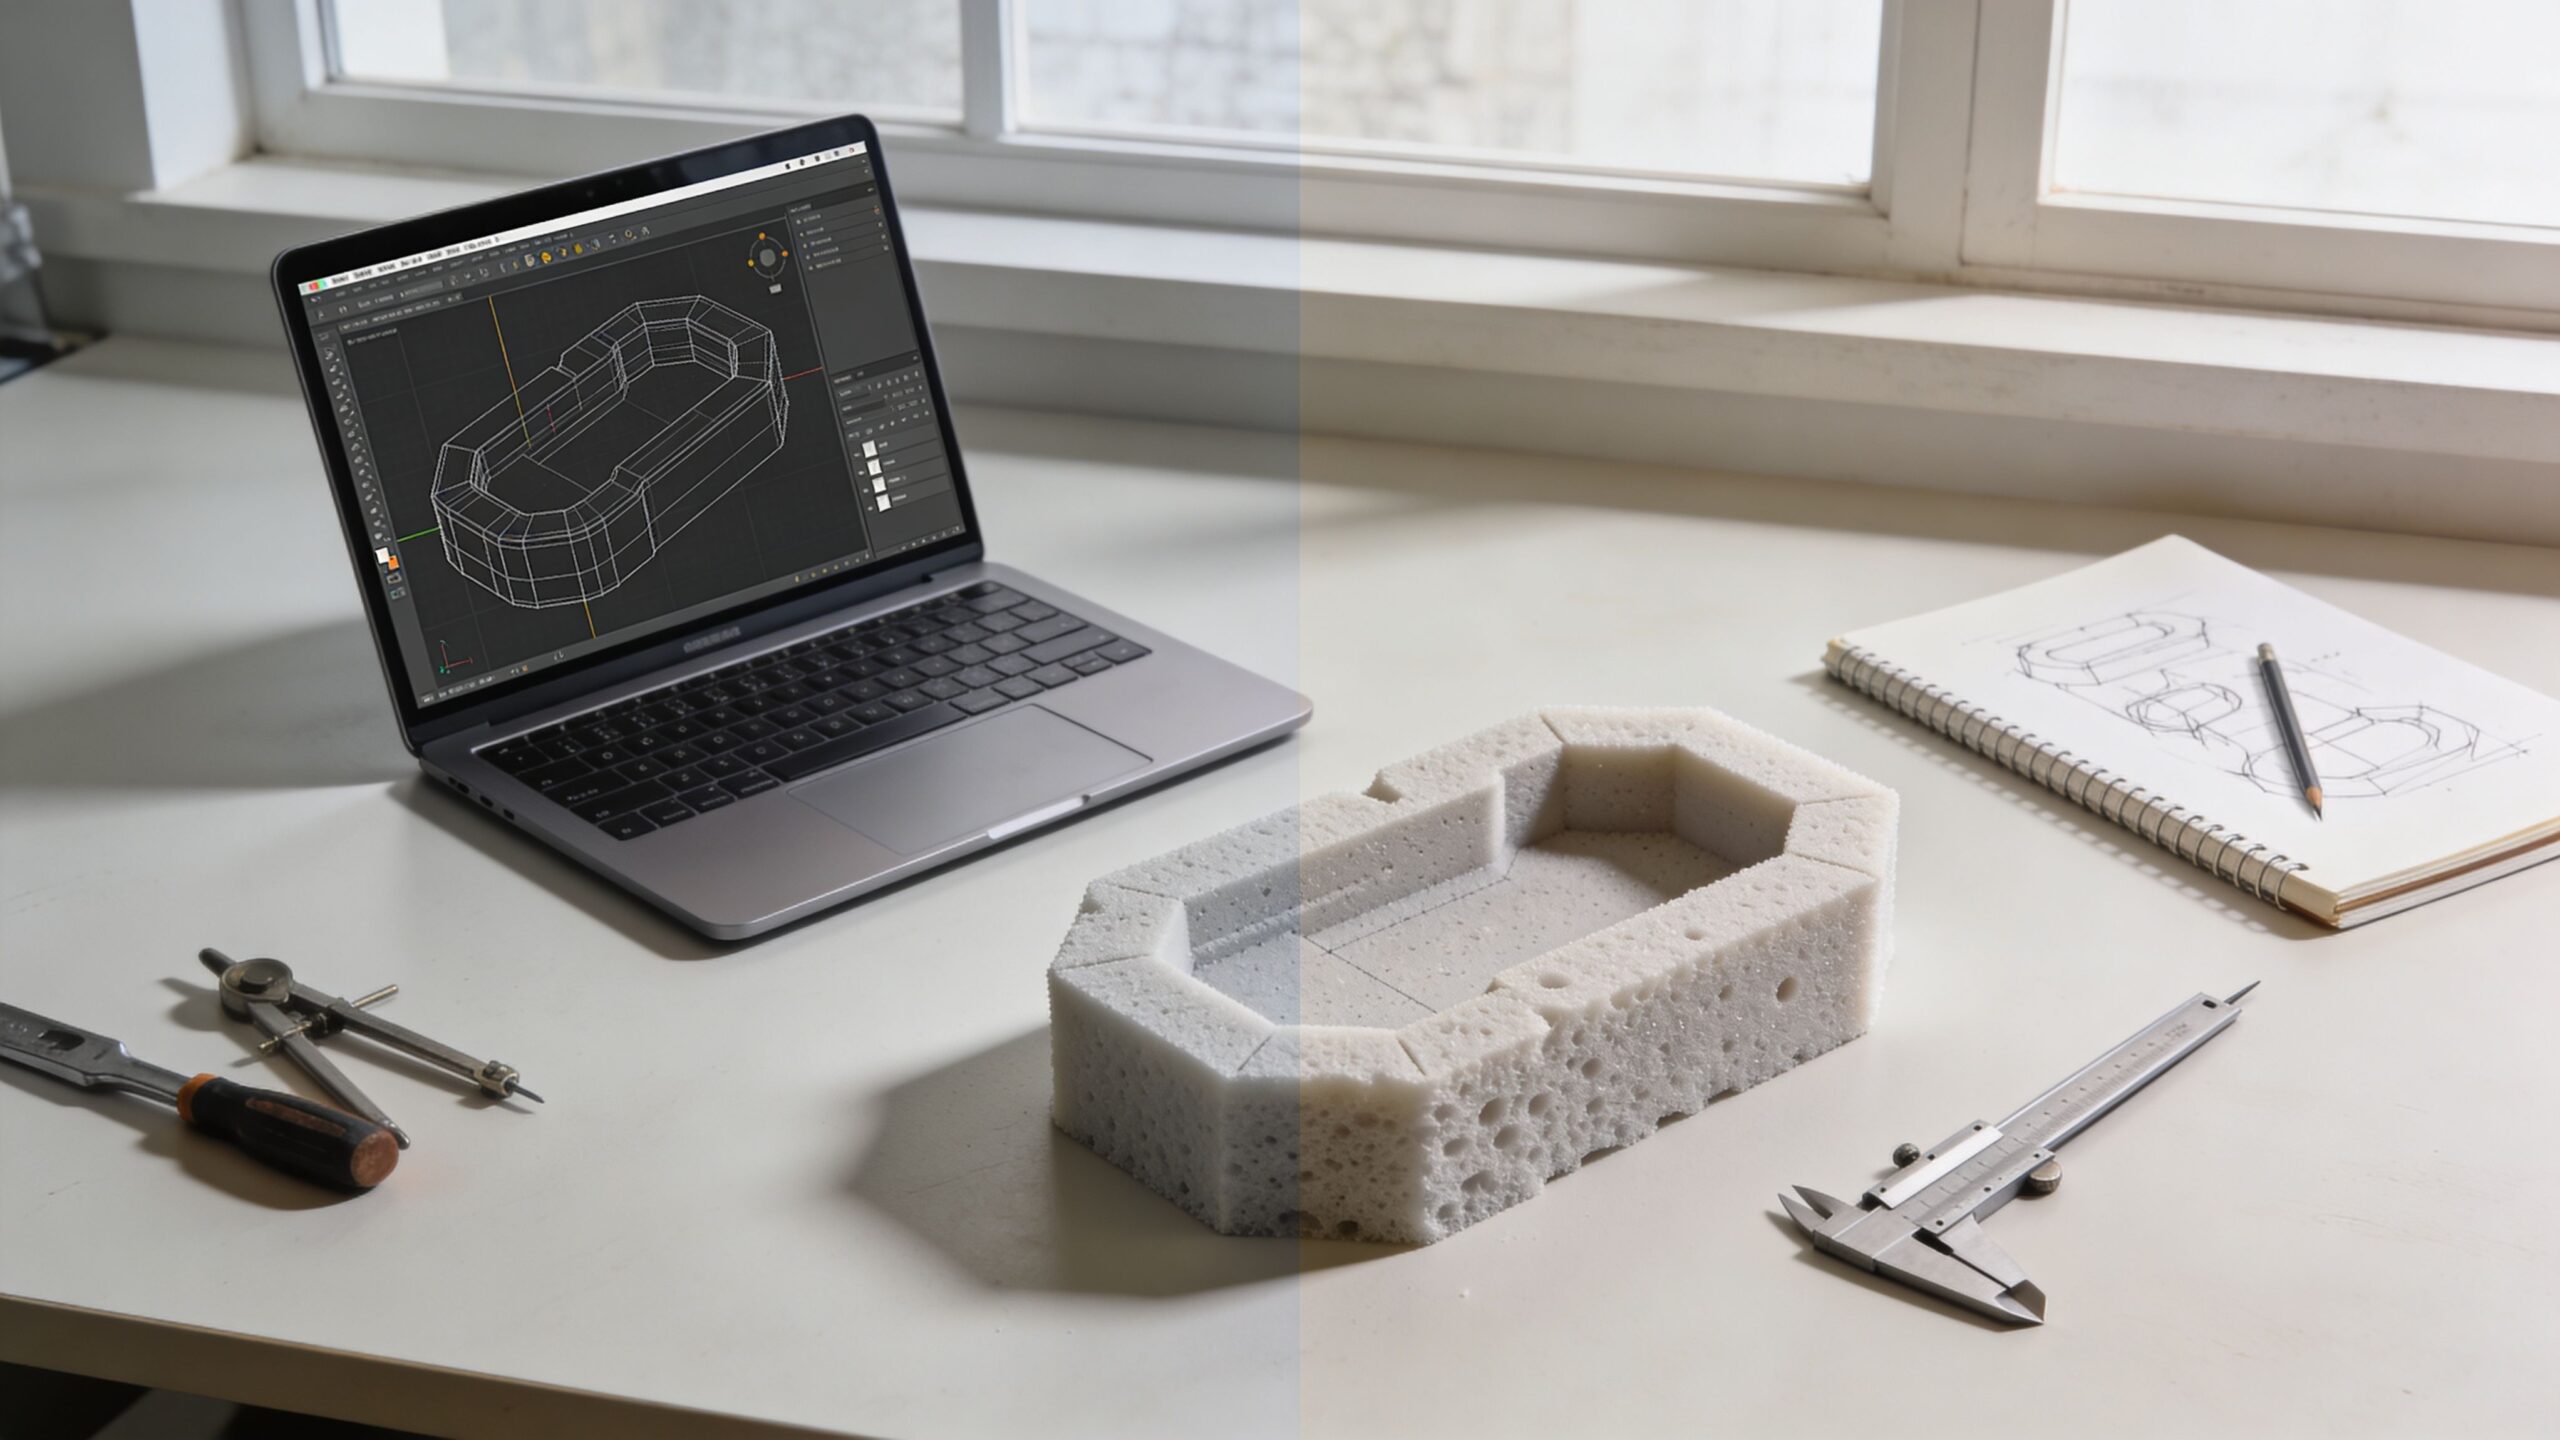
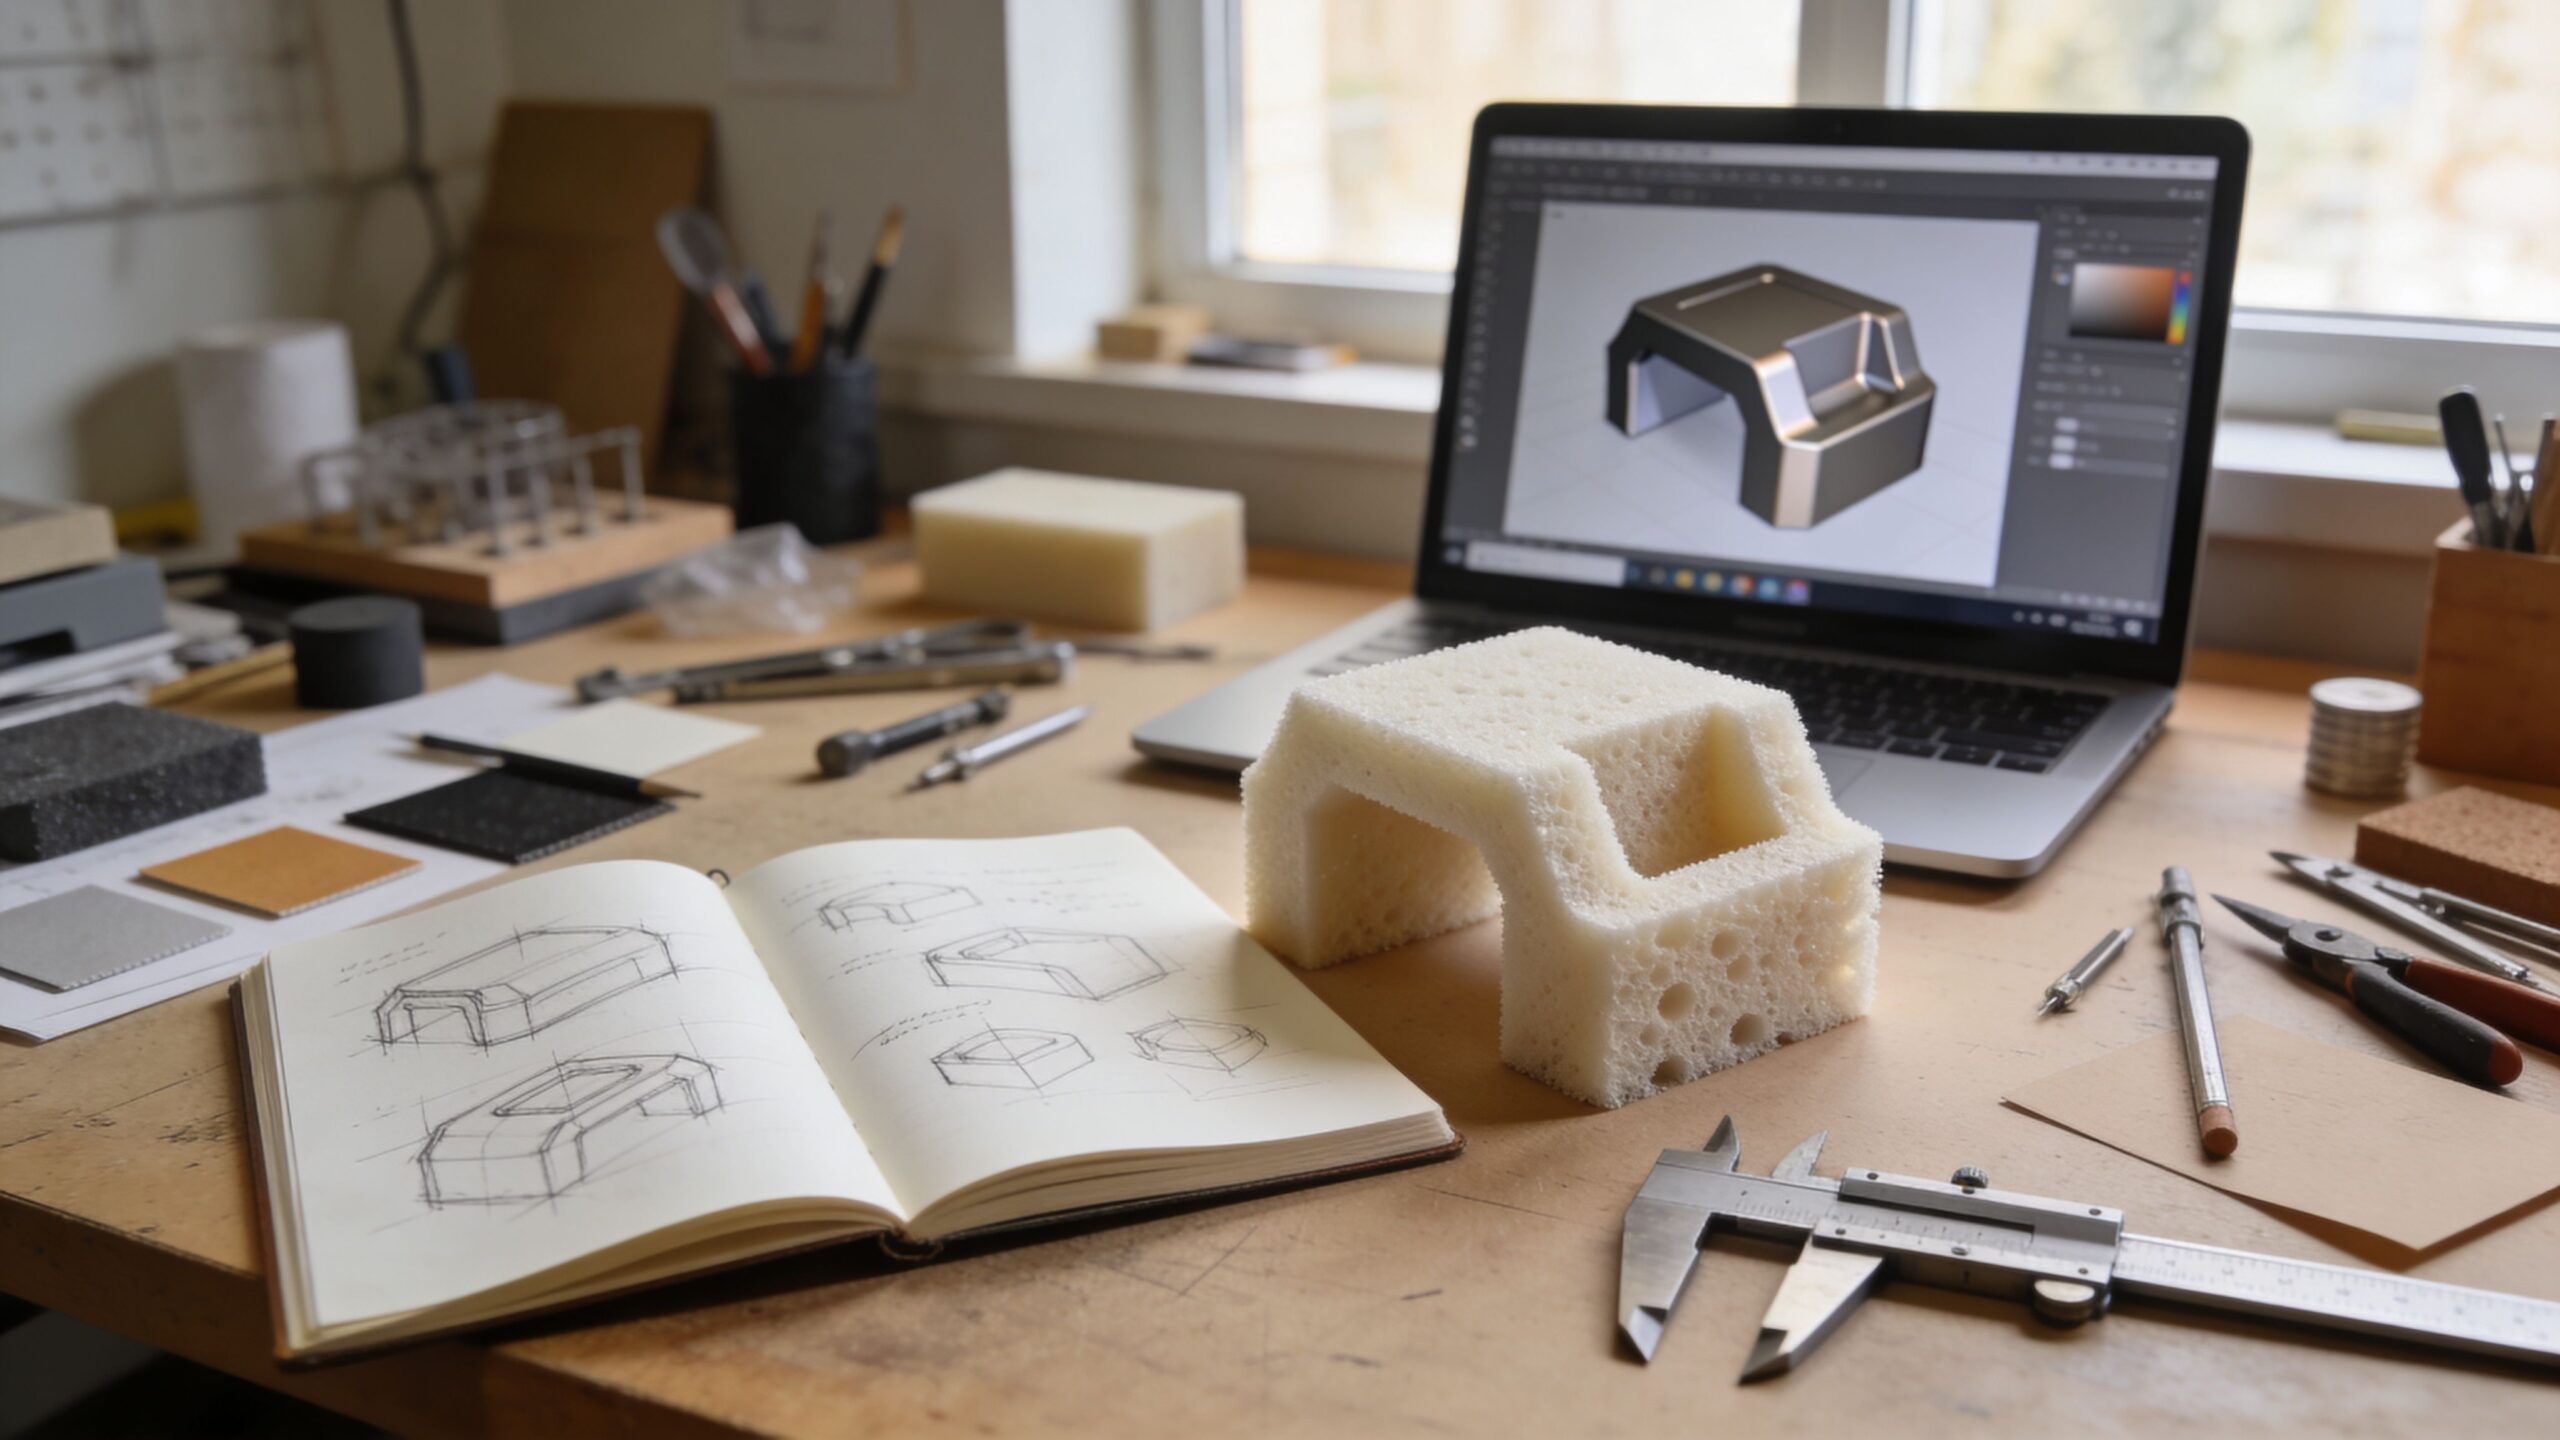
Step 8: Move Into Digital When Precision Starts to Matter
Once the physical mockup clarifies shape and interaction, digital tools can help refine the design. This is where CAD becomes your precision engine. You can lock in dimensions, explore internal packaging, and reduce guesswork about fit.
Digital modeling is especially valuable when your product has parts that must align, slide, rotate, or assemble in a specific order. It helps you avoid building physical prototypes that fail for predictable geometric reasons. It also sets you up for 3D printing, CNC work, or any fabrication method that requires a digital model.
For beginners, the key is to keep the CAD simple early. Model what you need to test. Don’t over-detail. The purpose is still learning, not polishing.
Step 9: Prototype the Core Mechanism as Its Own Experiment
Most products have one “make-or-break” element: the mechanism that must work for the concept to matter. Instead of building a full prototype with every feature, isolate the core mechanism and prototype it as a focused experiment.
If your product uses a hinge, prototype the hinge geometry and motion. If it uses a latch, prototype the latch engagement. If it uses a sliding track, prototype the track and test friction. If it uses leverage, prototype the lever and test force. This focused approach reveals the real engineering challenges early. It prevents you from building a beautiful prototype that fails because the mechanism was never validated.
Step 10: Combine Form and Function Into a First Working Prototype
After you’ve confirmed scale and validated the mechanism, you’re ready to build a first working prototype—an early version that can perform the core action in a realistic way. This is the moment your idea starts feeling like a product.
This prototype doesn’t need to look finished. It needs to behave in a way you can test. If it’s handheld, it should be comfortable enough to use for several minutes. If it’s mechanical, it should cycle repeatedly. If it’s a tool, it should tolerate the forces you expect.
You will find problems. Parts will bind. Joints will loosen. Something will feel off. That is exactly why this step exists. Each flaw is information.
Step 11: Test Like a Skeptic, Not Like the Inventor
Inventors naturally want their ideas to work. That’s the emotion that drives building. But testing requires a different mindset. Testing is where you become a skeptic. You try to break your assumptions.
Use the prototype the way a real user would, in the environment they would use it. Notice hesitations and awkward steps. Watch where your hands naturally go. Pay attention to force: where you push, pull, twist, or brace. These are design truths. They reveal where to add support, where to reshape, and where to simplify. If possible, hand the prototype to someone else and observe silently. The moments where they struggle are the moments your design needs attention most.
Step 12: Capture Learning and Turn It Into Iteration
A prototype without iteration is just a craft project. The value of prototyping is the loop: build, test, learn, revise. After testing, capture your findings immediately. What worked? What failed? What surprised you? What did users misunderstand? What felt uncomfortable? What broke under stress? Then convert those notes into specific changes. Small, controlled changes are the secret to fast improvement. If you change everything at once, you won’t know what caused the improvement. If you change one or two variables, you build a clear map of what works. Iteration is where your product becomes real. It’s also where beginners become builders.
Step 13: Know When Your Prototype Is Ready for the Next Stage
At some point, you’ll need a higher-fidelity prototype—one that better represents final materials, size, or durability. The right time to level up is when your current prototype can’t answer the next question.
If your foam model can’t handle real forces, you can’t test durability. If your hand-built mechanism isn’t precise enough, you can’t test reliability. If your CAD model looks good but feels wrong, you need physical refinement.
Each stage of prototyping exists to answer a question. When a prototype answers its question, you move forward. When it doesn’t, you iterate.
The Workflow That Turns Ideas Into Momentum
From sketch to prototype, the complete idea development workflow is about one thing: turning uncertainty into clarity, one build at a time. Sketching gives you options. Mockups reveal reality. Digital models add precision. Mechanism prototypes reduce risk. Working prototypes create proof. Testing produces truth. Iteration creates improvement. If you follow this workflow, you don’t just build a product. You build momentum. And momentum is the most valuable material in innovation. It keeps you moving, learning, refining, and pushing your idea closer to something real—something you can test, share, and eventually produce. Your sketch is the spark. Your prototype is the proof. The workflow is the bridge.