Precision Begins With The First Reference Line
Measuring and marking by hand is not guesswork before the real work begins. It is where accuracy is created. A clean reference face, sharp pencil or knife, reliable square, consistent story stick, and careful layout order can produce precise parts without relying on digital machines. The art is learning when to measure, when to transfer, when to mark from the same reference, and when to stop before small errors multiply.
A: It is the chosen flat face or edge that all related layout marks are measured or transferred from.
A: A knife is better for precise joinery, while a pencil is useful for visible layout and rougher work.
A: A story stick preserves repeated dimensions without repeatedly reading numbers.
A: Mark related parts from the same reference or transfer directly rather than adding separate measurements.
A: Yes, clear waste marks help prevent cutting on the wrong side of the line.
A: Reliable, square, sharp, and consistent tools matter more than owning luxury versions.
A: Different references, thick marks, tool slop, rough stock, or repeated measuring can create small variations.
A: It can be very accurate for practical work when references, tools, and transfer methods are controlled.
A: Stop measuring when direct transfer or a physical stop gives a more reliable match.
A: Using multiple references without realizing each one carries its own error.
Start With Prepared Stock
Accurate marking depends on surfaces that can be trusted. If a board is twisted, cupped, bowed, or out of square, a perfect line on one face may not relate cleanly to another. Prepare at least one face and one edge before laying out critical joinery. That reference gives every later mark a stable starting point.
This does not mean every project needs furniture-grade milling. It means the surfaces used for layout should be good enough for the accuracy expected. Rough work can use rougher references; joinery needs more care.
Choose References Deliberately
A reference face and reference edge are agreements you make with the workpiece. Once chosen, they should guide related marks consistently. Flipping a part and measuring from a different edge can introduce tiny differences that appear as gaps during assembly.
Mark references clearly and keep them visible. When several parts look similar, physical orientation marks prevent confusion.
Use Measuring Less Than You Think
Measuring tools are useful, but repeated measuring can create repeated error. When parts need to match, direct transfer often beats reading the same number several times. Story sticks, spacers, stop blocks, paired parts, dividers, and gauges preserve relationships physically.
This is one reason traditional layout can be so accurate. It relies on comparison and transfer, not only numeric measurement.
Match The Mark To The Cut
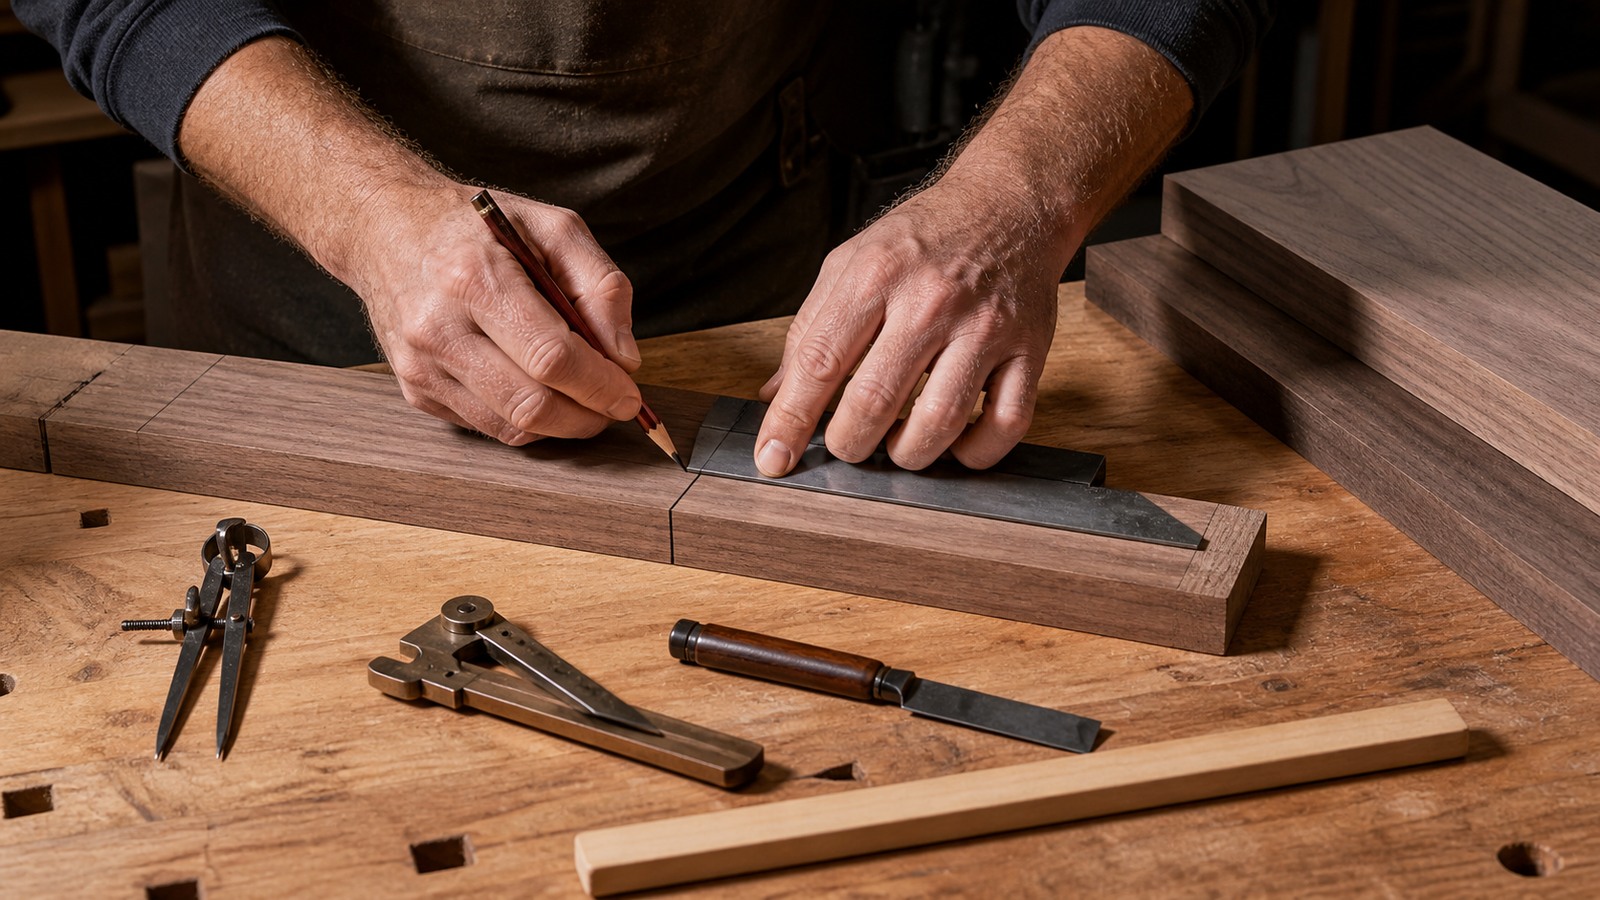
A pencil line has width. A knife line has a wall. A gauge line follows an edge. Each mark changes how the tool will register later. For joinery shoulders, a knife line can guide a chisel or saw cleanly. For rough cuts, a pencil line may be faster and more visible.
The mark should fit the cut that follows. A delicate knife line is wasted on rough construction cuts, while a fat pencil line can be too vague for tight joinery.
Lay Out In A Sensible Order
Layout order prevents confusion. Establish references first, mark major lengths and faces, then add joinery, holes, tapers, curves, or secondary features. Group marks that use the same tool setting. If several rails need the same shoulder, mark them together before changing the gauge.
Before cutting, review every waste mark. Many errors happen when the line is accurate but the wrong side is removed.
Carry Lines Around The Work
Parts are three-dimensional, so layout often needs to wrap around edges. A square can carry a shoulder line from face to edge to far face. Doing this cleanly helps saws and chisels stay honest. It also reveals stock that is not square enough for the intended operation.
When lines do not meet around a corner, stop and find out why. The stock, square, or technique may be lying.
Use Light And Body Position
Precision is easier when you can see. Raking light reveals knife lines and pencil marks. A stable stance keeps the square from shifting. Holding a marking knife consistently against a straightedge matters more than pressing hard. Good layout is physical, not only visual.
If you cannot see the line clearly, the cut will not become more accurate later. Adjust light, darken carefully, or choose a different marking method.
Check Before Irreversible Cuts
The moment before cutting is the cheapest time to catch a mistake. Compare parts, confirm orientation, check references, and make sure the waste side is obvious. This pause should be calm, not fearful. It is simply the final layout step.
Experienced makers do this because they know accuracy is not only skill; it is process.
Let Precision Serve Fit
Precision without machines is less about perfect numbers and more about relationships that fit. If two parts meet cleanly, a shelf sits square, a hinge lands correctly, or a joint closes without force, the layout succeeded. The work does not care whether the number looked elegant on paper.
Build habits that preserve relationships: reference consistently, transfer directly, mark clearly, and cut on the correct side. That is where hand precision lives.
Use Relative Accuracy Whenever Possible
Relative accuracy means parts fit each other even if a number is not perfect in isolation. A divider setting, story stick, spacer block, or direct transfer from a mating part preserves relationships better than repeatedly reading a scale. This is why two hand-cut parts can fit beautifully even when the nominal measurement is not impressive on paper.
Machines often chase absolute coordinates. Hand layout often succeeds through consistent relationships. Understanding that difference helps you choose the right technique for the job.
Make Lines Easy To Interpret
A layout mark should tell the next tool what to do. If a pencil line is too wide, a knife line too faint, or a waste mark unclear, the cut becomes a guess. Darken important lines only after the layout is confirmed, and use simple marks to show waste, face, edge, orientation, and mating parts. The goal is not decoration; it is unambiguous instruction.
This becomes crucial when several parts look similar. A clean system of marks prevents rails, stiles, legs, panels, and spacers from being rotated or swapped accidentally.
Check Tools Against Reality
Squares, gauges, rulers, pencils, and knives should be checked occasionally. A square can be dropped, a pencil can dull, a gauge fence can loosen, and a ruler can be misread from the wrong edge. Layout tools are trusted because they are verified, not because they look precise.
Simple checks are enough: flip a square against a straight edge, test a gauge line from both directions, compare repeated divider steps, and make sure the mark produced is fine enough for the cut. Tool confidence grows from use and checking together.
Use Stops And Jigs Without Machines
Precision without machines does not mean working without aids. Stop blocks, bench hooks, shooting boards, marking gauges, story sticks, templates, and spacers are traditional accuracy tools. They reduce repeated measuring and let the body focus on consistent motion. A simple stop can make several hand-cut parts match better than careful measuring alone.
These aids are especially valuable when making multiples. Set once, test once, and repeat with confidence. The work becomes faster because the setup carries the accuracy.
Let Layout Reveal Problems Early
Good layout often reveals problems before cutting. Lines that do not wrap around squarely may expose twisted stock. A gauge line that wanders may reveal a bad reference edge. A story stick that does not match the opening may show that the assembly changed. These warnings are gifts because they appear while the mistake is still cheap.
When layout exposes a problem, pause. Fix the reference, revise the plan, or remake the part before the saw turns a warning into waste. Precision is partly the willingness to listen before cutting.
Use Knife Walls For Control
A knife wall is a small physical guide created by a marking knife and sometimes deepened with a chisel. It gives a saw or chisel a shoulder to register against, which can be more precise than trying to split a pencil line by eye. This is especially useful for dovetails, tenons, housings, hinge mortises, and other joinery where the shoulder line defines the fit.
Knife walls should be made deliberately. Register the knife against a reliable square or gauge, make a light first pass, then deepen only after the line is correct. Pressing hard too soon can pull the tool away from the reference and create the very inaccuracy the knife was meant to prevent.
Prefer Physical Stops For Repetition
When several parts need to match, physical stops reduce decisions. A stop block on a bench hook, a spacer between dividers, a fence on a marking gauge, or a story stick with fixed marks can repeat a dimension without reading numbers again. This reduces both mental load and measuring error.
Stops are not only for machines. Traditional shops have always used jigs, gauges, templates, and fixtures to repeat work. The more often a dimension appears, the more useful a physical reference becomes.
Mark For Assembly, Not Only Cutting
Layout should help the final assembly, not only the next cut. Mark face sides, face edges, mating pairs, top and bottom orientation, inside and outside faces, hinge sides, and grain direction where relevant. These marks prevent parts from being rotated, reversed, or swapped after they are cut.
Assembly marks can be light and temporary, but they should survive long enough to matter. Sanding them away too early invites confusion. Remove or hide them only when the assembly no longer needs their guidance.
Develop A Pre-Cut Reading Habit
Before the saw or chisel starts, read the board. Follow the line, find the waste side, check the reference mark, confirm the part orientation, and imagine the tool path. This takes seconds, but it catches many of the errors that feel obvious only after the cut is complete.
The habit is especially useful when working with mirrored parts. Left and right pieces are easy to mark correctly and cut backward. A pre-cut reading habit slows the moment just enough for the brain to catch up with the hands.
Work From Coarse To Fine
Hand precision improves when the work moves from coarse to fine deliberately. Rough length, reference face, reference edge, final layout, knife lines, and waste marks each belong in a sequence. Trying to mark delicate joinery on rough, uncertain stock is asking layout to solve a milling problem.
This sequence also reduces anxiety. Each step makes the next one more reliable. By the time the final line is marked, the board has already been prepared to accept it.
Use Mistakes To Improve The System
When a part is wrong, identify where the error entered. Was the reference edge inaccurate, the line too thick, the square tilted, the wrong side cut, or the measurement repeated from a different source? The answer should change the layout system, not only your mood.
A small correction to process can prevent many future mistakes. That is how hand accuracy grows: not through superhuman eyesight, but through better references, clearer marks, and fewer chances for error to multiply.
Protect Layout Until It Is No Longer Needed
Layout marks are fragile project information. Sanding, handling, finish prep, and casual pencil cleanup can remove them before assembly is complete. Protect important marks until the operation they guide is finished. If a mark must disappear for appearance, transfer its information elsewhere first.
This matters on complex builds where several parts share orientation. Losing a face mark, hinge side, or mating symbol can turn a careful layout into a guessing game. Preserve the information until the project no longer depends on it. Good marks are temporary, but their guidance should last through every cut, fit, and assembly step that needs them during careful work.