Failure Becomes Useful When It Changes The Next Version
Every maker fails, but not every maker learns from failure with the same speed. A cracked bracket, warped panel, poor print, rough finish, weak joint, or awkward prototype can become either discouragement or evidence. Iteration is the habit that turns failure into a design conversation. The point is not to enjoy mistakes. The point is to study them clearly enough that the next version becomes stronger, simpler, safer, or more useful.
A: Failure exposes real behavior that sketches, assumptions, and optimism often miss.
A: Record the symptom, likely cause, test condition, and exact change before rebuilding.
A: No, save only examples that teach a useful lesson or document a decision.
A: Redesign when the same weakness returns or the repair adds too much complexity.
A: Enough means the risky question has been answered and the next version has evidence behind it.
A: Shrink the next test so progress feels possible again.
A: Yes, safety-critical failures require conservative testing, qualified help, and cautious project choices.
A: Describe what the object did, not what you hoped it would do.
A: Stop when the project reliably meets its intended use without disproportionate cost or complexity.
A: Iteration saves time when it catches bad assumptions before they become final builds.
Failure Is Information With A Cost
Failure always costs something: time, material, pride, momentum, or trust. The goal is to make sure it also gives something back. A failed part should tell you about load, fit, heat, moisture, tool setup, user behavior, finish, or assumptions. When you capture that information, the cost becomes part of the learning budget.
Ignoring failure is what makes it expensive. If a mistake is repeated without diagnosis, the project pays twice for the same lesson.
Start By Describing What Happened
A neutral description keeps the mind open. Instead of writing the bracket was bad, write the bracket cracked at the screw hole after side load. Instead of the finish failed, write the second coat stayed tacky after a humid overnight cure. Specific language points toward specific tests.
Drama feels natural after disappointment, but it rarely improves the next version. Evidence does.
Change One Thing When You Can
When troubleshooting, changing one variable gives the result meaning. If a print fails and you change temperature, filament, speed, orientation, and support at once, the next print cannot identify the fix. One-variable changes are slower for a single attempt but faster for learning.
Some redesigns require several changes, but even then, record which problem each change is meant to solve.
Use Prototypes To Lower Stakes
Prototypes are failure-friendly by design. They let you test shape, fit, strength, user interaction, or finish before the final material and full effort are involved. A cardboard mockup can reveal reach problems. A scrap-wood joint can reveal fit. A small print can reveal tolerance.
Lower stakes make honesty easier. You can criticize a rough prototype without feeling like the whole project is collapsing.
Study The Weakest Point
The place a project fails is often the most useful part of the design. It may reveal a thin wall, wrong grain direction, unsupported span, sharp inside corner, poor fastener choice, or confusing user action. The failure shows where the design concentrated stress or misunderstanding.
Improving the weakest point may require geometry, material, assembly order, or user guidance. Do not assume the answer is simply making everything heavier.
Let Emotion Cool Before Big Changes
Frustration can make makers overcorrect. A small failure becomes a total redesign, a useful feature gets removed, or expensive material gets blamed unfairly. A short pause helps separate disappointment from diagnosis.
Clean the bench, take photos, write notes, and return when the failed part can be studied calmly.
Make Iteration Visible
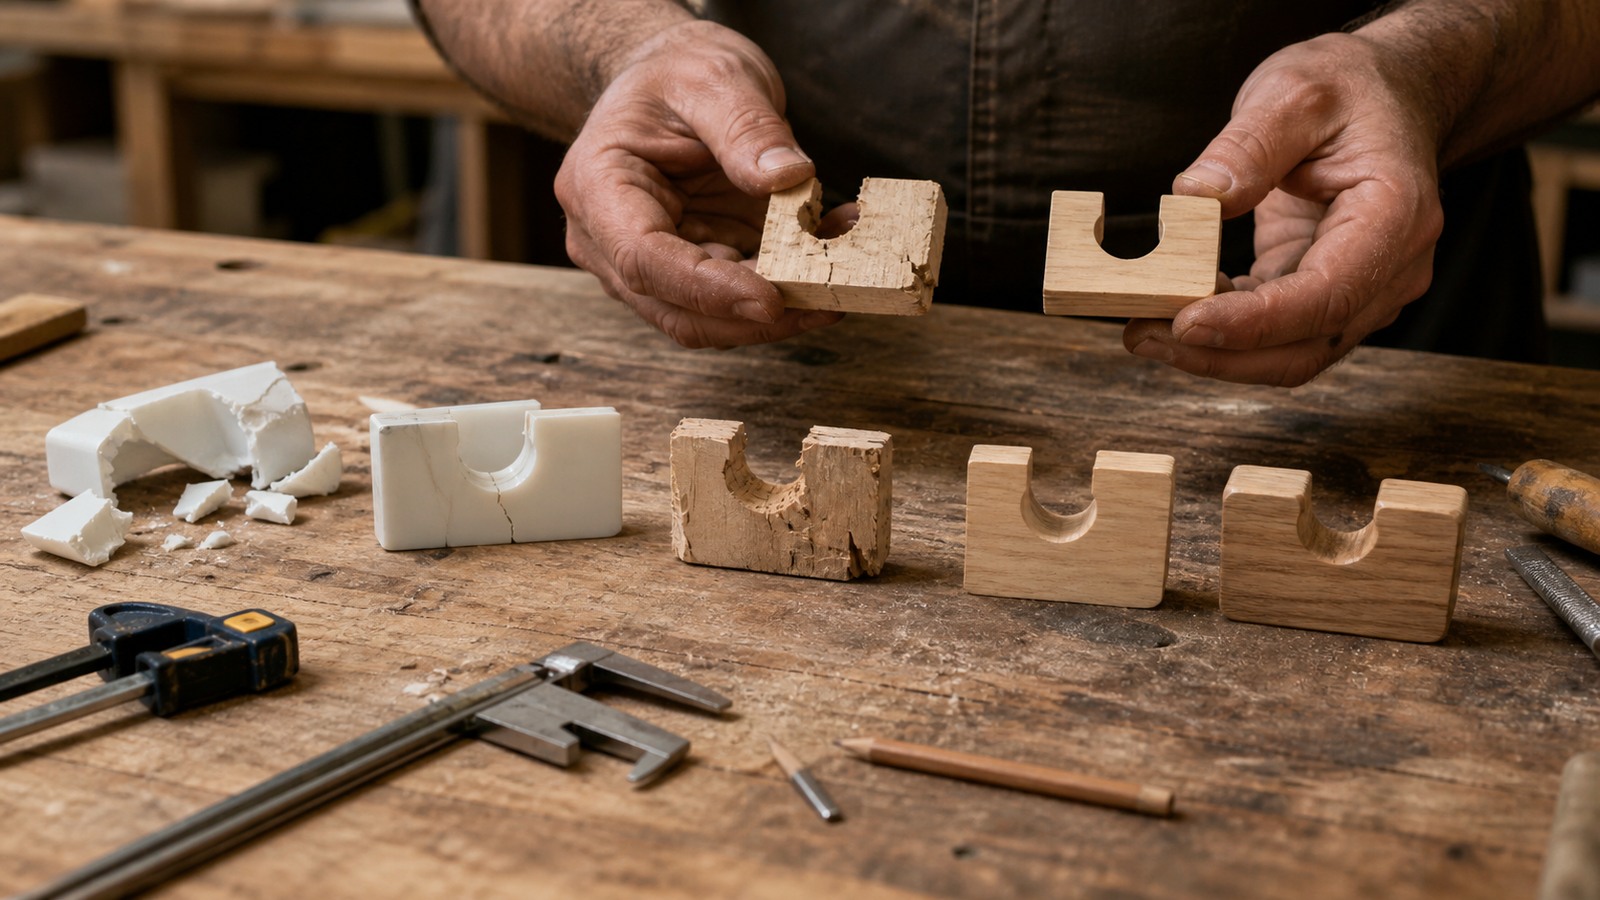
Keeping versions visible helps progress feel real. Version one may be ugly, version two may solve fit, version three may improve strength, and version four may simplify assembly. Seeing that path turns failure into movement rather than a pile of mistakes.
Photos and notes make the same progress visible after parts are thrown away.
Stop When The Purpose Is Met
Iteration can become avoidance if the maker keeps revising after the project already works. The goal is not infinite improvement. It is a reliable object that meets its purpose with reasonable effort, cost, and care.
A mature maker learns both when to revise and when to finish.
Create A Failure Autopsy Habit
A useful failure autopsy is short, factual, and specific. What failed, where did it fail, what was the material, what was the process, what load or condition exposed the problem, and what will be tested next? This structure keeps the maker from drifting into vague self-criticism. The failed object becomes a source of information rather than a verdict.
Photographs help because emotion fades but evidence remains. A crack pattern, warped corner, burned edge, delaminated layer, loose screw, or blotchy finish can explain more later than memory will. Capture it before sanding, cutting, or throwing the part away.
Distinguish Bad Luck From Repeatable Problems
One failure may be a random flaw, but repeated failures point toward a system issue. If every print lifts in the same corner, every shelf racks during assembly, or every finish sample stays sticky, the process is asking for diagnosis. Treat repeated failure as a pattern, not as a string of personal defeats.
Patterns are useful because they narrow the search. They tell you where to focus: material, temperature, clamping, layout, design geometry, surface prep, or user behavior. The more specific the pattern, the easier the next test becomes.
Use Smaller Tests After Big Mistakes
After a major failure, the instinct is often to rebuild the entire thing immediately. A smaller test is usually smarter. If a joint failed, test the joint. If a finish failed, test a sample board. If a bracket cracked, print or cut a coupon with the changed geometry. Small tests reduce the cost of learning.
This is the heart of iteration. The next version does not always need to be the whole project. It needs to answer the question that failure raised. Once that question is answered, the full build can move forward with less risk.
Let Failure Improve The Brief
Sometimes failure reveals that the project goal was incomplete. A box that is strong but impossible to clean, a bench that looks good but is awkward to move, or a jig that works only when one person uses it may not need a minor fix. It may need a better definition of success.
When this happens, revise the brief. Add maintenance, portability, clarity, safety, or repeatability to the goal. Failure often shows what the original plan forgot to value.
Share Failure Selectively And Usefully
Sharing failures can help other makers, but the most useful sharing includes the conditions and the fix. A dramatic broken part without context may entertain; a clear explanation of why it broke teaches. If you post or discuss a failure, include material, process, assumptions, and what changed next.
This also builds a healthier maker culture. When people see iteration rather than only flawless outcomes, they learn that skill includes diagnosis, repair, and revision. The polished final object is only the visible end of a longer learning path.
Build Confidence From Recovery
Confidence does not come from never failing. It comes from knowing you can recover. Each diagnosed mistake proves that a project can become clearer after going wrong. Over time, failure feels less like a wall and more like a fork in the path.
That confidence is practical. It makes makers more willing to test, ask questions, and revise before problems become permanent. Iteration turns resilience into a shop skill.
Make The Next Test Smaller Than The Emotion
Big frustration often pushes makers toward big reactions. The better move is usually a smaller test. If the project feels ruined, isolate one question and answer it with scrap, a sample, or a small model. A tiny successful test can restore direction faster than rebuilding the entire object while annoyed.
This works because failure often makes the project feel vague. A small test makes it specific again. The maker can see one cause, one change, and one result. That clarity is calming.
Track Assumptions Explicitly
Many failures begin as assumptions that were never named. The screw will hold. The finish will dry. The print will be strong enough. The user will understand the motion. The wood will stay flat. When an assumption fails, write it down. That note becomes a design requirement for the next version.
Tracking assumptions helps because future projects often reuse the same quiet beliefs. Once an assumption has failed visibly, it deserves to be tested earlier next time. This is how one mistake improves several later builds.
Learn Which Failures Need Outside Help
Some failures should not be solved alone. Structural welding, electrical work, load-bearing furniture, chemical exposure, machine modifications, and anything used by others may require qualified advice or conservative testing. Iteration is not an excuse to experiment casually with serious risk.
Knowing when to ask for help is a maker skill. It protects people, tools, and confidence. A project can still be creative while respecting the limits of self-taught diagnosis.
Make Iteration Part Of The Schedule
Projects feel less disappointing when iteration is expected from the beginning. Budget material for tests, leave time for a second version, and avoid designing the schedule around a perfect first attempt. If the plan assumes learning will happen, failure no longer feels like a surprise interruption.
This is especially important for new materials or tools. The first attempt teaches the process. The second attempt often creates the usable part. Scheduling that reality makes the work feel honest.
Keep The Failed Version Long Enough
Throwing away a failed version too quickly can erase useful evidence. Keep it until the next version has been tested or photographed thoroughly. The failed part can show where material was too thin, where a screw split the grain, where support scars weakened a print, or where the user applied force differently than expected.
After the lesson is captured, let it go. A shop full of old failures can become emotional clutter. The goal is evidence, not a museum of frustration.
Use Iteration To Simplify
Iteration is often assumed to mean adding strength, features, or refinement. Sometimes the best iteration removes something. A fragile decorative cutout, awkward hinge, unnecessary handle, tight tolerance, or clever mechanism may be the source of repeated trouble. Removing it can make the object more reliable and easier to build.
Simplification is not giving up. It is choosing the cleanest path to the project’s purpose. Many strong designs become better because failure revealed what did not need to be there.
Measure Progress By Better Questions
After a failure, progress may not look like a finished object right away. It may look like a better question: Is the load traveling through the grain? Does the user grip the part differently than expected? Is the finish compatible with the sealer? Does the joint need clearance instead of force? Better questions are real progress.
Those questions guide the next prototype and protect the maker from repeating the same assumption. Iteration is a thinking process as much as a making process.
Use Material Tests As Confidence Builders
Material tests are a quiet way to rebuild confidence after failure. Bend a sample, drill a scrap, print a smaller bracket, stain an offcut, or glue a joint coupon before touching the final piece again. The test gives the maker evidence that the next attempt is not just hope in a new shape.
This is particularly useful when the failure felt personal. A material test reminds you that making is a conversation with physical limits. When the test improves, confidence becomes grounded in proof rather than mood.
Keep The Final Purpose Visible
Iteration should serve the project’s purpose. A storage rack should store reliably, a jig should make work easier, a planter should survive weather, and a printed part should fit or function. When revisions multiply, return to the purpose and ask whether the latest change helps.
This prevents endless adjustment. Failure teaches, iteration improves, and purpose tells the maker when the project is ready to become useful.