Design Thinking Is Already in Your Hands
If you’ve ever rebuilt a bracket because it didn’t fit, tweaked a handle because it felt wrong, or scrapped a “perfect” plan because real-world use exposed a flaw, you’ve practiced design thinking. Makers don’t just imagine solutions—they test them against reality. That’s the heart of design thinking: a repeatable way to solve problems by understanding people, clarifying the real need, exploring options, building fast, and learning through use. The phrase “five stages of design thinking” can sound like something invented for conference rooms, but in a workshop it becomes a simple rhythm. You empathize by observing the user or situation. You define by naming the actual problem without trapping yourself in a single solution. You ideate by widening the field of possibilities. You prototype by turning questions into physical things. You test by letting reality do the talking and iterating until the design stops fighting the user. For makers, the five stages are less like steps on a staircase and more like gears on a bike. You shift when the terrain changes. Sometimes you loop back. Sometimes you skip ahead. But when you use the stages deliberately, your builds get smarter: fewer dead ends, fewer “almost works” projects, and more creations that feel natural, reliable, and worth repeating.
A: Not formally—use them as a checklist when you’re stuck or unsure.
A: Prototyping and testing—because physical feedback is fast and honest.
A: Test under realistic conditions and notice your own workarounds.
A: Include who, context, and success—without naming the solution.
A: Force contrast: simplest, toughest, fastest, cheapest, and most modular options.
A: Rough enough to change quickly, clear enough to test one key assumption.
A: A few honest testers can reveal major issues quickly.
A: Silent use—watch where someone hesitates without coaching.
A: When changes stop improving outcomes and the build meets the defined goal reliably.
A: Polishing too early instead of learning fast with rough versions.
Stage 1: Empathize—See the Problem in the Wild
Empathize is the stage that most makers accidentally skip because it doesn’t feel like building. It feels like waiting. But empathy is where you get the raw truth that no drawing can provide. In maker terms, empathize means watching what happens before you reach for tools. It’s observing hands, habits, workarounds, and frustrations in the real context where the problem lives.
If you’re designing a tool organizer, empathy means noticing how people actually return tools—whether they toss them, stack them, or leave them on the bench. If you’re improving a camera mount, empathy means seeing how someone adjusts angles under pressure, in bad light, or with gloves on. If you’re making an assistive device, empathy means understanding not just anatomy, but routines: where the object sits, how it’s stored, how quickly it must be grabbed, and what happens when the user is tired.
The goal isn’t to “feel what they feel” in a poetic way. The goal is to collect clues. Where do they hesitate? What do they complain about? What do they avoid? What do they do when it fails? Makers can empathize through quick conversations, but observation is often stronger than opinions. People describe what they think they do; their behavior shows what they actually do. The empathy stage is also where you discover hidden constraints. Maybe the solution must be quiet. Maybe it must clean easily. Maybe it must survive being dropped. These details rarely show up in a first problem description, but they decide whether a build succeeds in real life.
Stage 2: Define—Write the Problem So It Can Be Solved
Define is where the maker’s brain wants to jump straight to a solution. You see a frustration and instantly think, “I’ll build a better version.” The define stage asks you to pause and shape the problem in a way that keeps options open. A good definition is specific enough to guide decisions but broad enough to allow creativity.
In practice, defining means turning a messy complaint into a clean target. “This clamp is annoying” becomes “I need a way to hold thin material securely with one hand, without leaving marks, in tight spaces.” “My prints fail” becomes “I need a process that makes first-layer success repeatable without constant re-leveling.” “This device is hard to use” becomes “I need controls that can be understood without instructions and operated quickly under stress.”
For makers, a strong problem definition also includes context. Who is using it? Where is it used? What conditions make it worse? What does success look like in the moment of use? If you define success as a user completing a task smoothly on the first try, you’re designing for real life, not for your own familiarity.
This stage is also where you set guardrails that prevent feature creep. If the problem is about speed and clarity, you don’t add features that add complexity. If the problem is about comfort, you don’t chase maximum power at the cost of ergonomics. Define is your project compass. When you feel lost later, you come back here.
Stage 3: Ideate—Generate Options Before You Commit
Ideate is the stage that gives makers room to breathe. Once you understand the problem and define it clearly, you can explore solutions without immediately judging them. Ideation is about widening the field of possibilities so you’re not trapped in your first idea. In a workshop, ideation doesn’t have to be formal brainstorming. It can be sketches, quick notes, or rough mental models. The point is to consider multiple directions: a mechanical approach versus a magnetic approach, a single-piece solution versus a modular one, a tool-based fix versus a workflow fix. Sometimes the best “design” isn’t a new object at all—it’s a better process, a clearer layout, or a smarter sequence of steps.
Makers often ideate best by intentionally creating contrast. Imagine one option that is ultra-simple, one that is ultra-rugged, one that is ultra-fast to use, and one that is ultra-cheap to build. You don’t need to build them all, but thinking this way reveals priorities. If the simple option feels most aligned with the problem definition, that’s a clue. If the rugged option solves a hidden constraint you observed in empathy, that’s another clue. Ideation also helps you avoid overengineering. When you explore multiple solutions, you see that Design A requires twelve parts and Design B requires three. If both meet the need, you’ve just saved yourself time, failure points, and frustration.
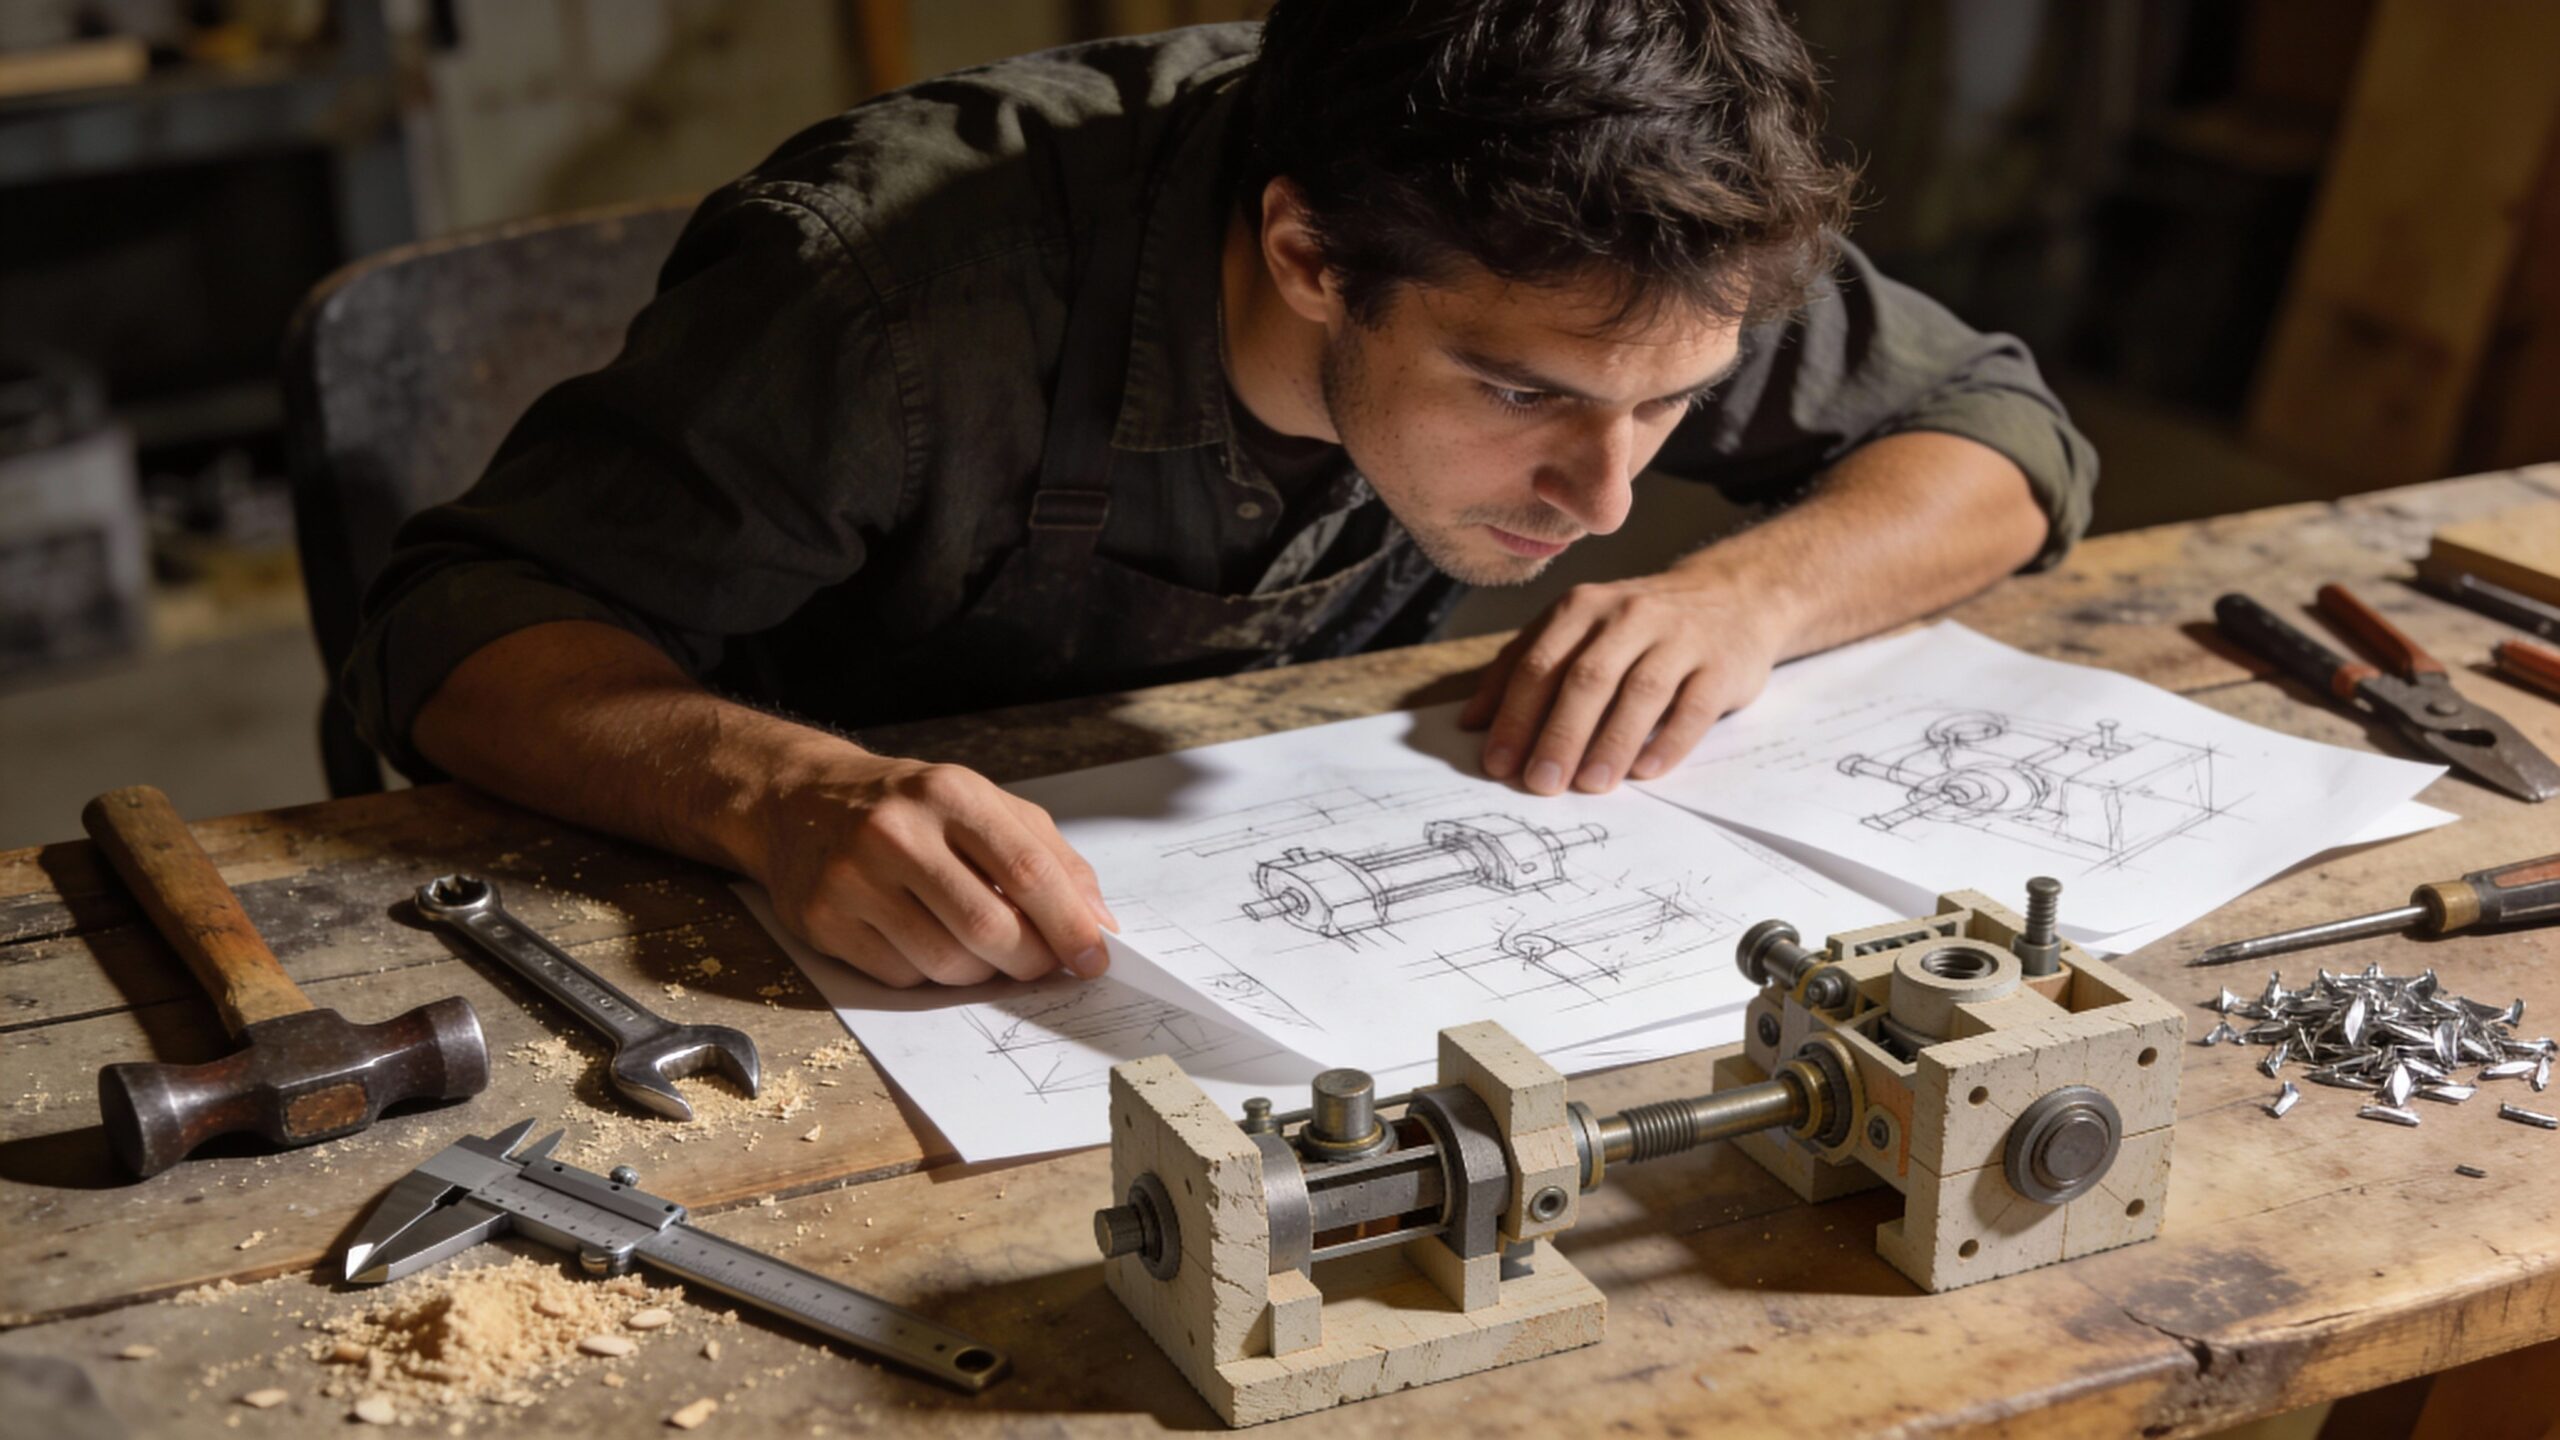
Stage 4: Prototype—Build Questions, Not Final Products
Prototype is where makers feel at home. But design thinking reframes prototyping in a powerful way: prototypes are not mini versions of the final build. They are learning tools. A prototype is a question you can hold.
For makers, the best prototypes are focused and fast. You’re not trying to impress anyone. You’re trying to answer something specific: Does this grip size reduce strain? Does this layout prevent mistakes? Does this angle improve leverage? Does this mechanism jam when dusty? Does this shape fit the space it needs to live in?
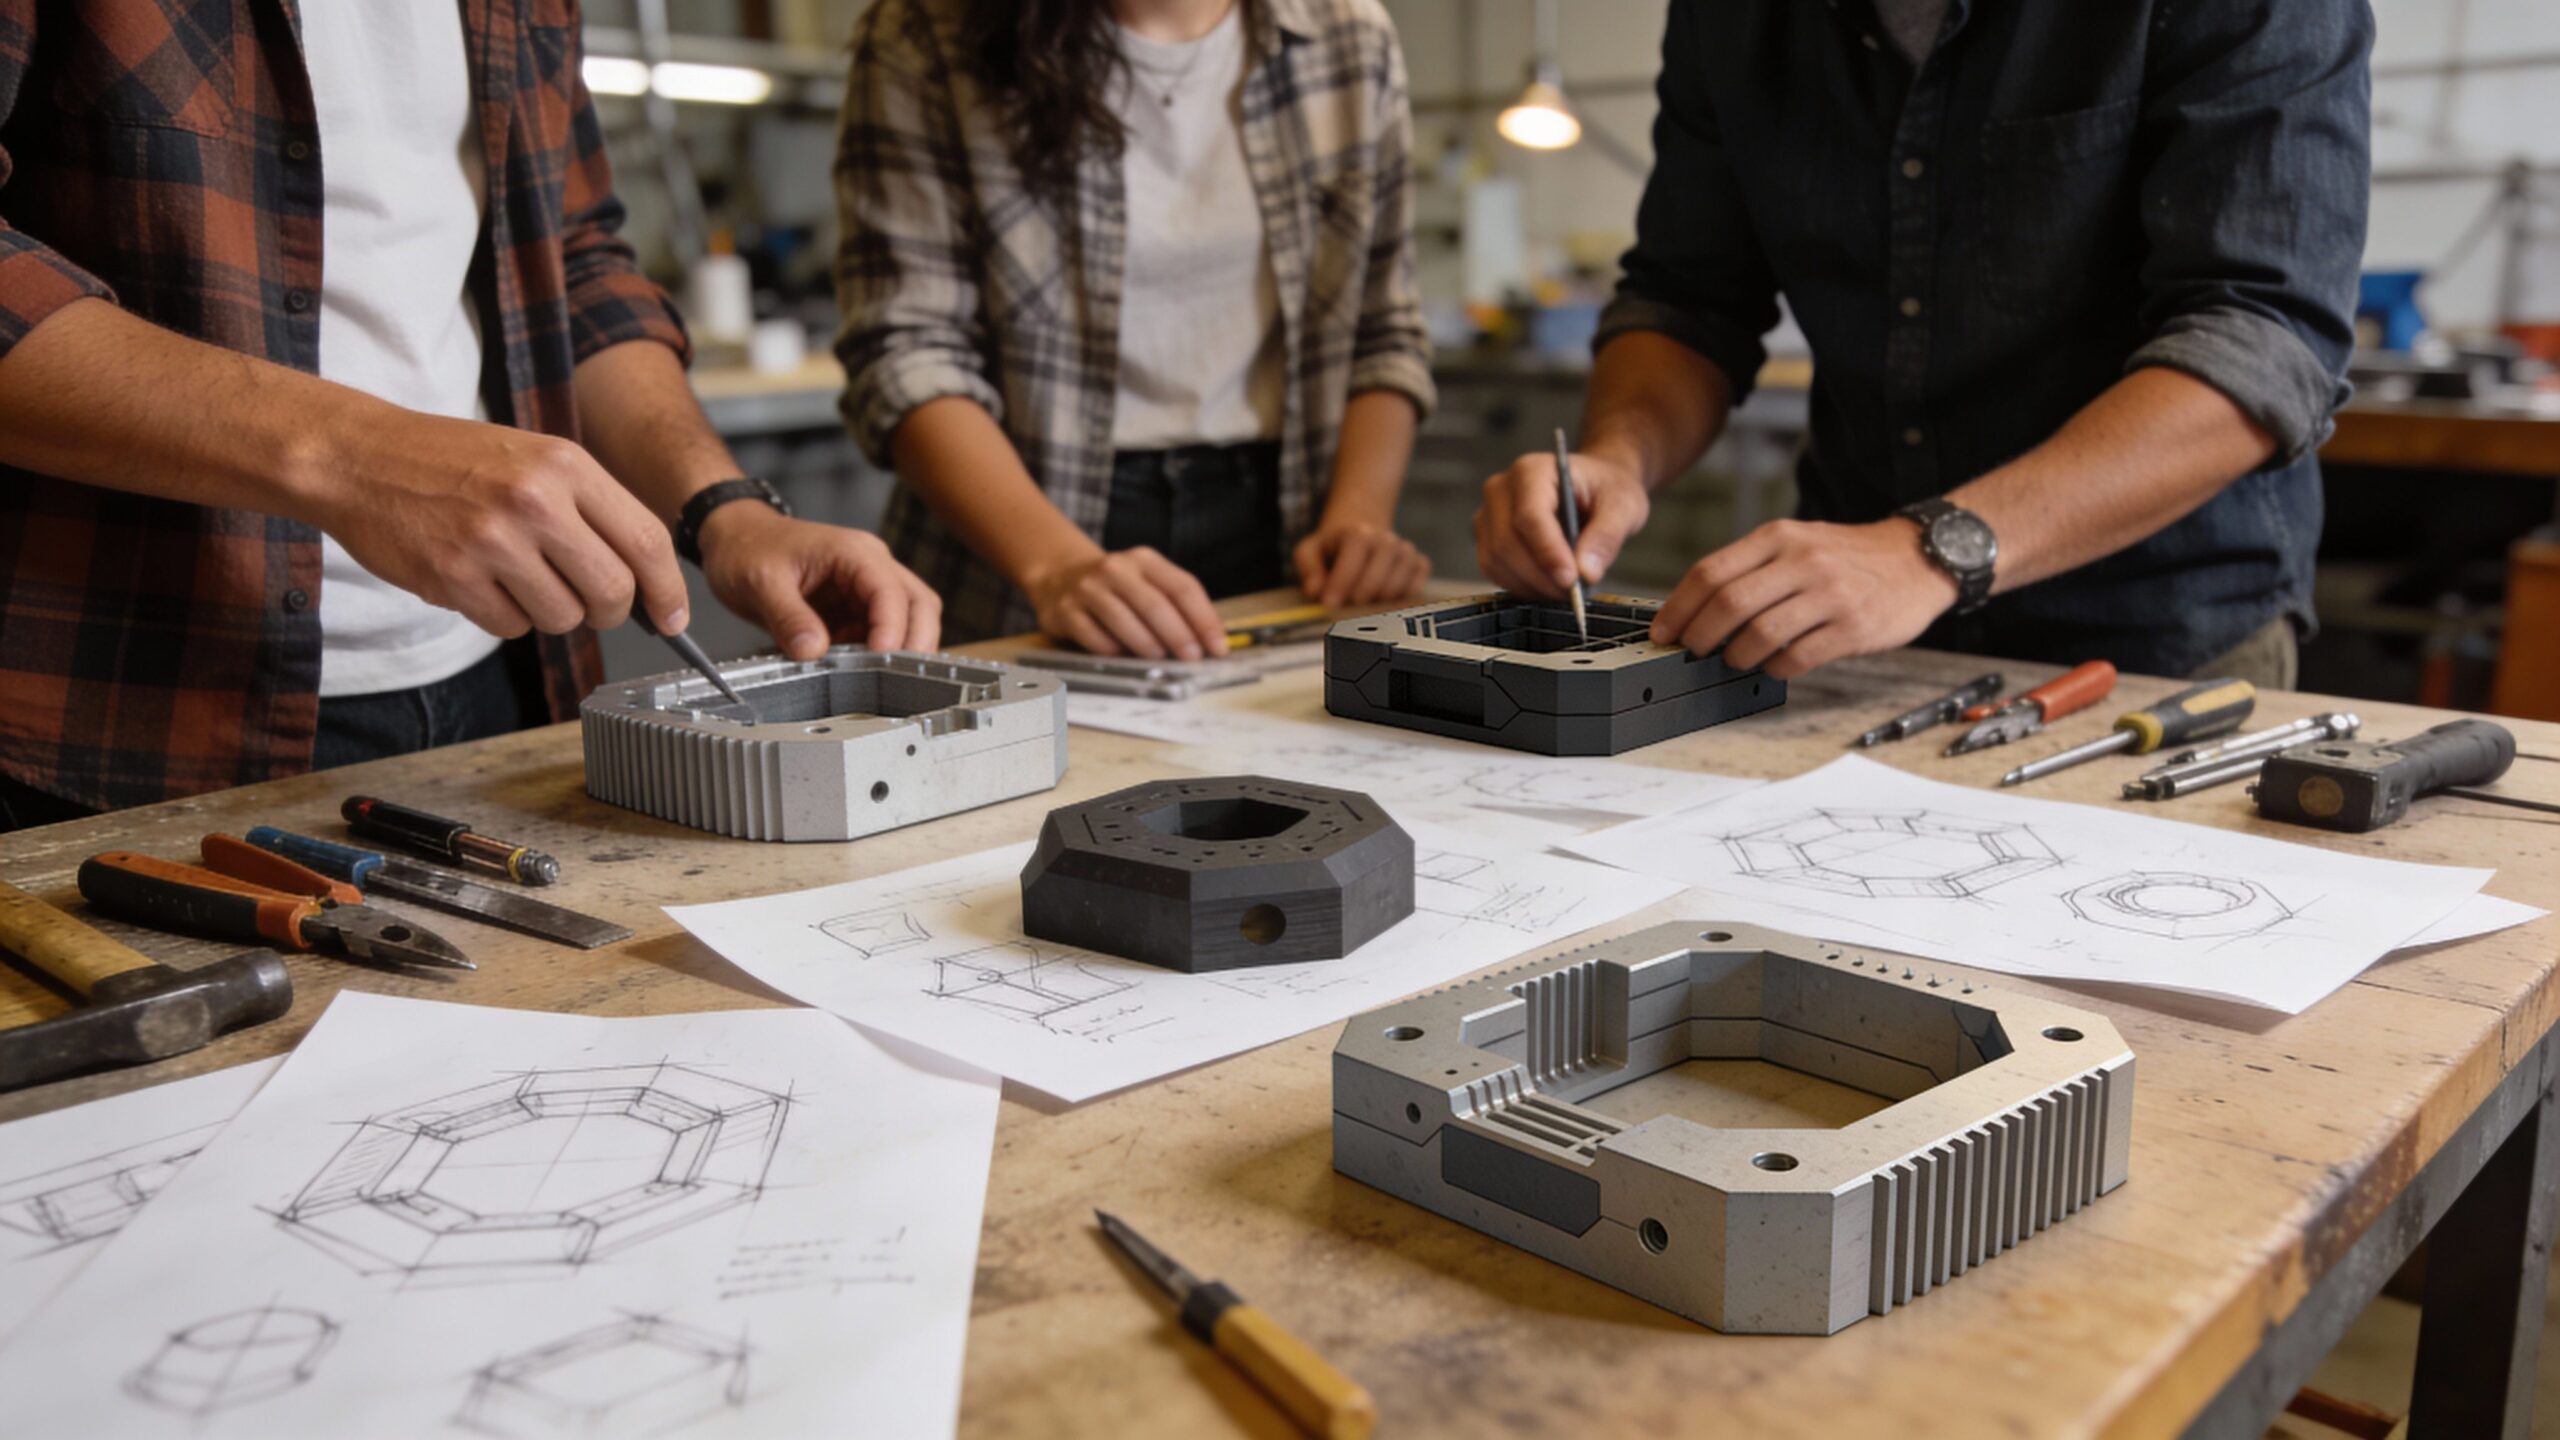
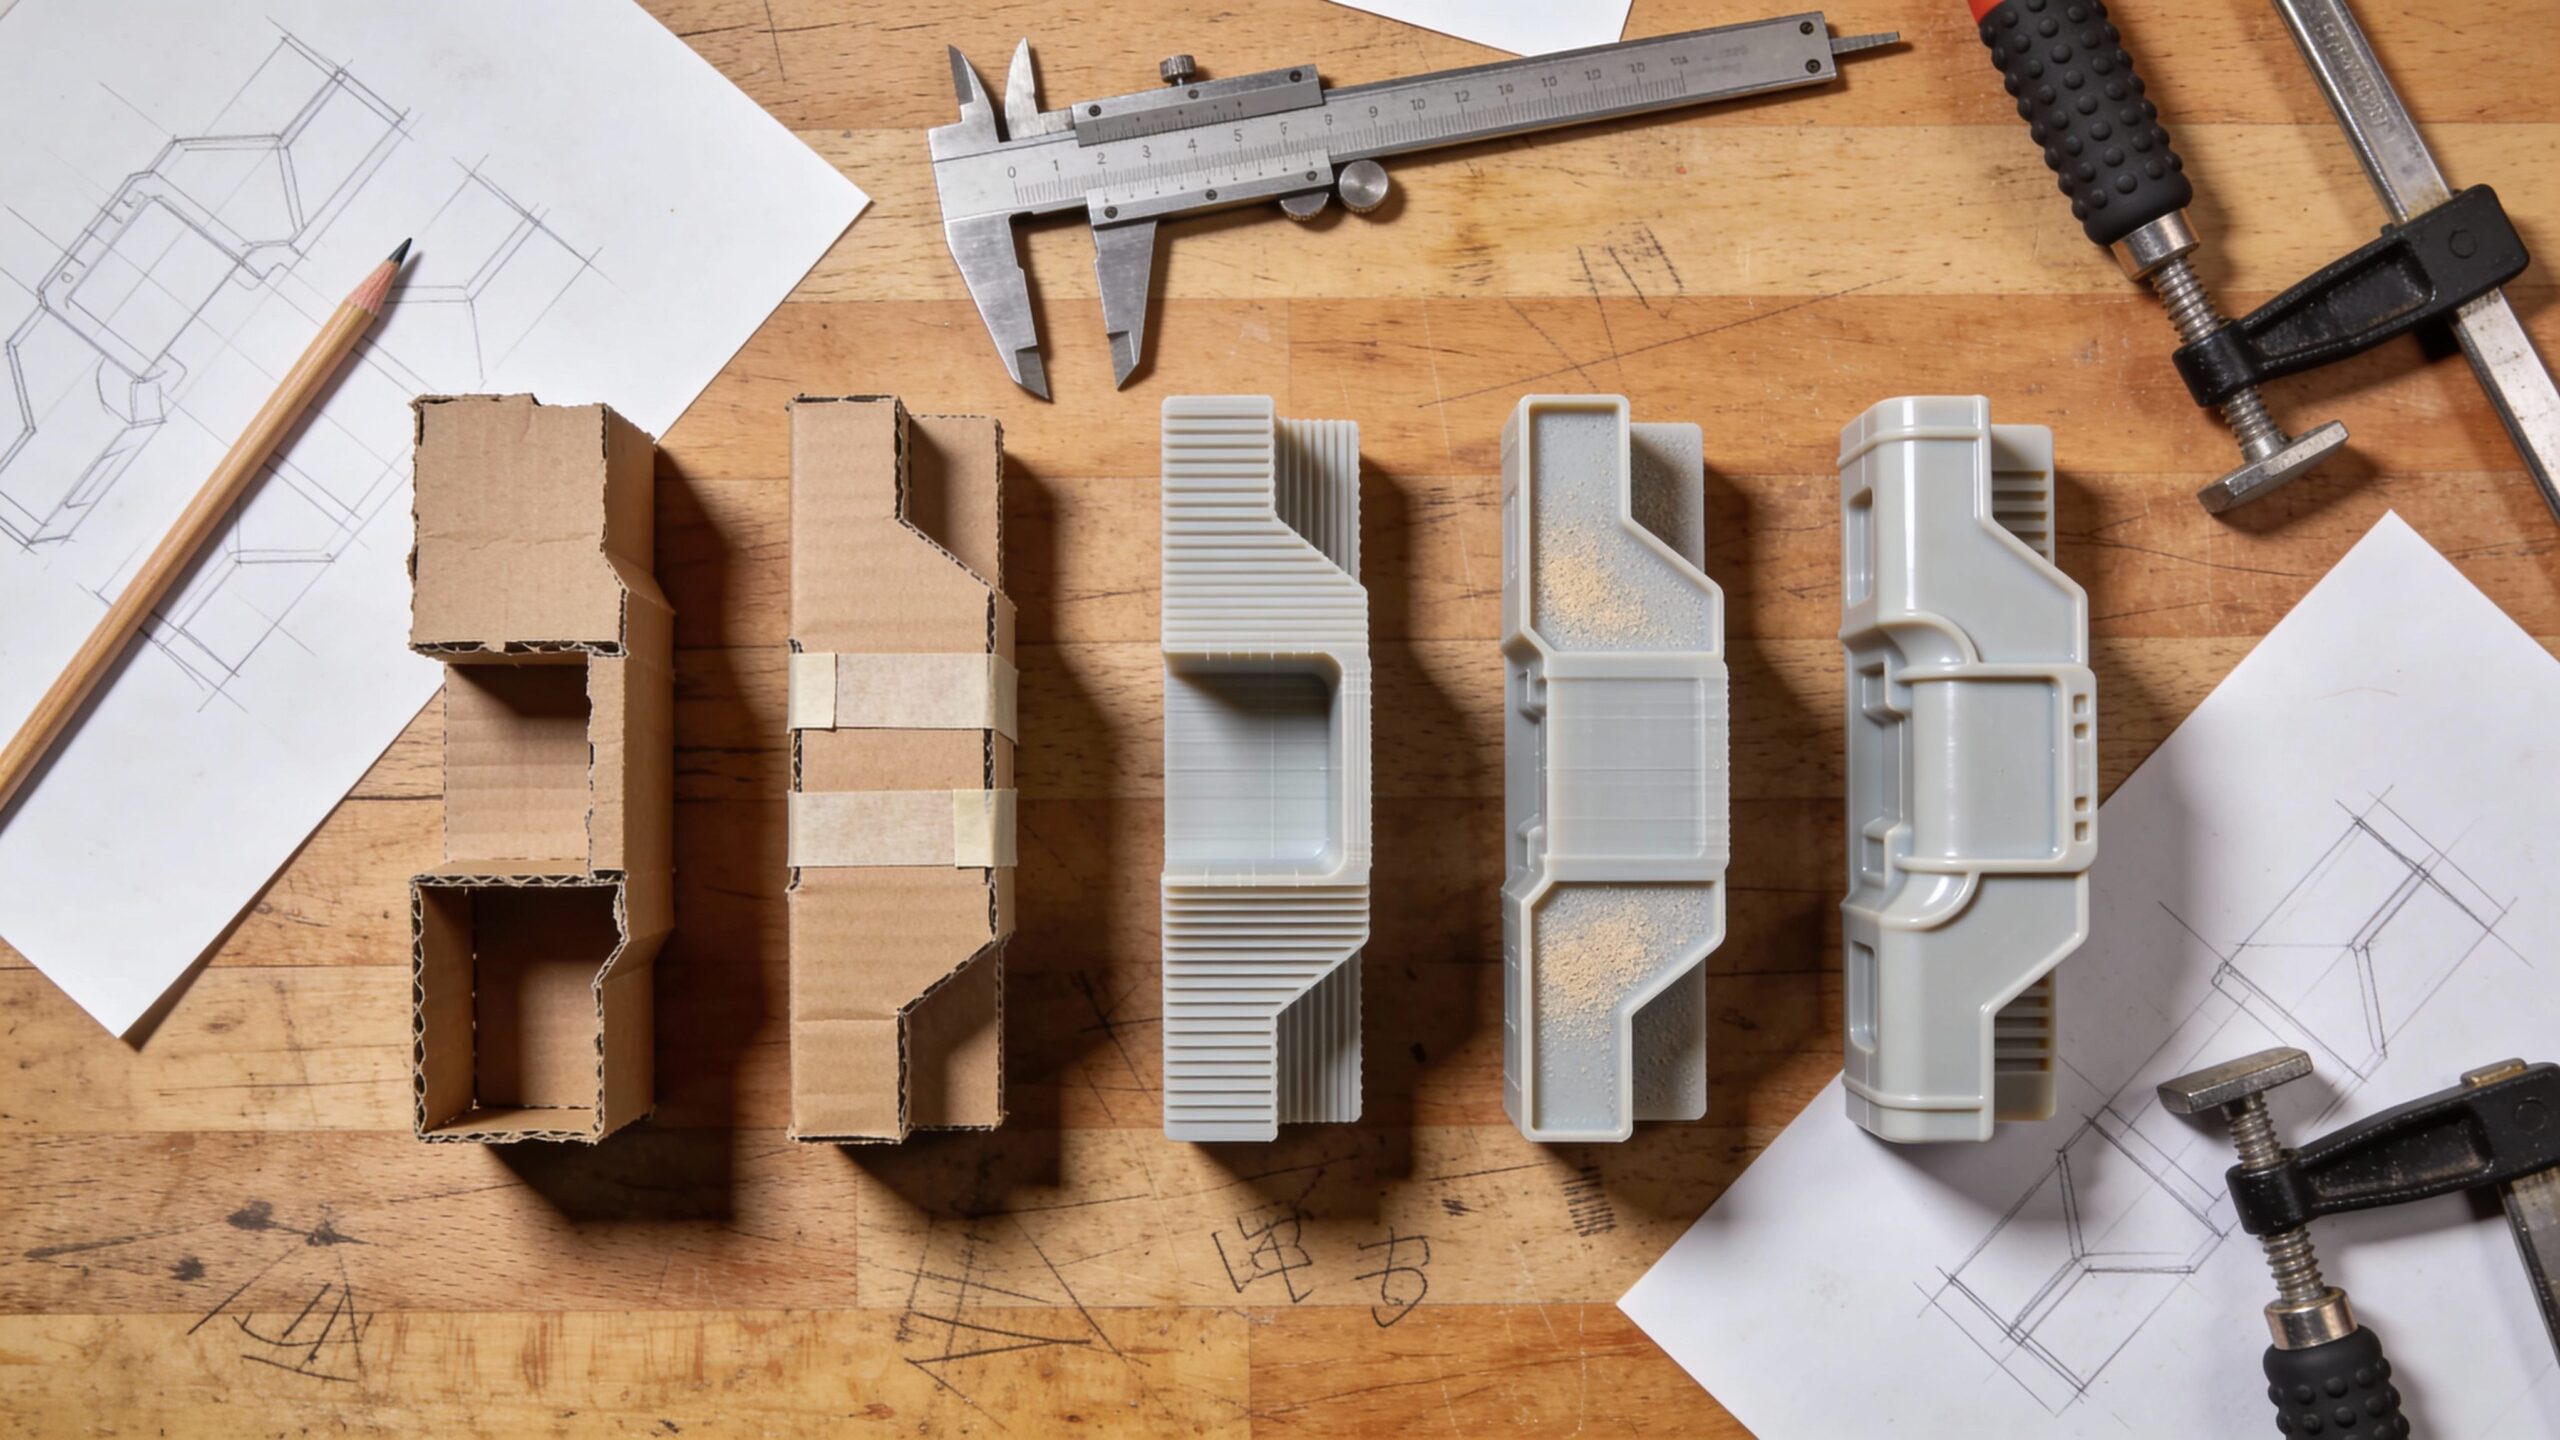
That’s why early prototypes should be cheap and quick. Cardboard is brilliant because it forces you to stay rough. Foam is great for ergonomic experiments. Scrap wood is perfect for jigs and guides. Quick 3D prints can test geometry without committing to final material. Tape and clamps can hold together a temporary version that teaches you more than a polished part ever could at this stage.
A maker who prototypes well also prototypes in layers. If your build has multiple uncertainties—fit, durability, usability—you don’t need one prototype to answer all of them. You can build separate prototypes for separate questions. One can test ergonomics. Another can test the mechanism. Another can test how it mounts or stores. This approach makes failure smaller and learning faster.
Stage 5: Test—Let Reality Judge the Design
Testing is where design thinking becomes real. It’s the moment you stop arguing with yourself and let behavior answer the question. For makers, testing can feel vulnerable because it exposes flaws. But those flaws are exactly what you need if you want a build that works outside your own hands.
A strong test is simple. Put the prototype in the user’s environment and watch. If it’s for you, test it when you’re tired, in low light, or under time pressure—conditions that reveal weaknesses. If it’s for someone else, resist the urge to explain it. Let them try. Where do they hesitate? What do they do wrong? What do they assume? Those moments are design gold.
Testing is also where you discover whether your problem definition was correct. Sometimes you learn the real issue is different. Maybe the problem wasn’t that the tool slipped—it’s that the user couldn’t tell it was locked. Maybe the problem wasn’t the weight—it’s the balance. Testing doesn’t just refine solutions; it refines understanding. And testing is rarely one-and-done. It loops back to prototyping. You change what matters, you test again, and you repeat until improvements stop showing up. At some point, the design feels calm. Users stop thinking about it. That’s when you know you’re close.
The Stages Are a Loop, Not a Straight Line
One reason makers love design thinking once they try it is that it matches reality. Real builds don’t progress in a straight line. You empathize, define, ideate, prototype, test—and then you circle back. Maybe testing shows your definition was too narrow. Maybe prototyping reveals a new constraint. Maybe empathy uncovers a new user group.
This looping isn’t chaos; it’s progress. Each loop reduces uncertainty. Each loop removes assumptions. Each loop makes the design more stable and more useful. The danger isn’t looping. The danger is looping without a question, without constraints, or without a decision point. That’s where projects become endless. A maker-friendly way to keep the loop healthy is to time-box cycles. Decide you’ll run two rounds of prototypes this weekend. Decide what you’re trying to learn in each round. Decide what “good enough” looks like. Design thinking works best when it’s paired with maker discipline.
A Maker Example: Turning Friction Into a Reliable Solution
Imagine a common maker frustration: a small part you need to hold while sanding, drilling, or painting. It’s too small to grip comfortably, and it’s easy to ruin the finish. The “traditional” response might be to design a clamp, print it, and hope it works. Design thinking starts earlier. You empathize by watching the task. You notice the part gets repositioned often, and fingers get too close to the sanding surface. You define the problem as “a safe, quick way to hold small parts without marring, with fast repositioning.” You ideate several approaches: a soft-jaw clamp, a magnetic base with adjustable arms, a sacrificial handle that attaches temporarily, or a fixture that holds multiple parts at once. You prototype the simplest versions with scrap wood and rubber pads. You test by using them during the actual task, noticing what’s annoying, what’s fast, what’s unsafe. You iterate until holding the part becomes automatic and safe. The result is often simpler than the first “clever” idea. And it’s better because it’s shaped by real use, not by assumptions.
The Maker Advantage: Physical Prototypes Beat Abstract Arguments
In design thinking, makers have a huge advantage: you can make ideas tangible. Many teams in the design world debate concepts for weeks because their prototypes are slow or expensive. Makers can test in an afternoon. That speed turns design thinking into a practical superpower.
Physical prototypes also cut through bias. You may love a feature, but testing might show it adds confusion. You may distrust a simple option, but testing might show it’s the most reliable. Prototypes keep you honest. They turn opinions into observations.
This advantage matters most when building for others—customers, friends, family, or a wider audience. Your intuition is valuable, but it’s not universal. Testing transforms your personal experience into broader usability.
Common Mistakes Makers Make in Each Stage
In empathy, the common mistake is assuming you already understand the user or the task. Even if you’re the user, you can miss your own workarounds because they feel normal. In define, the mistake is writing the problem as the solution, which narrows creativity too early. In ideate, the mistake is stopping at the first workable idea instead of exploring alternatives that might be simpler or stronger.
In prototyping, the mistake is polishing too early, which makes you emotionally attached and slower to change. In testing, the mistake is explaining instead of observing, or testing only in perfect conditions. These mistakes don’t mean you failed; they simply slow learning. Design thinking exists to speed learning up.
The Five Stages Are a Shortcut to Better Builds
The five stages of design thinking are not a corporate ritual. They’re a maker-friendly map for turning real-world problems into solutions that work. Empathize gives you truth. Define gives you clarity. Ideate gives you options. Prototype gives you learning. Test gives you reality. Looping through these stages with intention transforms your workshop from a place where you “try things” into a place where you consistently solve problems. When you build this way, your projects change. They become simpler without losing power. They become more reliable without becoming boring. They start fitting into people’s lives instead of demanding attention. And the best part is that you don’t need special tools or a fancy process to start. You need curiosity, a willingness to test early, and the discipline to let reality guide the next version.