Why Makers Need Design Thinking Tools, Not Just Workshop Tools
A well-stocked workshop can make you feel unstoppable. You have the saws, the drivers, the printer, the soldering gear, and the bins of fasteners that whisper possibility. But if you’ve ever built a project that looked perfect and still didn’t get used, you’ve learned the quiet truth of making: the hardest problems are rarely about fabrication. They’re about people. They’re about real-life context, habits, confusion, comfort, and the difference between “cool” and “actually helpful.” Design thinking tools are the maker’s missing toolkit. They help you choose the right problem, reduce wasted effort, and build projects that fit into real routines. These tools are not corporate rituals; they’re simple methods for turning creativity into clarity. They make your building time count because they guide you toward designs that succeed outside your bench.
A: No—most are simple habits that makers already practice.
A: Start with a clear problem statement and a quick prototype.
A: One person, one task, no instructions—repeat weekly.
A: When users succeed smoothly and improvements plateau.
A: Not at all—paper and cardboard prototypes work great.
A: Look for patterns and prioritize the core need.
A: Usability first; polish later.
A: Test the riskiest assumption first.
A: Yes—especially for diagnosing the real pain point.
A: Overbuilding before confirming the concept.
Tool One: The Problem Statement That Refuses to Let You Drift
The most powerful design thinking tool is deceptively simple: a clear problem statement. Without it, maker projects expand until they collapse under their own ambition. A good problem statement doesn’t describe a solution; it describes a human challenge. It keeps your project honest when you’re tempted to add features that don’t matter.
In maker terms, a problem statement is a filter. It helps you decide what to build first, what to ignore, and what to postpone. When you write it in plain language, it becomes a compass you can return to when the project gets messy. It also makes testing easier because you know exactly what success is supposed to look like.
Tool Two: The User Moment Snapshot
Makers often design for an ideal scene: clean hands, perfect lighting, calm attention, and a tidy workspace. The real world is rarely so polite. A user moment snapshot is a tool for capturing the messy reality where your project must succeed. It asks you to describe the exact moment the problem happens, including environment, time pressure, physical constraints, and emotional state. This tool is especially useful when you’re building jigs, organizers, safety add-ons, or workflow improvements. Those projects live and die by friction. If the setup takes too long, if the placement feels awkward, or if the tool requires too much explanation, it won’t be used. The user moment snapshot forces you to design for reality, not fantasy.
Tool Three: The Five Whys for DIY Root Causes
The maker instinct is to fix the visible issue. The five whys tool helps you discover the real issue underneath. You take a problem and ask “why” repeatedly until the root cause emerges. It sounds simple, but it prevents a common maker trap: building a high-effort solution for a surface-level symptom.
When you use five whys, you often discover that what you thought was a hardware problem is actually a workflow problem. Or what you thought required a new tool actually requires better placement, clearer access, or a simpler routine. This tool saves time because it stops you from building the wrong thing beautifully.
Tool Four: “How Might We” Questions That Open Doors
Once you understand the problem, you need a tool that expands possibility without losing focus. “How might we” questions do exactly that. They transform constraints into creative prompts. Instead of “I need a better clamp rack,” you ask, “How might we make clamp retrieval effortless with one hand while holding a workpiece?” This tool prevents you from locking onto the first idea that appears. It keeps the challenge open enough to invite better solutions while still grounded in real needs. For makers, it’s the difference between improving an object and improving an experience.
Tool Five: Crazy Eights and Quick Sketch Variety
Makers sometimes skip sketching because they want to get to the fun part. But sketching is not an art contest; it’s a thinking accelerator. Crazy eights is a simple method where you sketch eight variations quickly, forcing variety. The point is not quality; the point is range.
For DIY projects, sketch variety reveals options you wouldn’t discover while cutting wood or printing parts. It helps you explore mechanisms, mounting ideas, handle shapes, and workflow layouts without spending money or time. The best builds often come from the third or fourth concept, not the first.
Tool Six: Assumption Mapping, Maker Edition
Every project contains assumptions about strength, comfort, usability, safety, cost, and durability. Assumption mapping is the habit of naming those assumptions and ranking them by risk. The riskiest assumption is the one most likely to sink the project if it’s wrong. This tool changes your build order. Instead of building the easiest part first, you test the riskiest part first. That saves effort and prevents the heartbreak of discovering late that the core idea doesn’t work. It’s one of the most practical design thinking tools a maker can adopt.
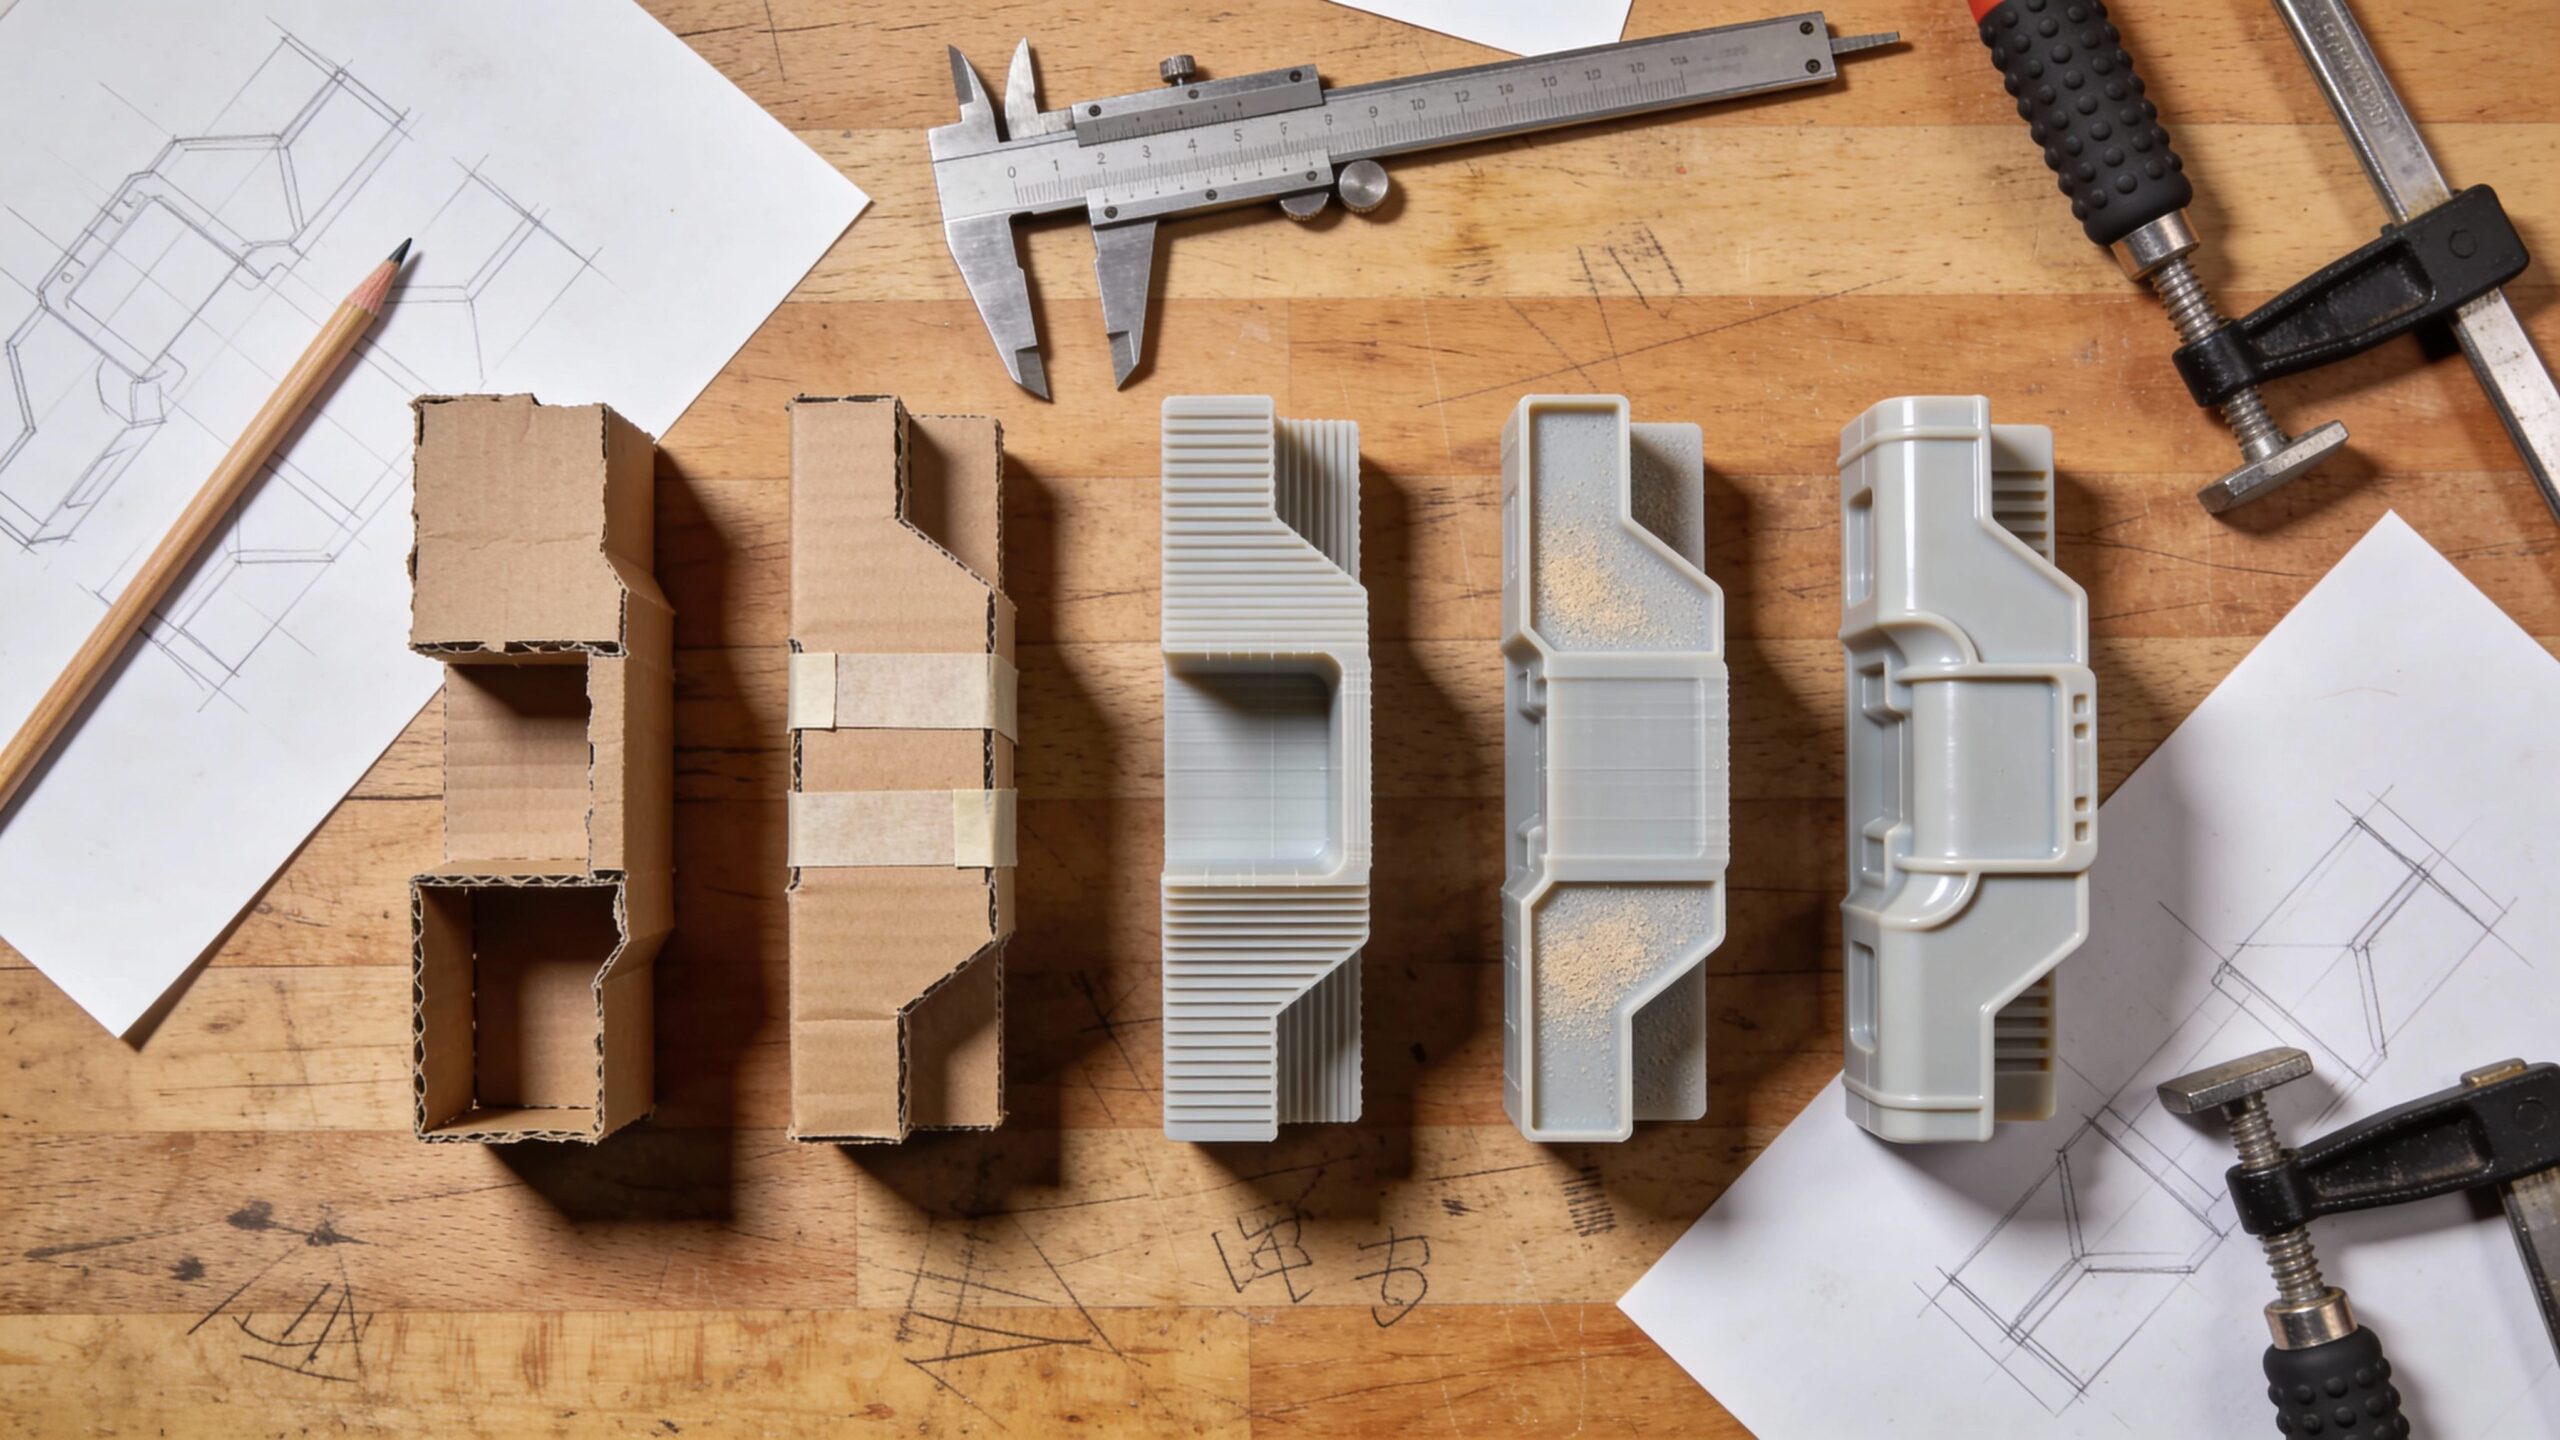
Tool Seven: Low-Fidelity Prototyping With Intention
Prototyping is a maker superpower, but design thinking adds structure to it. Low-fidelity prototypes are meant to be fast, rough, and disposable. Their job is to answer questions, not to impress. Cardboard, foam, tape, scrap wood, and quick prints become a strategic advantage when you prototype the right thing.
A good low-fidelity prototype targets the most uncertain part of the design. If you’re unsure about ergonomics, prototype the grip. If you’re unsure about clearance, prototype the fit. If you’re unsure about workflow, prototype the layout. This tool turns prototyping into a learning engine rather than a detour.
Tool Eight: Task-Based Testing That Reveals Truth
Makers often ask for feedback like “What do you think?” and get vague answers. Task-based testing is more reliable. You give someone a simple task, like “use this jig to make a cut,” or “mount this tool and retrieve it,” and you watch what happens. You avoid explaining. You observe. This tool reveals friction that users can’t articulate. It shows you where they hesitate, where they grip incorrectly, where they misunderstand the purpose, and where the design fails under real behavior. The goal is not compliments. The goal is insight.
Tool Nine: Silent Testing for Unfiltered Feedback
Silent testing is a special version of task-based testing where you do not help at all. You watch your user struggle, succeed, or improvise. This is the fastest way to discover if your design communicates clearly.
In maker projects, silent testing often exposes the need for alignment cues, tactile guidance, clearer orientation, better handholds, or simpler steps. If a person needs you to explain how to use it, the design is not finished. Silent testing can feel brutal, but it produces the kind of improvements that make a tool feel obvious and trustworthy.
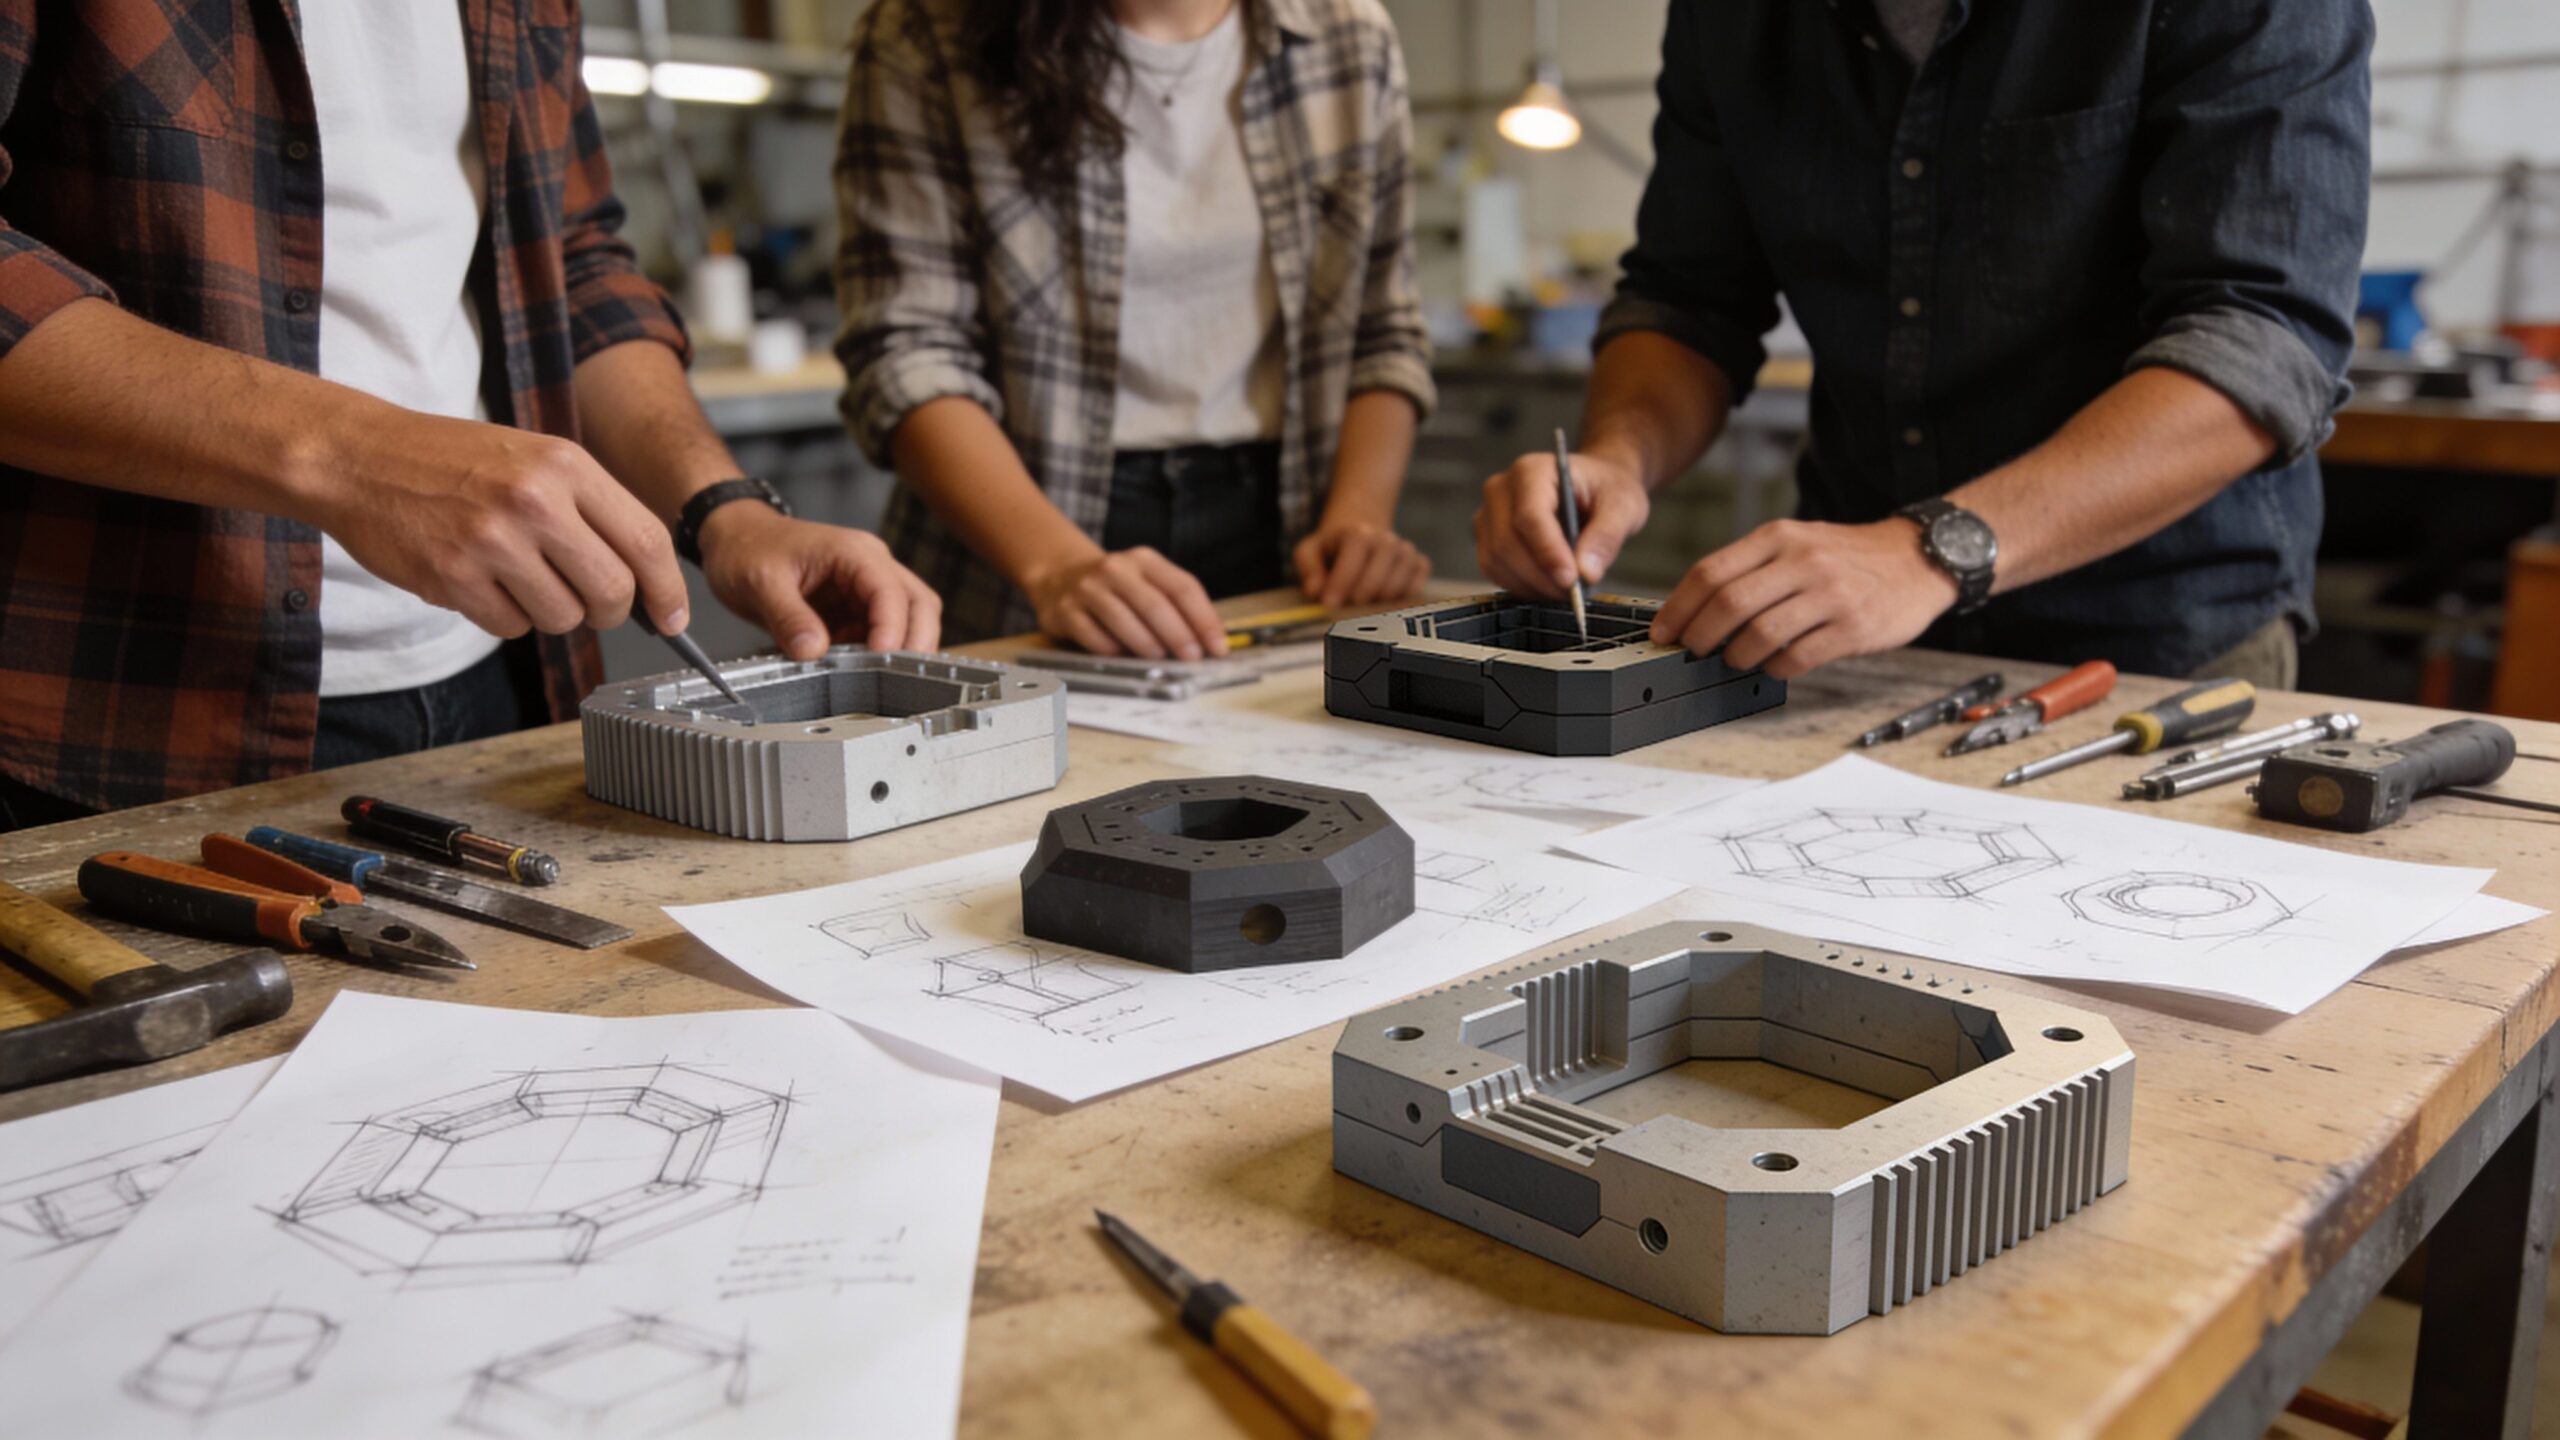
Tool Ten: The Iteration Log That Turns Tinkering Into Progress
Makers iterate constantly, but iteration can feel like wandering if you don’t track what changed and why. An iteration log is a simple tool that records version changes and outcomes. It can be as basic as a note that says “v3: moved handle forward; improved balance; reduced wrist strain.” This tool builds confidence because it makes progress visible. It also helps you avoid repeating mistakes. Over time, your iteration log becomes a personal playbook for better design. It turns tinkering into a deliberate process.
Tool Eleven: Constraints as a Design Partner
In DIY projects, constraints are everywhere: budget, materials, time, tools, space, and skill level. Design thinking teaches you to treat constraints as a partner rather than an enemy. Constraints force you to simplify, and simplification often improves usability.
When you name constraints clearly, you stop fighting them and start designing with them. Your project becomes more realistic, more buildable, and often more elegant. This tool is especially powerful for makers who tend to overbuild.
Tool Twelve: The Story Scenario That Pressure-Tests Reality
Before you commit to a final build, imagine a story where your user must succeed. Where are they? What are they holding? What interrupts them? What conditions make the task harder? A story scenario is a tool that surfaces edge cases early. In DIY, edge cases are often the main case. Gloves, dust, clutter, noise, low light, and awkward body positions show up constantly. A story scenario helps you design for those moments instead of being surprised later.
Putting the Tools Together Without Overcomplicating Your Build
Design thinking tools can sound like a lot, but makers don’t need to use all of them every time. The goal is not to create a rigid process. The goal is to create momentum with fewer wrong turns. A simple flow works for most DIY projects: define the problem, capture the user moment, identify the riskiest assumption, prototype that part quickly, test with a real task, then iterate. When you adopt even a few of these tools, your builds change. You waste less effort polishing ideas that don’t fit reality. You gain feedback sooner. You improve faster. And you end up with projects that feel less like experiments and more like reliable companions in your work.
Why These Tools Make You a Better Maker
A strong maker can fabricate almost anything. A successful maker builds things people actually use. Design thinking tools bridge that gap. They help you design for behavior, context, and trust. They turn creativity into clarity and tinkering into progress.
The best part is that these tools don’t demand more time; they protect your time. They reduce rework by revealing truth early. They improve usability by keeping humans at the center. And they help your DIY projects deliver that rare, satisfying outcome: not just “I built it,” but “I built it right.”